411829-L, Maintenance April 2012 Page 5-11
5
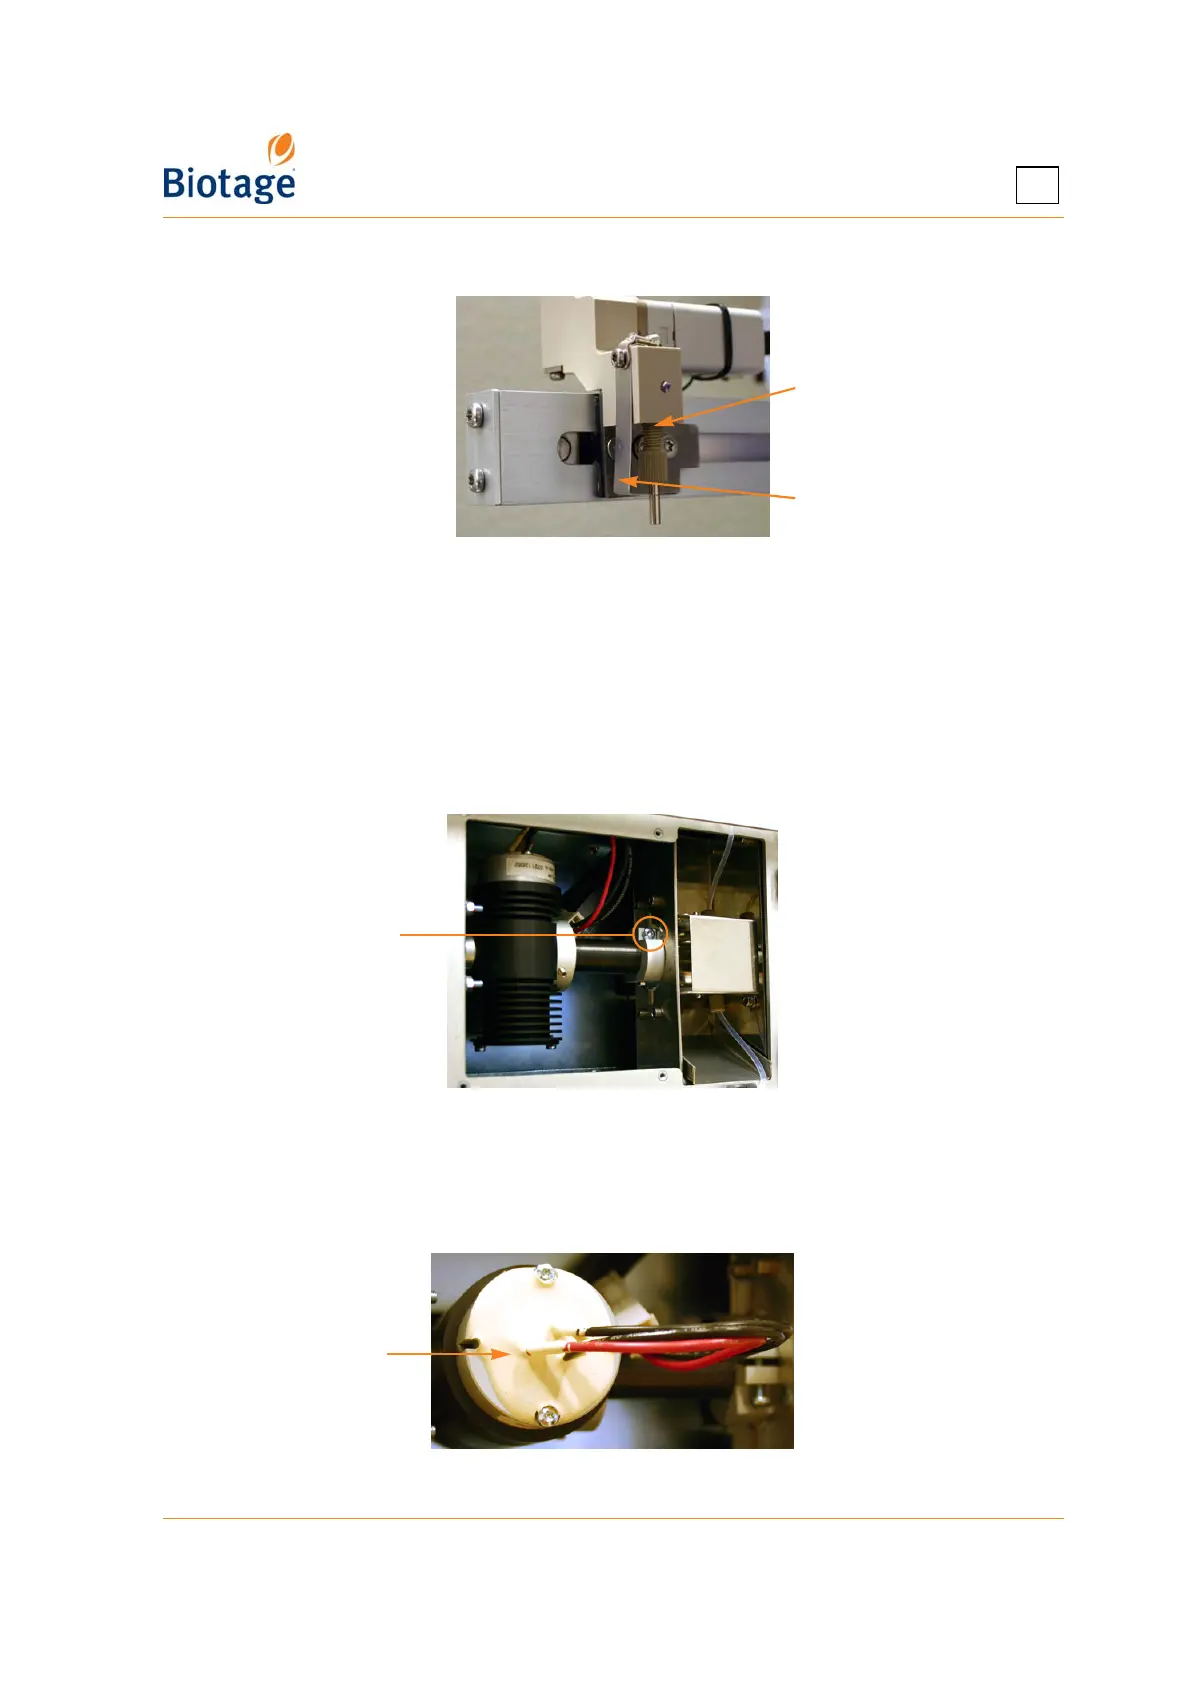
4. Mount the needle on the collection arm. Ensure that the needle is touching the needle guide.
Figure 5-11. Mount the Needle on the Collection Arm
5.13 Replace the Detector Lamp(s)
1. Shut down the system as described on page 4-1.
2. Disconnect the power cord from the power outlet.
3. Remove the internal detector service panel at the left side of the system using a Torx 10
screwdriver.
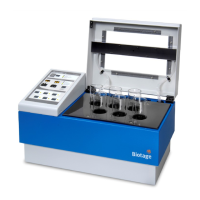
4. Loosen the screw locking the UV lamp in a vertical position (see Figure 5-12) using a Torx 20
screwdriver.
Figure 5-12. Loosen the Locking Screw
(Fixed and Variable Detector Shown)
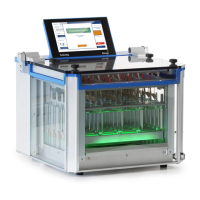
5. Turn the UV lamp into a horizontal position with the lamp socket facing you; see Figure 5-13.
6. Remove the two screws on the lamp socket (see Figure 5-13) using a Torx 10 screwdriver.
Figure 5-13. Turn the UV Lamp and Remove
Mount the
needle here
The needle
should touch the
needle guide
Locking screw
Lamp socket