76
LAN Setup
Follow the instructions below to select the Ethernet interface and configure it for remote
operation.
1. Press the SYSTEM button and you will see the following options:
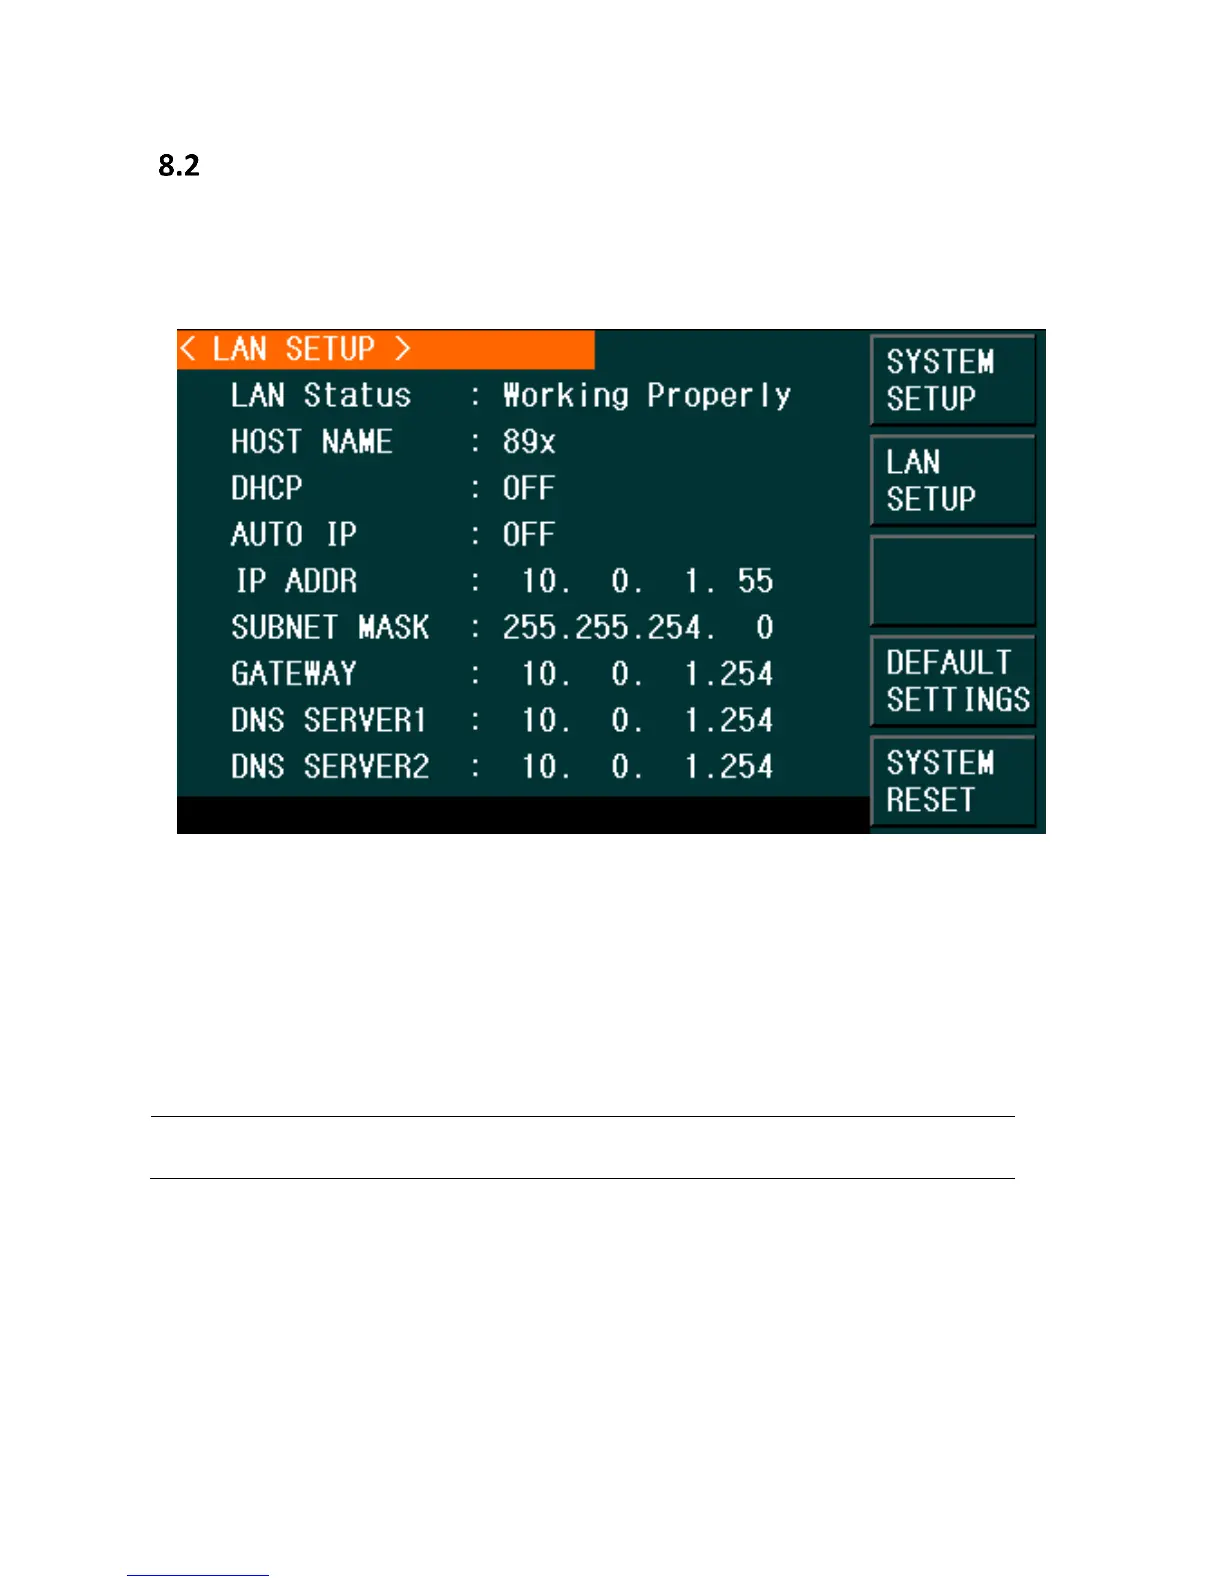
Figure 27 - LAN Setup
2. Press the LAN SETUP button.
3. To turn on the AUTO IP (or off) and the DCHP options, using the arrows, move the
cursor to the AUTO IP (or DCHP) field and using the soft menu keys press the ON
option. AUTO IP field will display whether that option is turned on or off.
4. Using the keypad and arrow keys to set the values required to establish communication
via Ethernet for IP Addr, Subnet Mask, Gateway, DNS Server1 and DNS server2.
NOTE: The unit must already be connected via Ethernet connection and the connected
network/router must be compatible to assign the correct parameters to the instrument.
5. Press any of the softkey buttons or any of the Menu Keys to exit the LAN SETUP page.
www.GlobalTestSupply.com
Find Quality Products Online at: sales@GlobalTestSupply.com