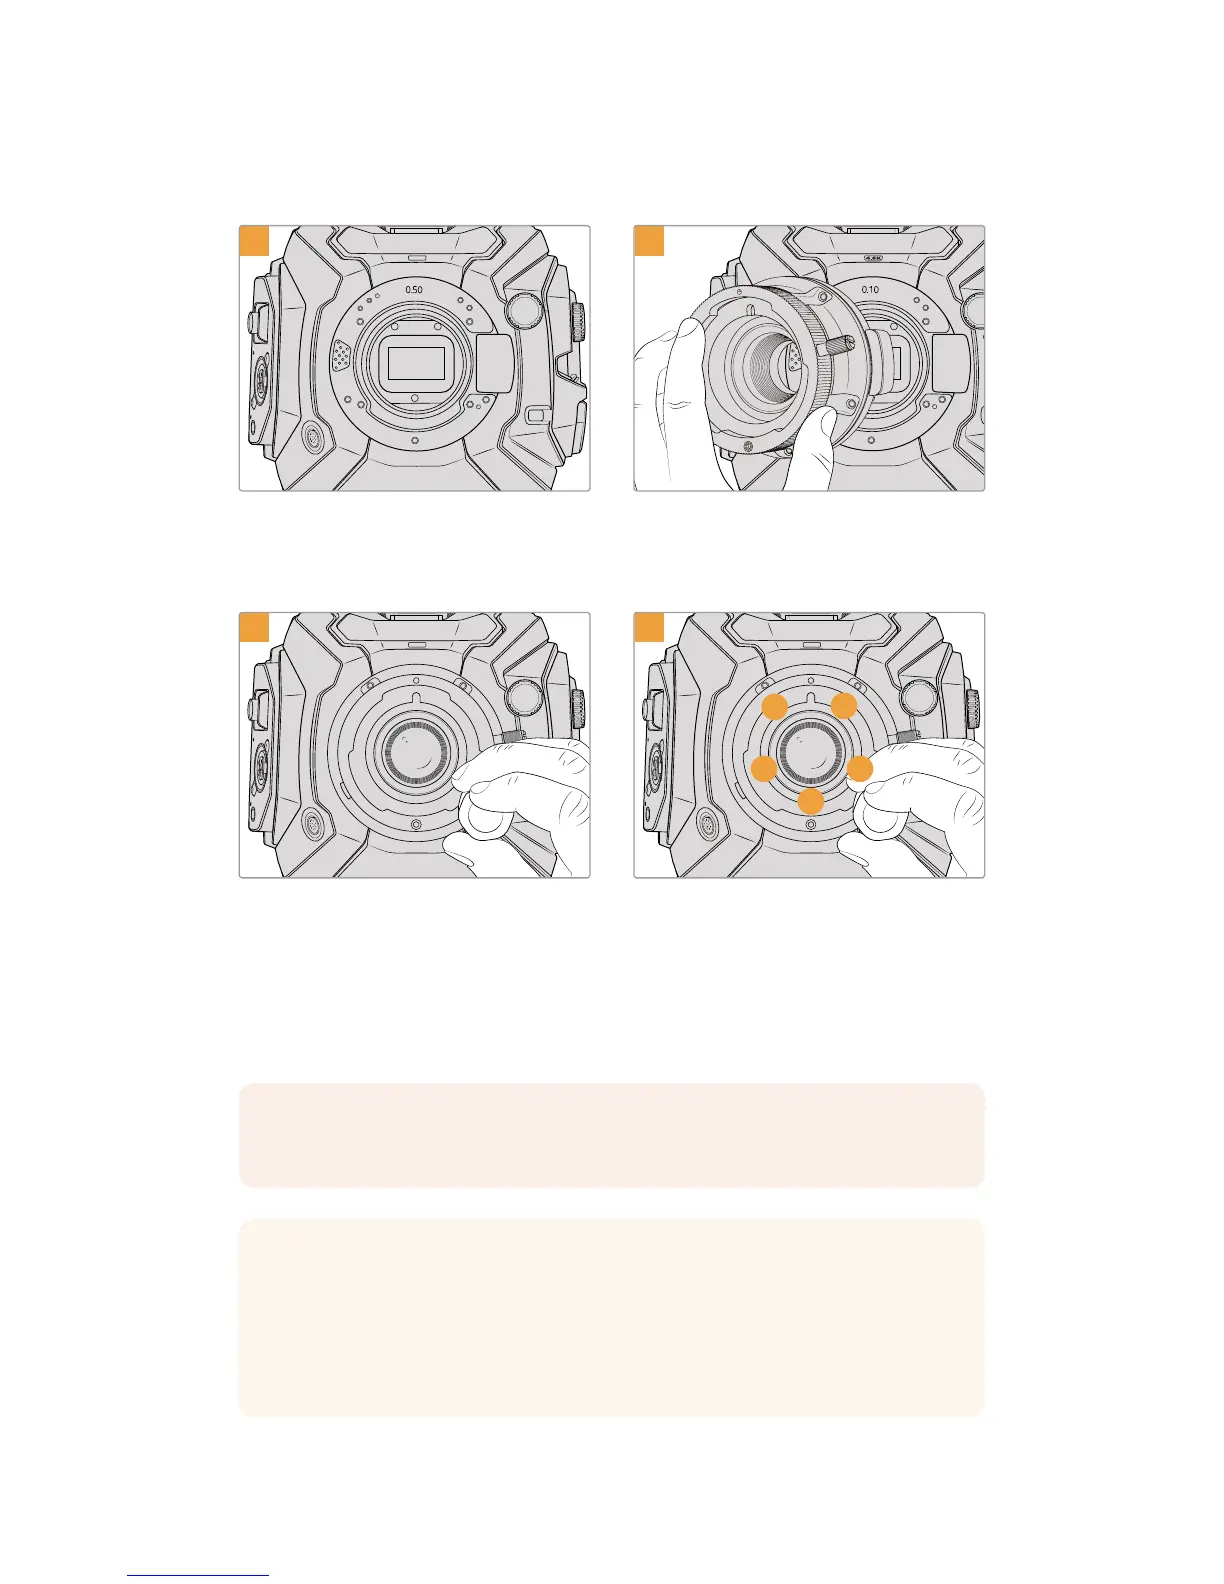
Place Blackmagic URSA Mini Pro 4.6K vertically
on a solid, clean bench top to ensure that the
mount can be inserted vertically.
Add the 0.10mm shim to the camera, then place
the Blackmagic URSA Mini Pro 4.6K B4 lens
mount onto the camera body ensuring the red dot
is at the 12o’clock position.
3
1
3
4
5
2
Loosely turn the five mounting screws until initial
contact is made with the shoulder of the lens mount.
Using the 2mm Hex driver, or torque wrench with
2mm Hex key, apply one full turn of pressure to
mounting screw 1, followed by one full turn to
screw 2. Repeat for screws 3and 4, then 5.
Continue to apply one full turn to each screw in
the sequence above until all screws have reached
the maximum torque of 0.45Nm.
NOTE When removing the B4 mount, simply follow the instructions in reverse order
from step 4 to step 1.
TIP When using a B4 lens with URSA Mini Pro 4.6K, set the resolution to 2K 16:9 or
lower, and 'window sensor' to 'on' in the 'record' tab of the dashboard. It is important
touse these settings to prevent vignetting of the image, as B4 lenses do not cover
thesuper 35mm image circle. Once you have attached a B4 lens to your camera
andadjusted the settings on your camera, you should also check the back focus on
thelens.
198Interchangeable Lens Mount