7 8
1 3
4
5
2
6
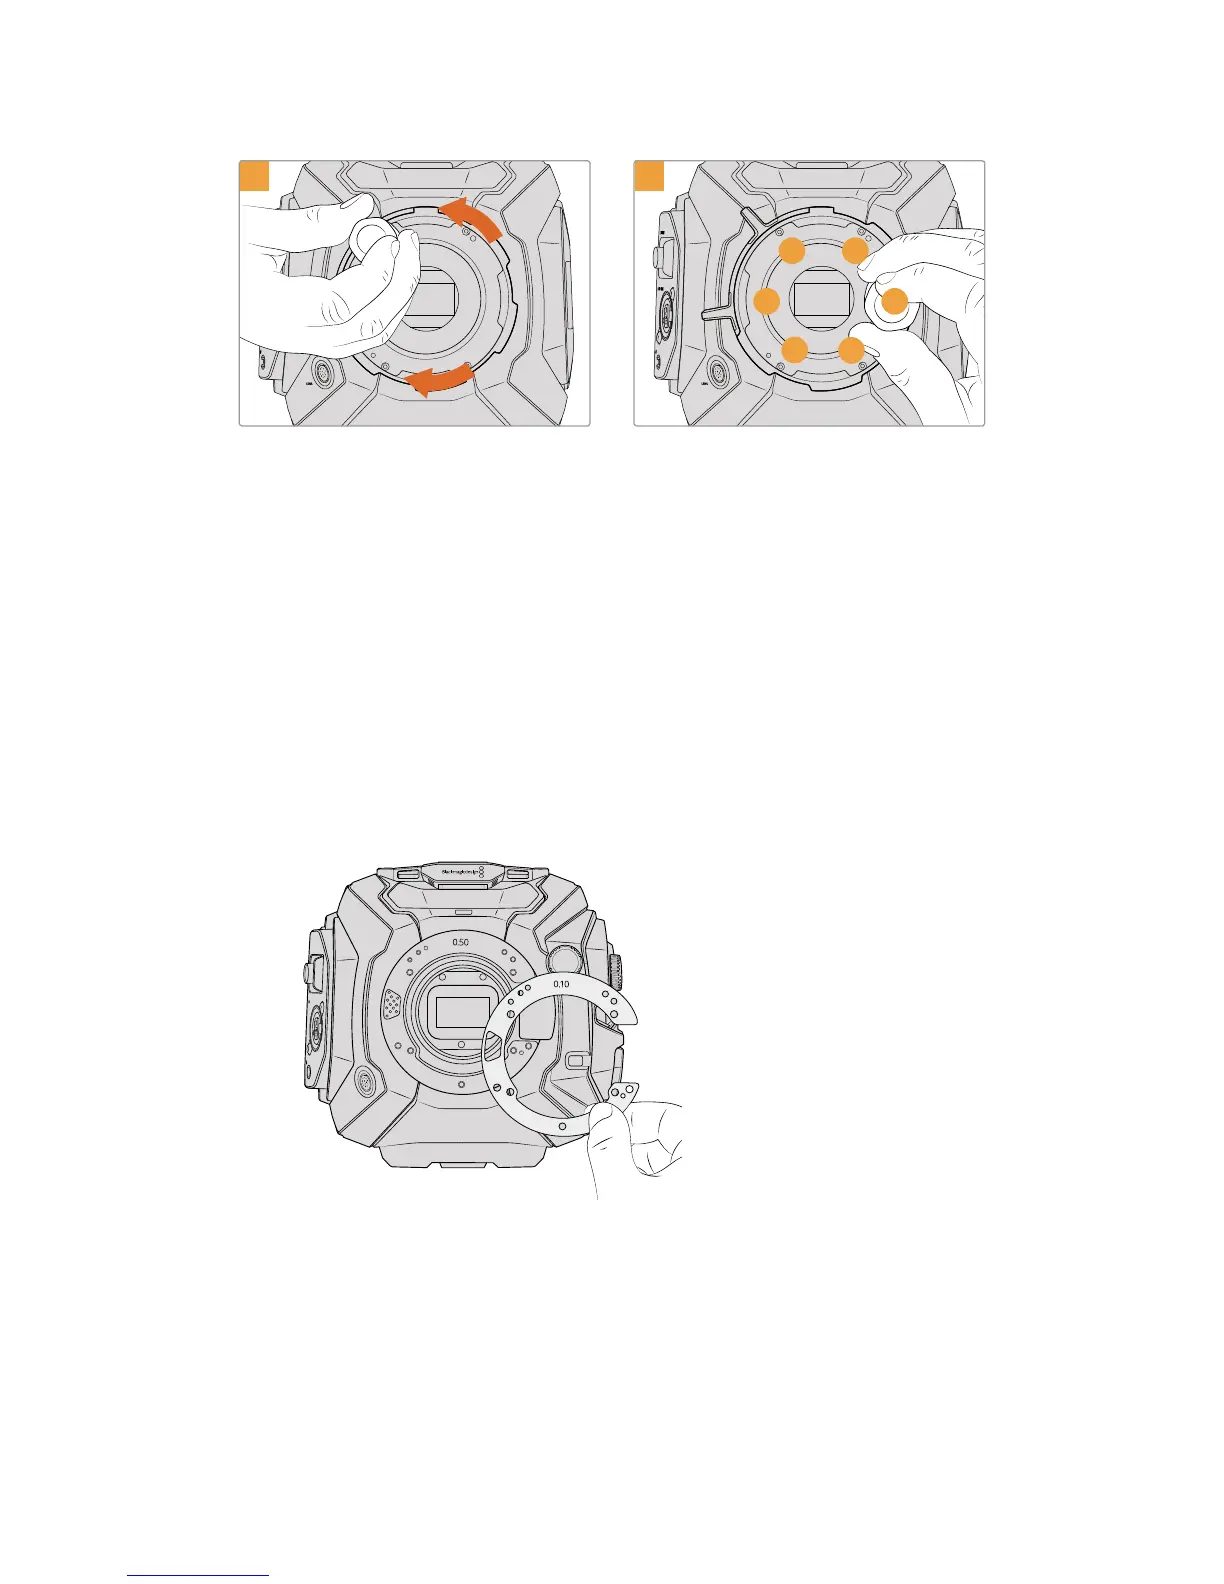
Loosely turn the five mounting screws until initial
contact is made with the shoulder of the lens
mount. To access all five screws, you will need to
rotate the PL locking ring, as some holes are
obscured when the ring is either open or closed.
Using the torque wrench and 2.0mm Hex key,
apply one full turn of pressure to mounting screw
1, followed by one full turn to screw 2, repeat for
screws 3 and 4, then 5 and 6. Continue to apply
one full turn to each screw in the sequence above
until all screws have reached the maximum torque
of 0.45Nm.
Shimming URSA Mini Pro 4.6K
Shimming URSA Mini Pro 4.6K is almost the same as URSA Mini PL. The only difference is the
shape of the shims themselves. To shim your URSA Mini Pro 4.6K, simply remove the attached
lens mount, and add or remove shims as you would for URSA Mini PL, then replace the mount.
See the 'Interchangeable lens mount' section for more information on attaching lens mounts to
URSA Mini Pro 4.6K.
URSA Mini Pro 4.6K's shims are C shaped to accommodate
the lens release mechanism in the EF mount. This
makes them easier to align as they can only fit one way.
Installation is otherwise identical to URSA Mini PL
ND
FILTER
4.6K
AUTO
W/B
LENS
SDI OUT
12V OUT
0
.50
0.10
263Shimming Lens Mounts