Getting Started
Getting started with your Blackmagic URSA Mini is as simple as attaching the side handle,
mounting a lens, and powering your camera.
Attaching a Lens
Attaching a lens to your camera is the same process for URSA Mini 4K, URSA Mini 4.6K and
URSA Mini Pro 4.6K, however the EF, PL, B4 and F mounts have slightly different ways of
operating. In all cases, the first step is to remove the protective dust cap.
To remove the protective dust cap from the EF lens mount, hold down the locking button and
rotate the cap counterclockwise until it is released. For the PL and B4 mount lenses, rotate the
locking ring counterclockwise and pull the protective dust cap away from the mount. For the F
mount, hold down the locking button and rotate the cap clockwise until it is released.
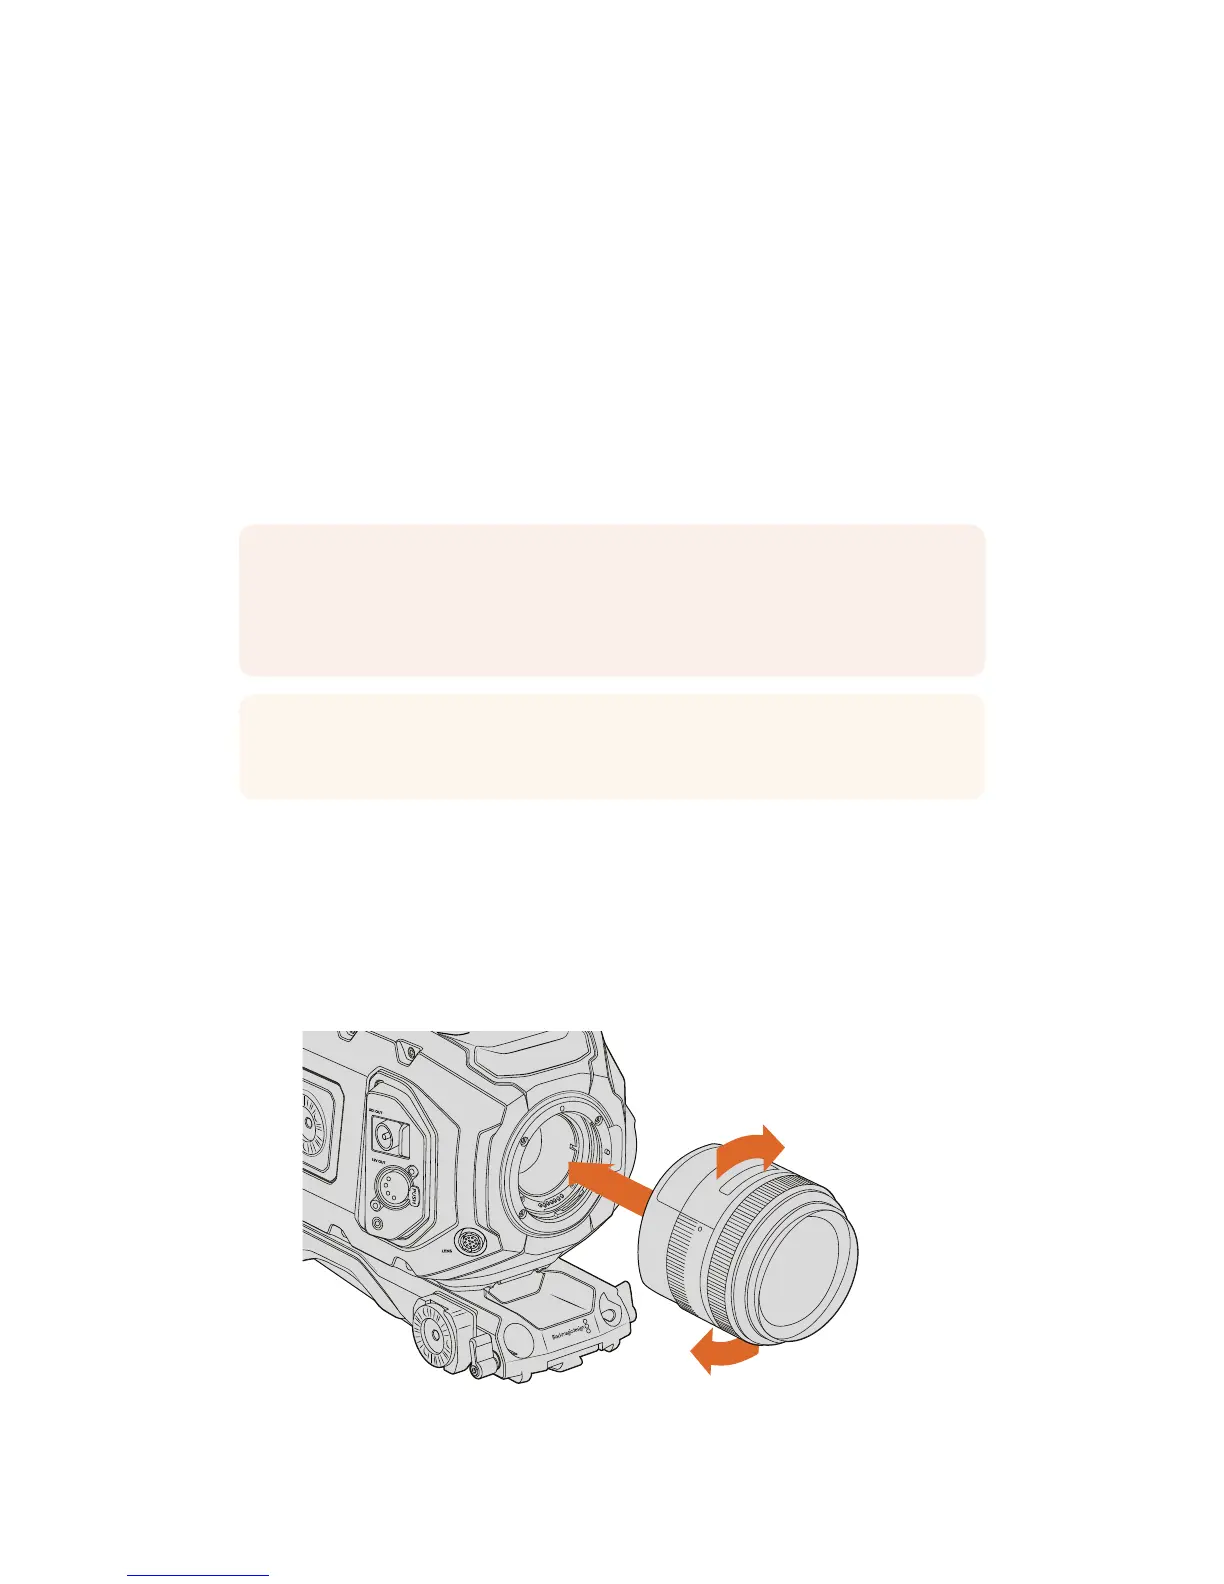
To attach an EF mount lens:
1 Align the dot on your lens with the dot on the camera mount. Many lenses have a visual
indicator, for example a blue, red or white dot.
2 Insert the lens into the mount and twist clockwise until it locks into place.
3 To remove the lens, hold down the locking button, rotate the lens counterclockwise
until its dot or indicator reaches the 12 o’clock position, and gently remove.
Attaching and removing an EF mount lens on Blackmagic URSA Mini EF
NOTE Blackmagic URSA Mini Pro 4.6K features an interchangeable lens mount
capable of accepting EF, PL, B4 and F mount lenses, as well as additional lens mounts
with accessories. Formore information on switching between mount types on
URSAMiniPro 4.6K, refer to the 'interchangeable lens mount' section in this manual.
TIP URSA Mini Pro 4.6K comes out of the box configured to accept EF lenses.
To get shooting right away, simply attach an EF mount lens as detailed below.
LENS
12V OUT
SDI OUT
8Getting Started