6 Choose your resolution from the ‘Decode Quality’ menu. A lower resolution will give
you better playback on limited systems. You also have the flexibility to change to full
resolution later on before delivery for the highest quality output.
Now you can adjust the camera settings for your clips such as saturation, contrast and midpoint
in Blackmagic RAW, or white balance, ISO, sharpening and more in CinemaDNG. This will affect
all clips in your project that are set to decode using ‘project’.
For a full description of all RAW settings available, refer to the DaVinci Resolve manual.
Editing your Clips
With your clips in the media pool, click on the ‘edit’ tab to open the edit page.
Now you can start building your edit!
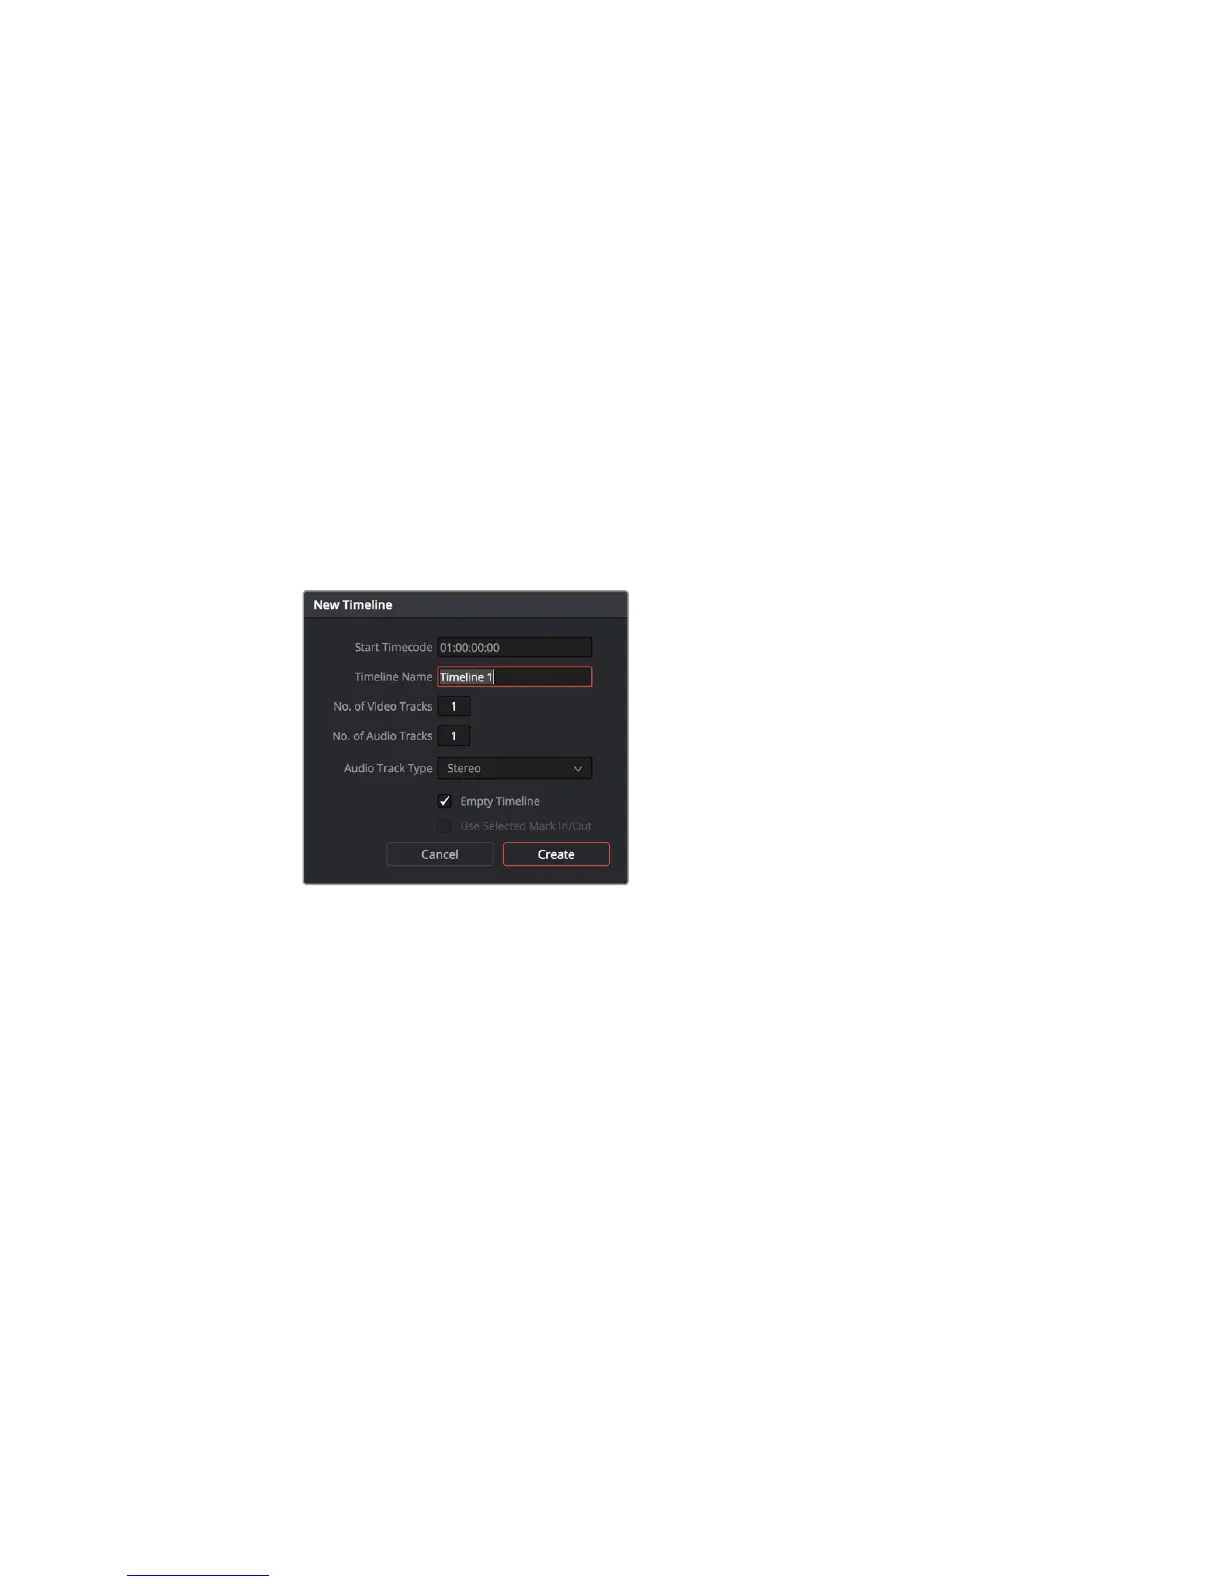
1 You’ll first need to create a new timeline. Right click on an empty area within the
mediapool and choose Timelines > Create New Timeline. When the dialog box
appears, name your timeline and click the ‘create’ button.
To start editing your clips, you’ll need to create
a new timeline. Thetimeline is the stage upon
which all your editing will take place
2 Double click a clip in the media pool to open the clip in the source viewer. Use the
mouse pointer to scrub the play head under the source viewer left and right until
you find the start frame you want for the clip. Mark the in point with the ‘I’ keyboard
shortcut. Do the same for the end frame using the ‘O’ keyboard shortcut.
3 Go to the timeline and position the timeline play head where you want your clip to
be inserted.
216Using DaVinci Resolve