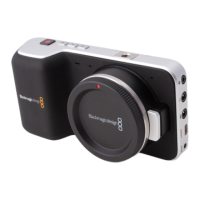
To attach a PL mount lens:
1 Open your camera’s PL locking ring by rotating it counterclockwise until it stops.
2 Align one of the lens’ four flange notches with the locating pin on the camera mount.
Be sure to align the lens for easy viewing of the lens marks.
3 Tighten the PL locking ring by rotating it clockwise. If attaching a PL lens with a servo
unit to URSA Mini PL or URSA Mini Pro 4.6K, you can also connect the 12 pin broadcast
connector for servo control.
4 To remove the lens, rotate the locking ring counterclockwise until it stops, then gently
remove the lens by pulling it directly out from the camera body. There is no need to
rotate the lens.
Attaching and removing a PL lens on Blackmagic URSA Mini PL
LENS
URSA Mini Pro 4.6K
URSA Mini Pro 4.6K's PL mount features four pins at the 12 o'clock position that are
used to communicate with lenses featuring Cooke’s /i Technology interface. The lenses
that support this interface include lenses from Canon, Cooke, Fujinon, Leica and Zeiss.
Thislets you record lens information in your clips’ metadata such as the lens model,
focal length, aperture setting, focus distance and other lens specific information.
The information that is recorded as metadata via Cooke's /i Technology interface
canbe very helpful in post production and VFX. Knowing the lenses used in
productionand their precise settings can be helpful in the event that the setup
needsto be replicated at a later date.
ND
FILTER
4.6K
AUTO
W/B
LENS
SDI OUT
12V OUT
When mounting a PLlens with
/iTechnology to URSAMini Pro 4.6K,
make sure the lens pins align withthe
mount pins at the 12o'clock position
9Getting Started