1 2
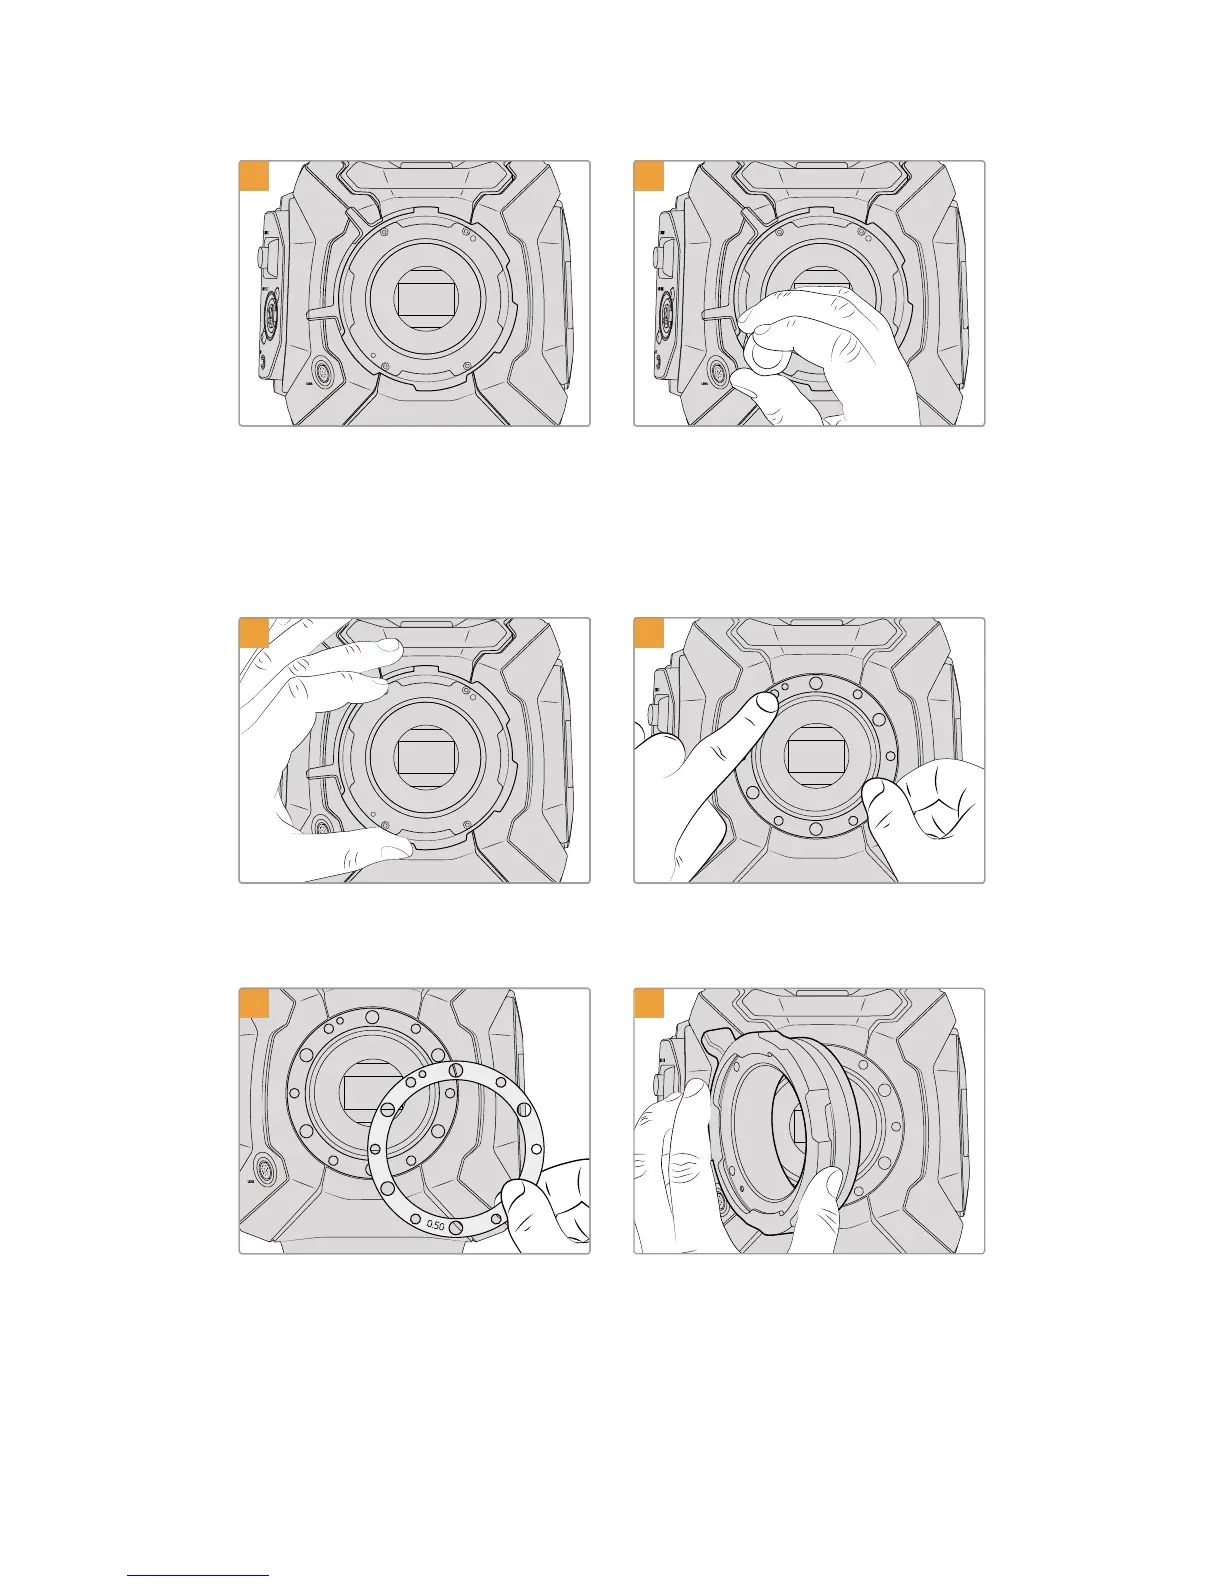
Place URSA Mini PL vertically on a solid, clean
bench top and remove your lens or dust cap. The
glass filter covering the sensor will be exposed
for the duration of the shimming process, so it’s
important to keep the filter as clean as possible.
Be careful not to touch the filter while shimming
the PL mount.
Remove the six PL mount screws using the 2.0mm
Hex driver. You may need to occasionally rotate
the PL locking ring clockwise or counterclockwise
to access the screws.
3 4
Carefully lift the lens mount away from the
camera body. Keep the screws safely located
close to the lens mount.
Note the alignment of the existing 0.50mm
shim with the alignment pin at the 11
o’clock position.
5 6
Add or remove shims in 0.10mm increments, and
test with your lenses when the camera is
reassembled to make sure they are hitting
theirmarks. To 'remove' shims, you might replace
your 0.50mm shim with a 0.40mm shim,
for example.
Place the Blackmagic URSA Mini Pro4.6K
PLlens mount onto the camera body.
262Shimming Lens Mounts