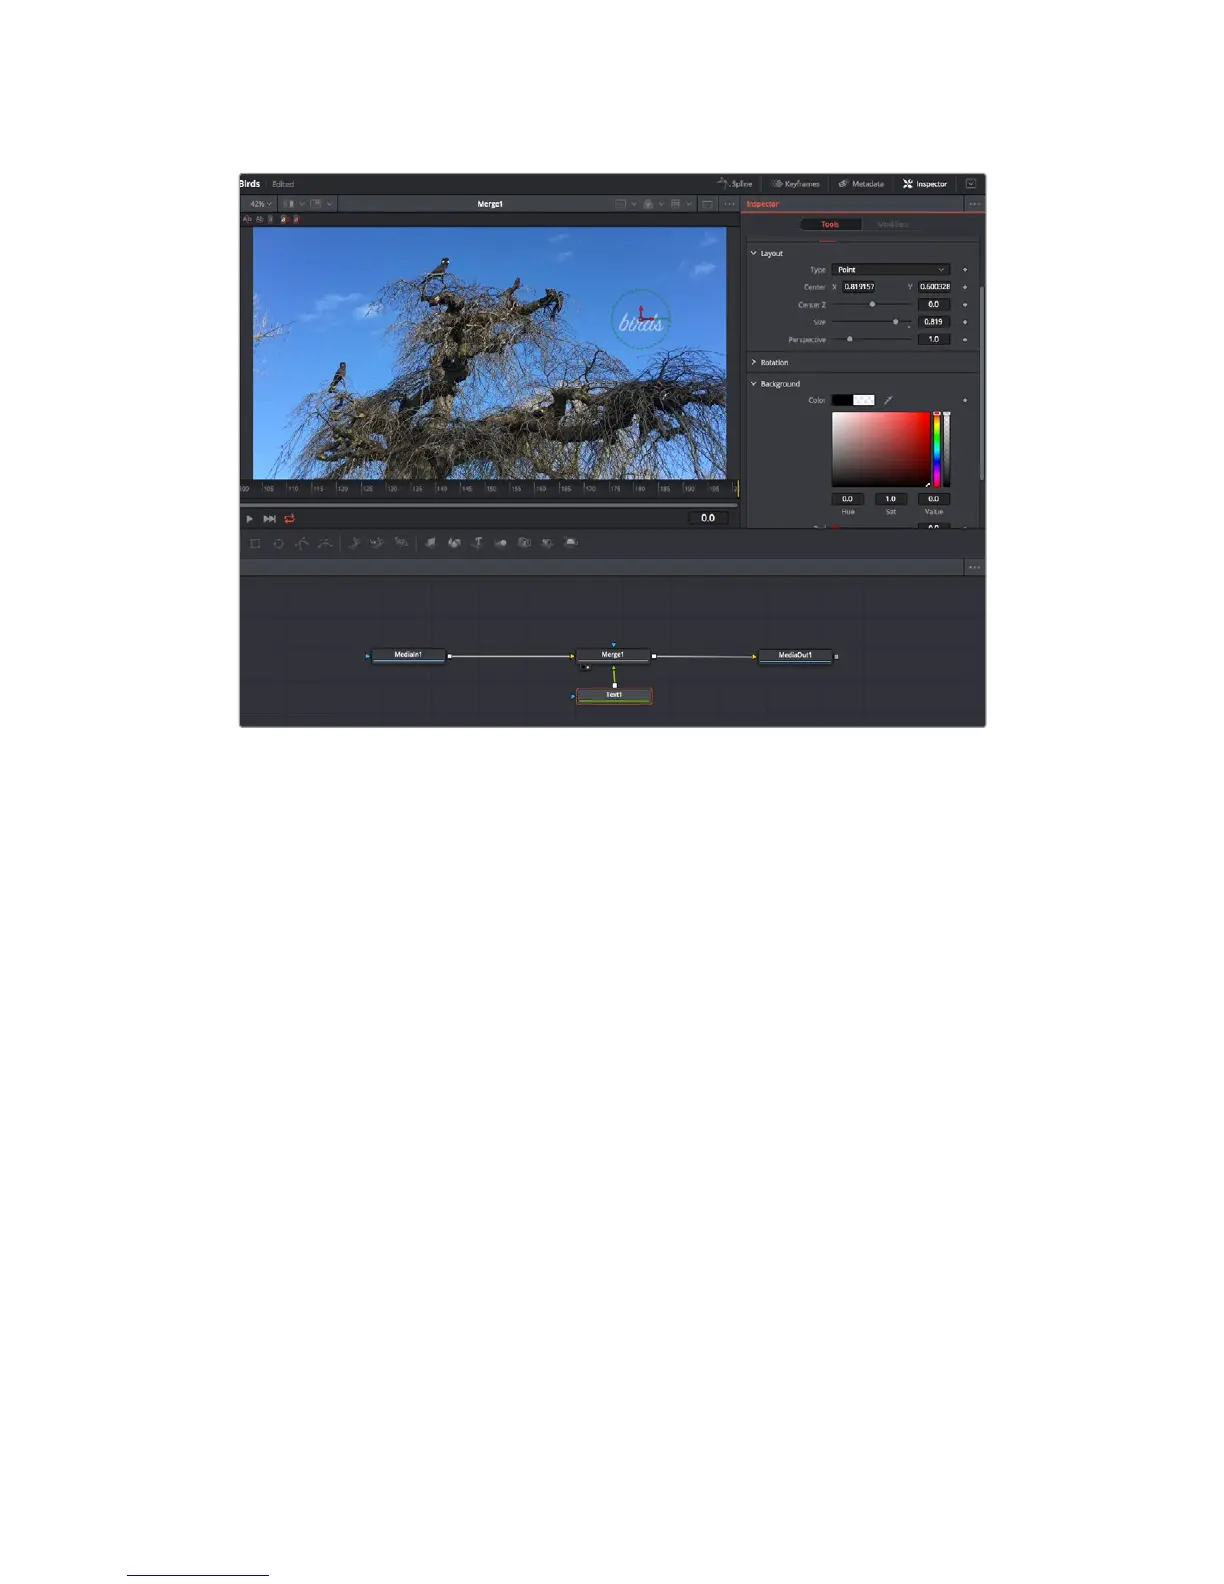
Selected nodes appear with a red border. Here the inspector
panelisdisplaying the layout tab controls for the text node.
There are different parameters and settings you can adjust for every node depending on its
task, from sizing and center positions to changing the number of particles in an emitter node.
Setting keyframes and changing the settings over time will animate the effect.
Working with Keyframes
In the inspector window, set a keyframe by right clicking on a setting and choosing ‘animate’
from the contextual menu. The keyframe icon to the right of the setting will turn red. This means
keyframes are now active and any changes you make will be applied to the current frame only.
When two or more keyframes are created by changing the setting parameters on a different
frame, a transition is interpolated between them. Arrows on each side of the keyframe icon let
you move the playhead to those exact positions on the timeline.
The splines panel gives you further control over keyframe animation. You can select keyframes,
such as the first and last, and smooth the animation between them into a bezier curve by typing
‘shift’ + ’s’, or right clicking on a keyframe and selecting ‘smooth’.
237Using DaVinci Resolve
 Loading...


