3 4
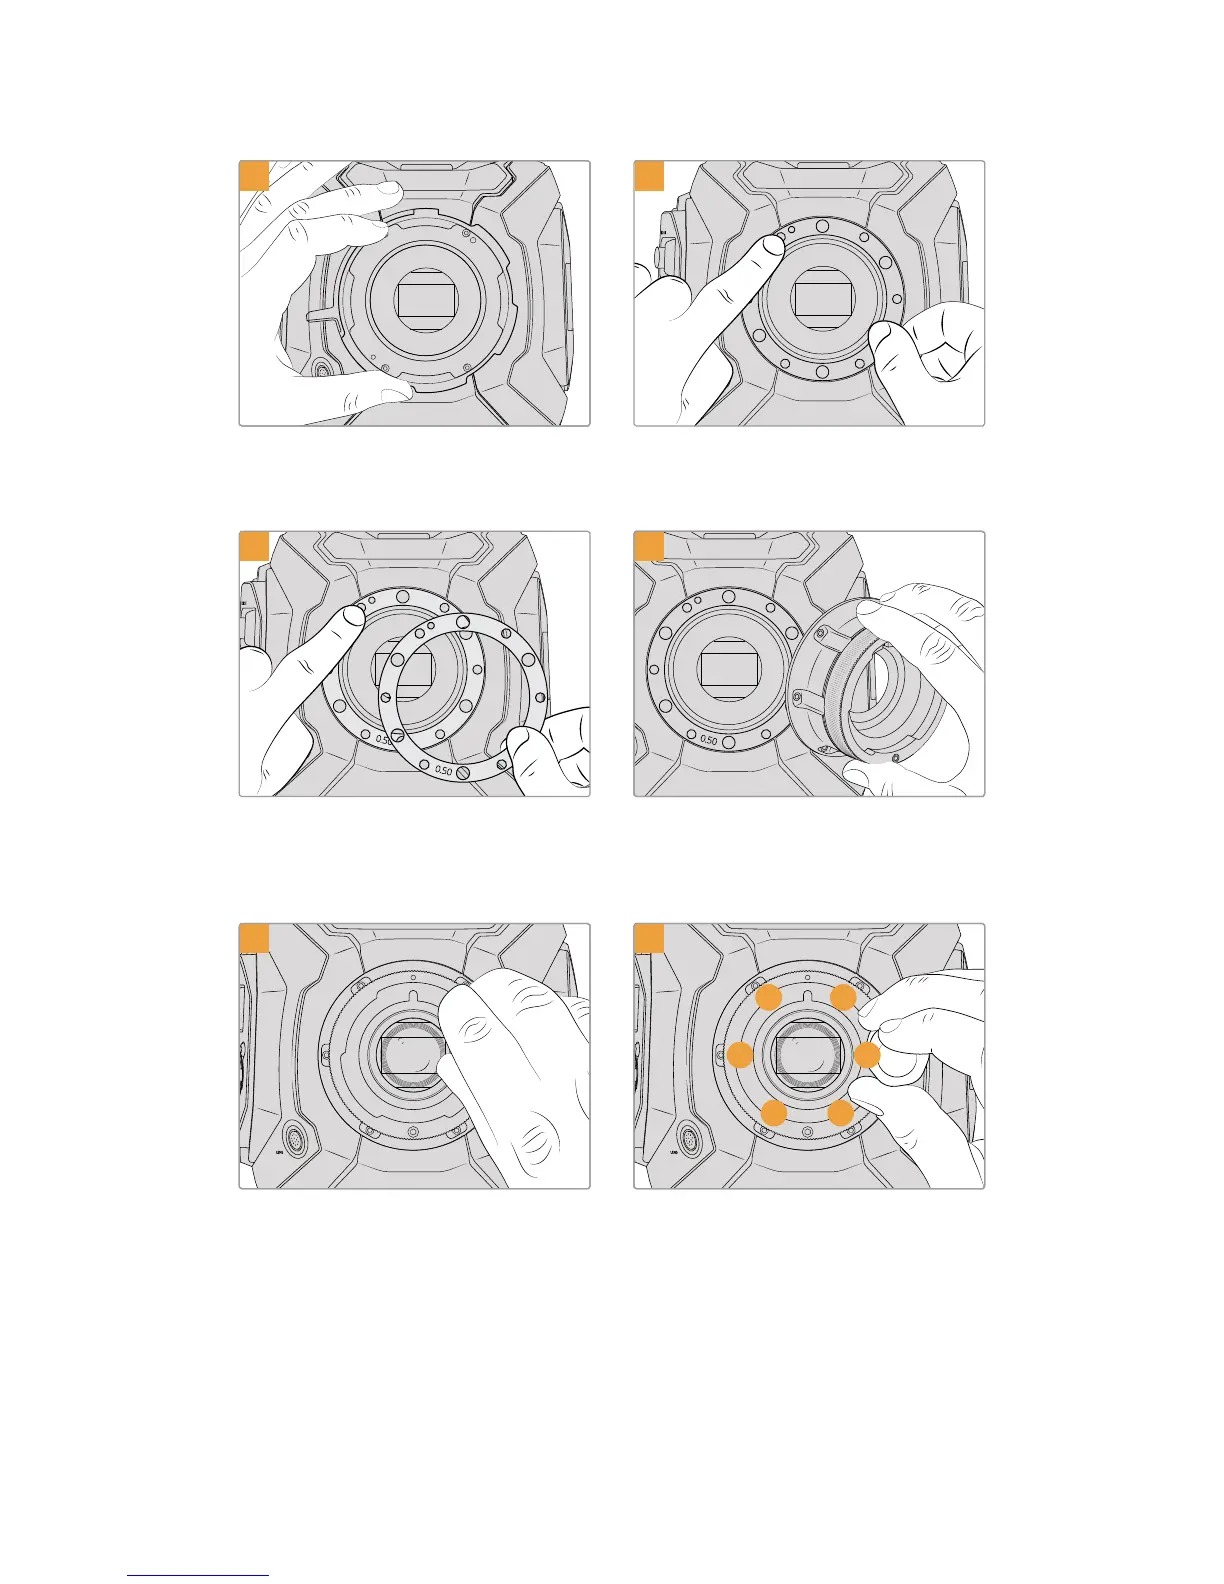
Carefully lift the lens mount away from the camera
body. Keep the screws safely located close to the
lens mount.
Note the alignment of the existing 0.50mm shim
with the alignment pin at the 11o’clock position.
5
6
Place the 2 x 0.50mm shims supplied with your
Blackmagic URSA Mini B4 lens mount onto the
original 0.50mm shim. This creates the clearance
needed to optimize the flange focal distance.
Place the Blackmagic URSA Mini B4 lens
mount onto the camera body ensuring the
registration slot is aligned with the alignment
pin at the 11 o’clock position.
7
1 3
4
56
2
8
Loosely turn the six mounting screws until
initialcontact is made with the shoulder of the
lens mount.
Using the torque wrench and 2.0mm Hexkey,
apply one full turn of pressure to mounting
screw 1, followed by one full turn toscrew 2,
repeat for screws 3 and 4, then 5and 6.
Continue to apply one full turn to each screw in
the sequence above until all screws have
reached the maximum torque of 0.45Nm.
260Blackmagic URSA Mini B4 Mount