37
Section 2. Creating Sounds
Section 2
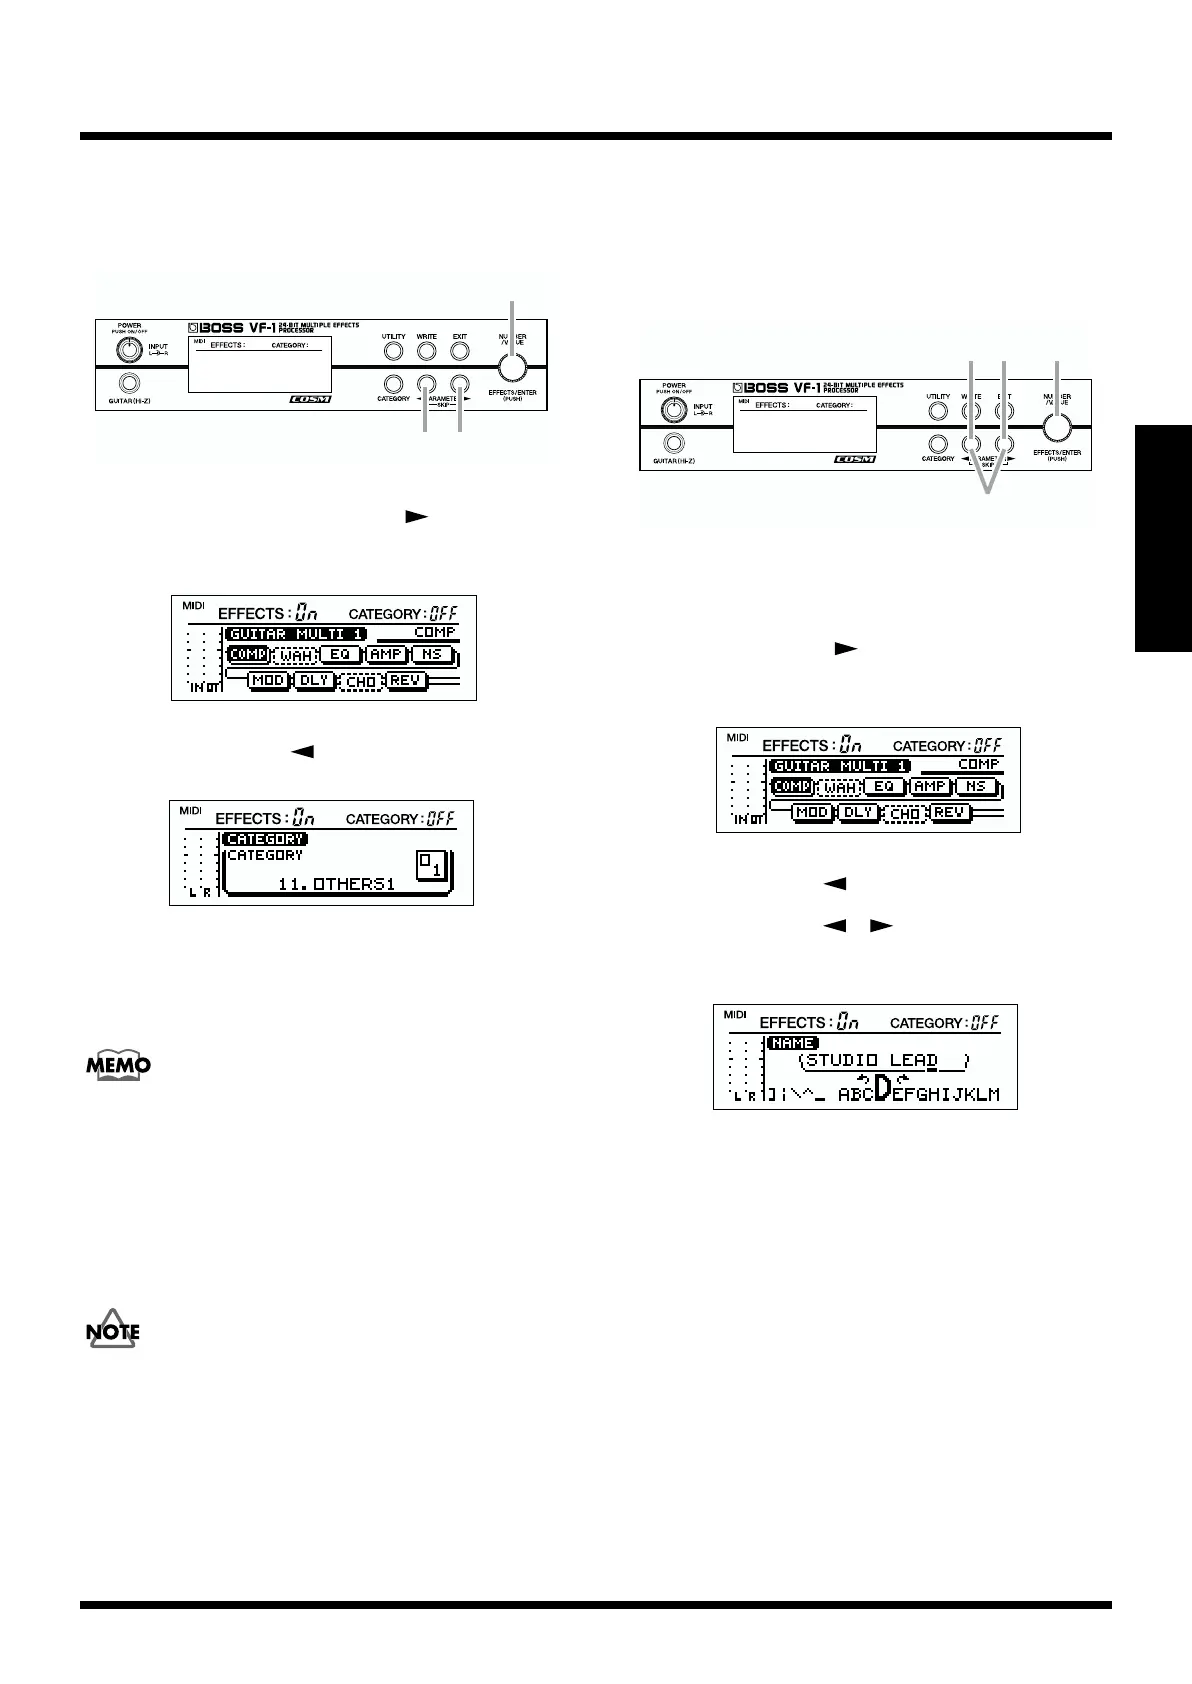
Assigning the category
You can assign a category for each patch.
fig.2-26
1. In Play mode, press PARAMETER [ ].
The following display will appear.
fig.2-12
2. Press PARAMETER [ ] to select “CATEGORY.”
fig.2-27
3. Rotate [VALUE] to assign the category.
The change will occur more rapidly if you hold down
[CATEGORY] while you rotate [VALUE].
For the available categories, refer to p. 19.
* The following categories cannot be selected.
• PRESET-A
• PRESET-B
• USER-A
• USER-B
If you wish to keep your settings, perform the Write
operation (p. 38).
Editing the patch name
Each patch can be given a name (patch name) of up to 13
characters. You can assign a name that reflects the type of
sound you created, or the song in which the patch is used.
fig.2-37
1. In Play mode, rotate [NUMBER] to select the patch
whose name you wish to edit. (p.18)
2. Press PARAMETER [ ].
The following display will appear.
fig.2-12
3. Use PARAMETER [ ] to access the “NAME” display.
4. Use PARAMETER [ ][ ] to move the cursor to the
character that you wish to change.
fig.2-38
5. Rotate [VALUE] to change the character.
The change will occur more rapidly if you hold down
[CATEGORY] as you rotate [VALUE].
The following characters can be used.
Uppercase alphabet
Lowercase alphabet
Numerals
Symbols
(Space)
By pressing [ENTER], you can switch the type of the
character where the cursor is located.
Uppercase alphabet –> Lowercase alphabet –>
Numerals –> Space –> Uppercase alphabet –> ...
1
3
2