M410 User Manual 36
Editing Labels on the Printer
Formatting Text
2. Press .
A pop-up menu displays the available font sizes for the label supply installed.
3. Navigate through the Size menu to select the desired font size.
•
Custom:
To manually enter a size, select
Custom
. The minimum/maximum range is shown
below the type-in field. If you exceed these values an error will display.
•
Auto:
To have text automatically size as you type, select
Auto
. Autosize starts with the largest
font size that fits on the label. When a line of text reaches the edge of a label it scales downward
until you press or the minimum font size is reached. When working with autosize and
multiple lines of text, all lines on a label maintain the same size. Autosize is the default setting
for all labels and is indicated with an ‘A’ in the upper left corner of the screen.
4.
Press .
Shortcut: You can increase or decrease the size of the font one point at a
time using the navigation keys. Hold the shift key and press the up or down
navigation key repeatedly to reach the desired font size.
Font Attributes
Font attributes (bold, italic, underline, expanded, or condensed) can be
applied to an entire line of text or to individual characters within a line of text. The attributes can be
turned on before entering the text or after the text has already been entered.
New Text
To turn an attribute on before entering the text:
1. Position the cursor where the attribute should take affect.
2. Press .
3. Select the desired attribute, then select On (for bold, italics, and underline). For expanded,
select a percentage lower than 100; for condensed, select a percentage higher than 100.
4.
Press .
5. Enter the text to be affected by the attribute.
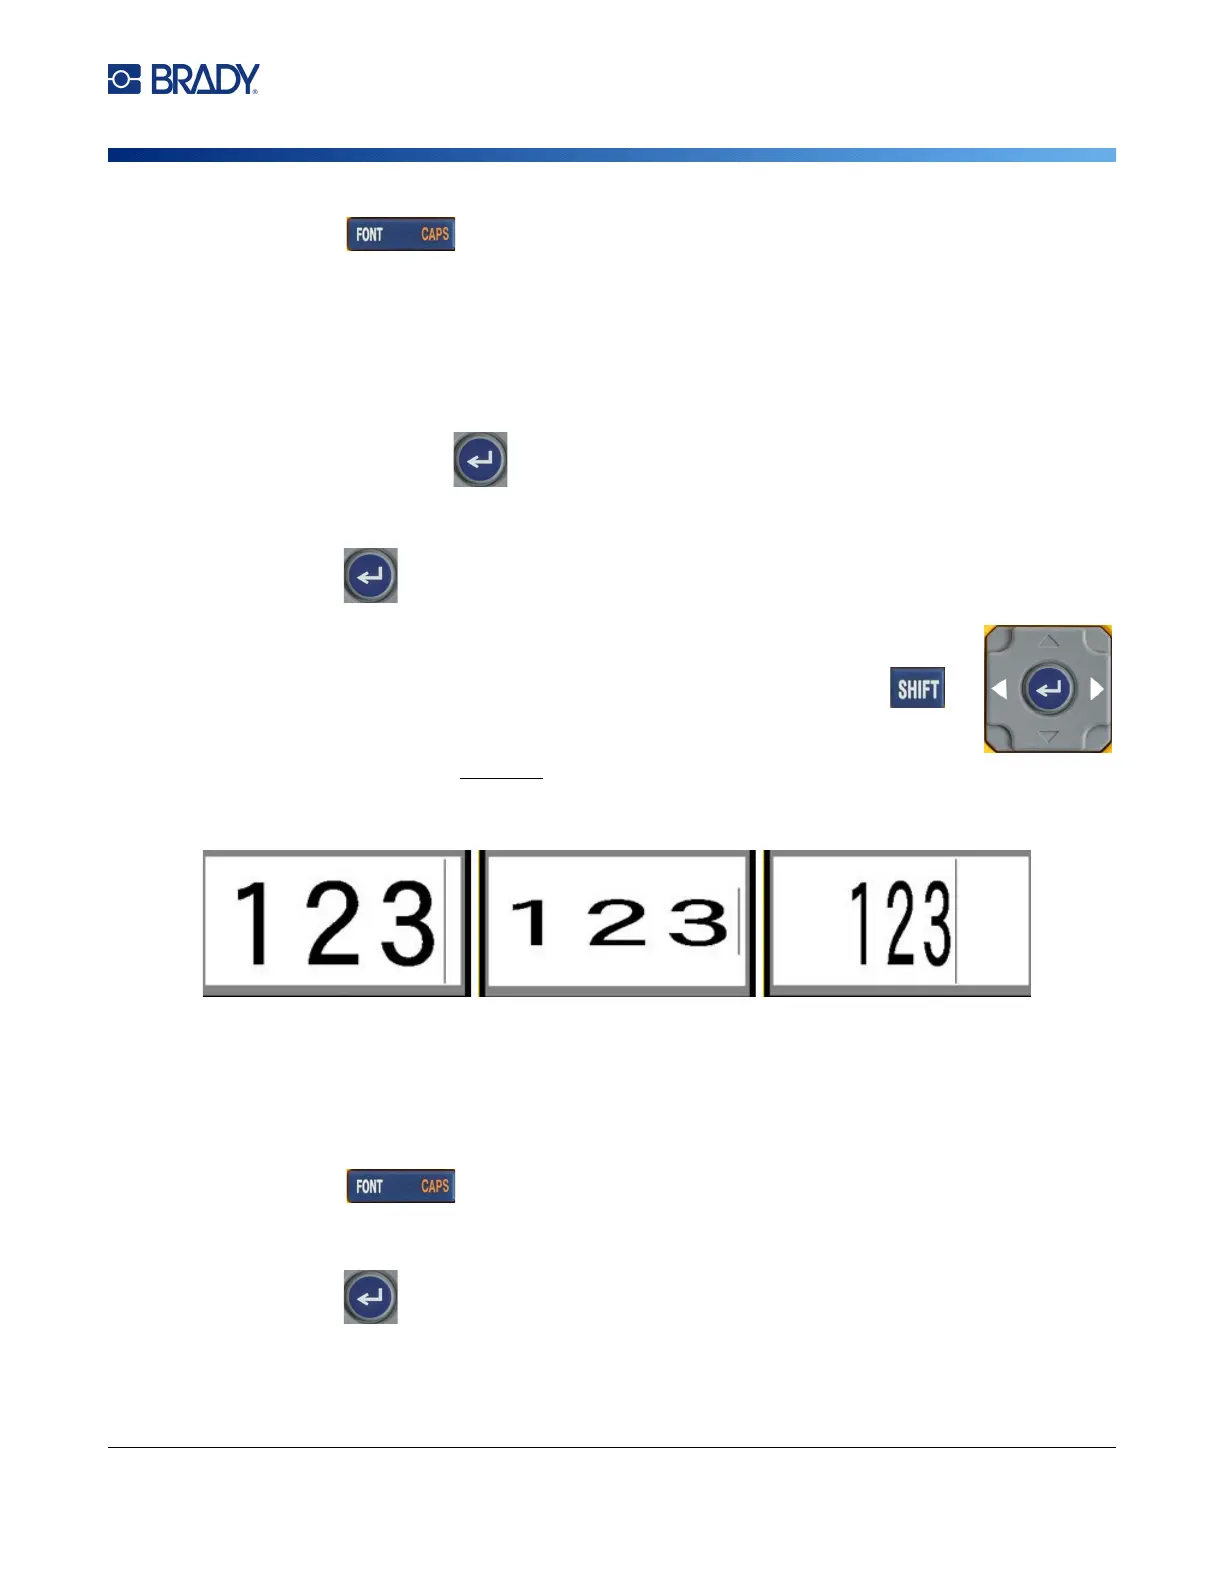
Standard
Expanded
Condensed