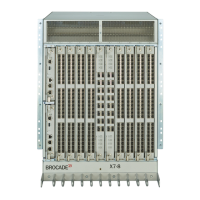
X7-8-Install-IG100 Installation Guide
Brocade
®
X7-8 Director Hardware Installation Guide
b) Continue pushing the blade into the slot using your thumbs or fingers until the ejectors move in toward the blade
slightly, indicating that the connectors are engaged.
c) Simultaneously push both ejector handles in toward the blade center with even pressure until the blade completely
seats in the slot.
NOTE
As you move the handles, you will hear connectors engaging the backplane connector and possibly a
slight popping noise. This is normal and is due to the dense backplane.
3. Tighten the captive screw for each ejector using a No. 1 Phillips screwdriver.
As the blade seats completely, the amber blade status and green blade power LEDs illuminate.
NOTE
Be sure that captive screws are tightened. If they are not tightened, high pressure from fan operation may
unseat the blade from chassis connectors.
4. Observe the blade power and status LEDs and verify the following:
a) Verify that the status LED on the blade shows amber until POST completes for the blade. The status LED should
then display green to indicate that the blade has power. If the status LED remains amber, the board might not be
properly seated in the backplane or the board may be faulty.
b) Verify that the power LED on the port blade is displaying a steady green light to indicate that the blade has power.
If it does not turn on, ensure that the blade is firmly seated and ejector captive screws are tightened.
5. Install the transceivers and cables in the blade.
6. Replace the chassis door. The door is required to meet EMI compliance.
Verifying Blade Operation
Perform the following tasks to verify the operation of a blade:
1. Check the LED indicators on the blade's front panel. For information on interpreting LED patterns, see one of the
following sections of this guide:
•
Interpreting FC32-X7-48 Port Blade LEDs
•
Interpreting FC32-64 Port Blade LEDs
•
Interpreting FC64-48 Port Blade LEDs
•
Interpreting Extension Blade LEDs
2. Enter the following commands and note any error conditions:
•
slotshow -p – Displays the current data on each slot in the system, including blade type, blade ID, status, and
Brocade model name.
•
tempShow – Displays temperature reading of blades.
•
chassisShow – Displays information about each component in the system.
•
sensorShow – Displays temperature reading of blades with fan and power supply status.
•
errDump – Displays the entire system error log.
•
errShow – Displays error log messages one at a time.
For output examples and additional information on Fabric OS commands, see Using Monitoring Commands
and the Brocade Fabric OS Command Reference Manual. For more information about error messages, refer
to the Brocade Fabric OS Message Reference Manual.
X7-8-Install-IG100
123

 Loading...