TT100 In-Line Viscometer Installation, Operation, Maintenance and Service Instructions
P/N M/97-520 2-3
Calculating Minimum Straight Pipe Length
NOTE: The TT100 In-Line Viscometer does not require special supports or
special pipe alignment. The housing is symmetrical with respect to the
flow direction.
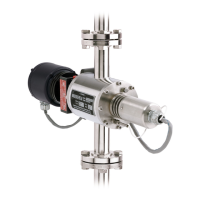
Refer to Figure 2-1 and the following procedure to install the viscometer.
1. Calculate the minimum straight pipe length leading to the
viscometer as follows:
Pipe Diameter x 10 = minimum straight pipe length
2. Select an installation location that will provide clearances of 14
inches from the sensing endcap, and 16 inches from the chamber
side as shown in Figure 2-1.
3. Using standard plumbing practices for the appropriate viscometer
flange type, install the viscometer in the preferred position as
shown in Figure 2-1.
4. If equipped, install the flushing fluid supply using the appropriate
valves.
5. If equipped, install the double mechanical seal barrier fluid supply
using appropriate valves as follows:
a. Connect the barrier fluid to the lower valve.
b. Vent the barrier fluid from the upper valve.
NOTE: The viscometer may be equipped with an optional pressure sensing
switch which is mounted on the double mechanical seal housing. If the
appropriate barrier fluid pressure is not sensed, the motor will not operate.
Installation
NOTE: Refer to the TT100 In-Line Viscometer Specification sheet to
determine the configuration of the viscometer.
1. Depending upon your configuration, refer to the appropriate
installation diagram as shown in Figures 2-2 through 2-4 to
install the viscometer.