TT100 In-Line Viscometer Installation, Operation, Maintenance and Service Instructions
P/N M/97-520 3-19
10. Connect the DVM negative lead to the wire installed on J1-Pin 2.
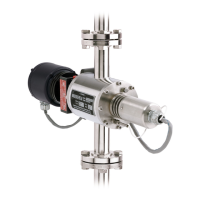
11. Loosen, but do not remove the Microsyn field coil assembly
mounting screws as shown in Figure 3-8.
12. Rotate the Microsyn field coil assembly, as shown in Figure 3-8,
until 0 ± .2 VDC is observed on the DVM. Tighten the mounting
screws.
Figure 3-8: Microsyn Field Coil Assembly Rotation
13. Remove the sensing endcap from the viscometer as follows:
CAUTION
Handle the sensing endcap assembly with care when removing it from the
measuring chamber. Damage to the torsion element may result by
contacting the stator with the rotor.
a. Remove seven of the eight screws that secure the sensing
endcap to the measuring chamber.
b. While holding the sensing endcap in position, remove the
last screw and carefully remove the sensing endcap from the
measuring chamber.
NOTE: Both the torsion element axis and the calibration bar axis must be
within 8º of horizontal for calibration within the limits of the instrument.
14. Carefully place the sensing endcap flange in a vise to hold it secure
and parallel to the work surface.