TT100 In-Line Viscometer Installation, Operation, Maintenance and Service Instructions
P/N M/97-520 6-25
8. Carefully install the gearbox on the replacement motor using the
previously removed mounting screws and washers.
NOTE: Do not tighten the screws.
9. Align the motor drive shaft coupling halves and install the motor on
the mounting bracket.
10. Install and tighten the motor mounting screws and washers.
11. With the gearbox mounting screws loose, adjust the position of the
gearbox until the motor drive shaft coupling halves are parallel to
each other. Tighten the gearbox mounting screws.
NOTE: If needed, refer to the viscometer specification sheet to determine
the appropriate drawing reference for step 12.
12. Install the power cable according to the appropriate Figure in
Appendix B.
13. Turn power ON to the motor control enclosure.
14. Check the gearbox for unusual noises or vibrations. Turn power
OFF.
15. Proceed with Drive Endcap Assembly.
Groschopp Motor Gearbox Replacement
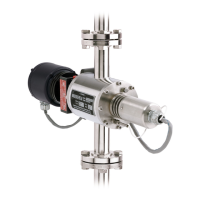
1. Remove the four hex bolts from the motor bracket and remove
the motor as shown in Figure 6-13.
2. Remove the three gearbox mounting screws and washers and
remove the gearbox.
3. Using a hex wrench, loosen the set screw and remove the drive
shaft coupling half from the gearbox shaft.
4. Install the drive shaft coupling half on the replacement gearbox
shaft and tighten the set screw.
5. Apply gearbox lube to the replacement gearbox.
6. Carefully install the replacement gearbox on the motor using the
previously removed mounting screws and washers.
NOTE: Do not tighten the screws.
7. Align the motor drive shaft coupling halves and install the motor on
the mounting bracket.
8. Install and tighten the motor mounting screws and washers.