Sensor Configuration and Numbering
SMART MATRIX - 2-13 -
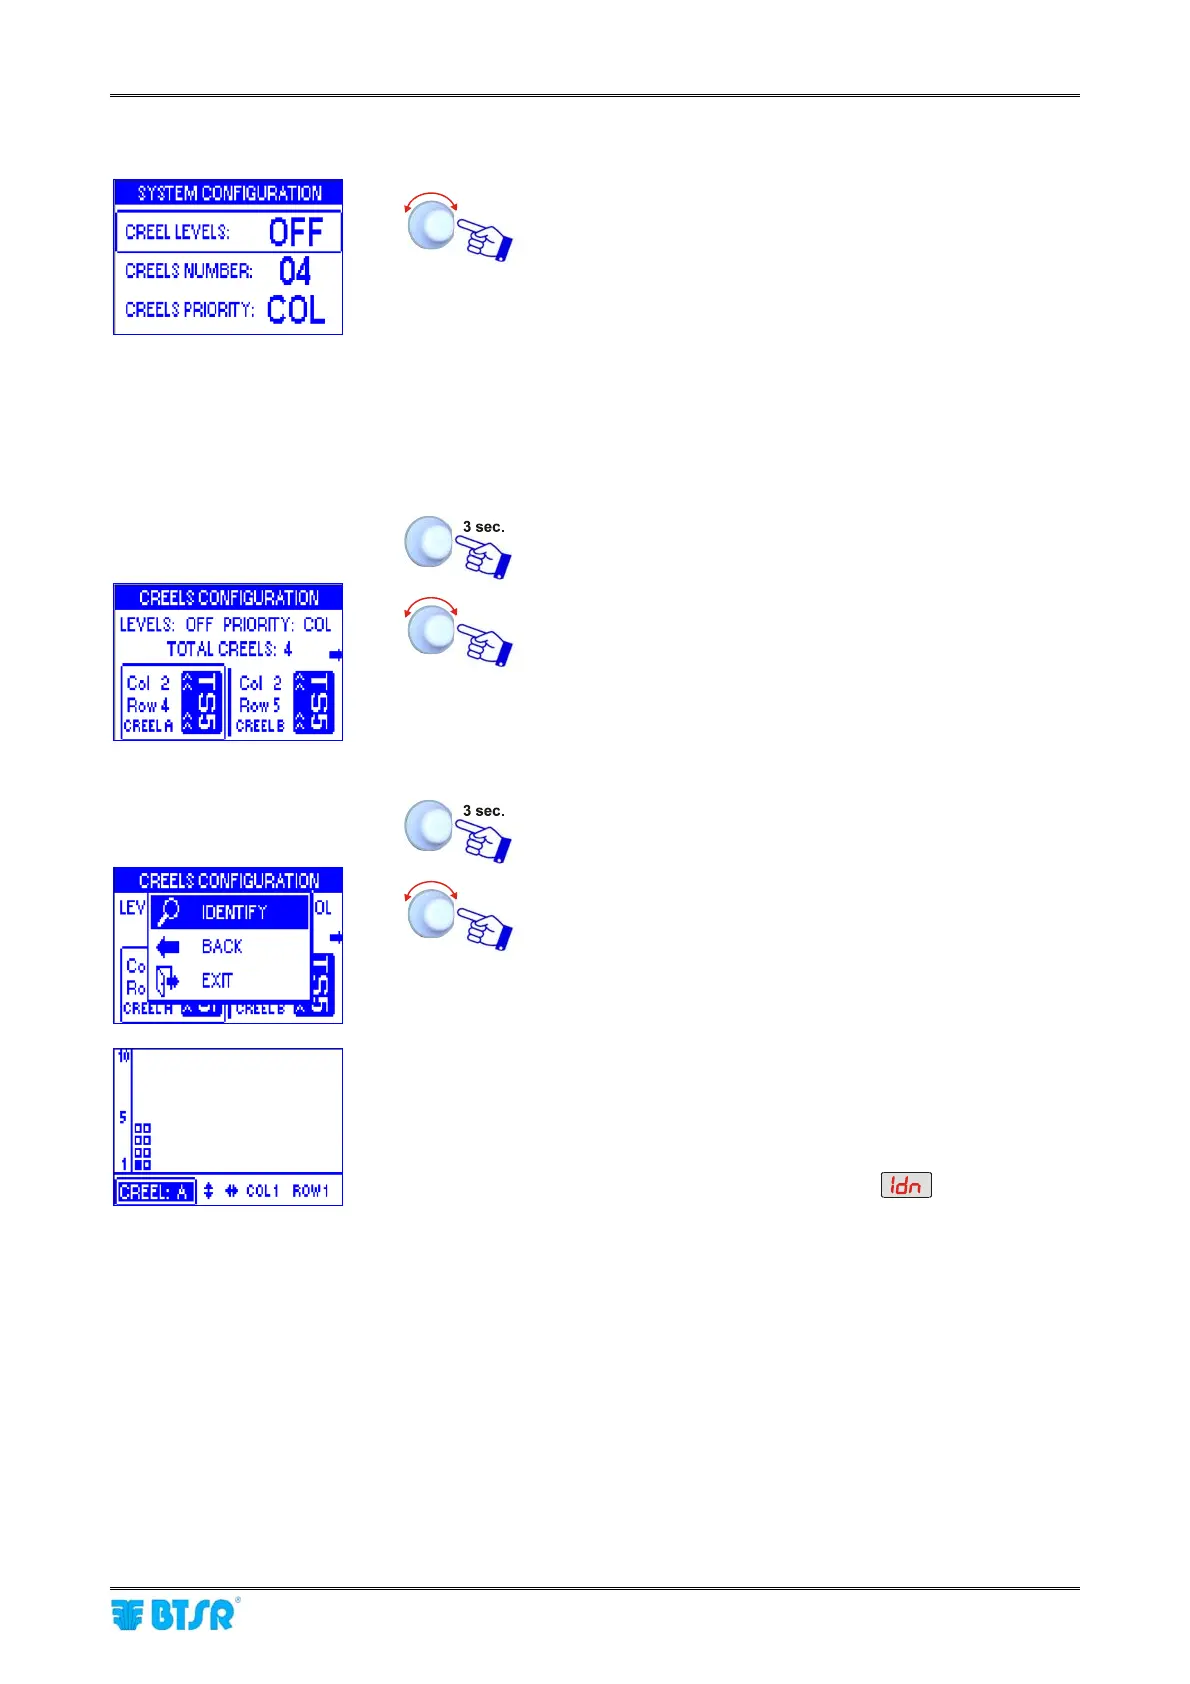
Example with CREEL LEVELS parameter = OFF (1 creel level)
• Point and select CREEL LEVELS.
• Set the number of CREEL LEVELS [in this case
CREEL LEVELS = OFF].
• Point and select CREELS NUMBER
• Set the CREELS NUMBER [Allowed values: 01 ÷ 26]
• Point and select CREELS PRIORITY
• Choose the desired priority (Rows, Columns, Bars)*
* The ENDS option refers to a special configuration that
cannot be used in a general way
SAVE to save the settings, BACK to go back to the
previous screen without saving, EXIT to go back to the
menu
• Point CREEL A
• Select Col field.
• Set the number of Columns for Creel A.
• Select the Row field
• Set the number of Rows of Creel A.
• Point CREEL B and so on for all the used creels.
Once you have configured all the creels.
IDENTIFY to start the sensor identification.
• The example shown indicates that the numbering
(identification) procedure of the 8 sensors belonging to
creel A is going to start. The flashing small square
indicates the sensor located on “Column 1 - Row 1 -
Creel A”.
• The display of all Boards will show
• The green led will flash on all sensors.
• Shim the touch light of the sensor corresponding to
“Column 1 - Row 1 - Creel A” position; The sensor’s led
changes from flashing green to red.
• On SMART MATRIX display the small square of sensor
located on “Column 1 - Row 2 - Creel A” starts flashing.
• Shim the touch light of the relevant sensor and continue
with the numbering of all sensors.
At the end of the numbering operation, the configuration
menu will re-appear.