12 Chapter 3 Imaging Software Overview
Acquisition Interface
Panoramic Acquisition Interface Overview
The Panoramic Acquisition interface provides you with panoramic imaging acquisition
functions.
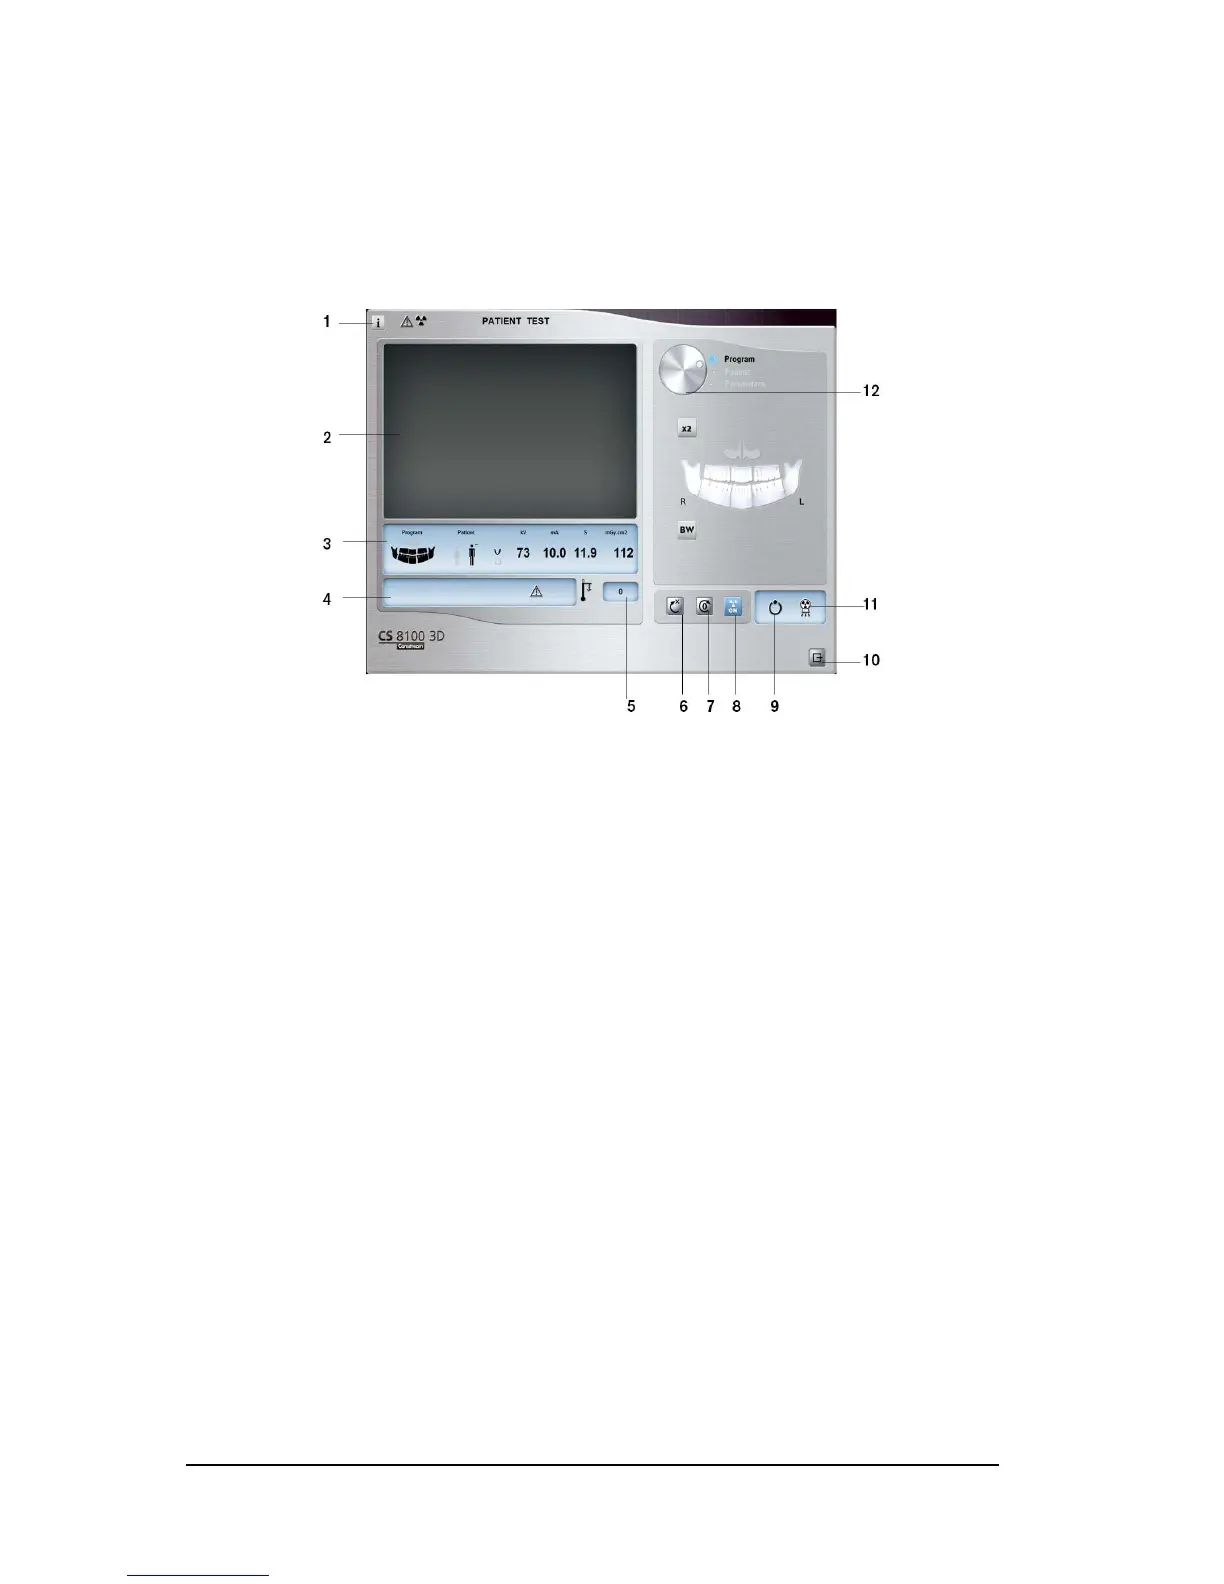
Figure 6 Panoramic Acquisition Interface
1 Information button:
• Show versions: Identifies Software and Firmware versions.
• Additional features: Contains information on additional activated options and date of
expiration.
• Resetting Anatomy setting: Resets to the manufacturing parameter settings.
• Memorize Anatomy setting: Memorizes the user preference settings for each patient
type (kV, mA and seconds).
2 Preview Screen: Displays the acquired acquisition frames.
3 Selected Parameter Display: Displays the current acquisition parameter settings.
4 System Status Screen: Displays various alert or warning messages originating from the unit.
5 Generator Cooling indicator: Indicates the automatic cooling time (mm:ss) required before the
next acquisition.
6 Reset button: Resets the unit to the patient-entry position to enable you to position a patient in
the unit.
7 Parallel position button: Leaves more free space around the unit when it is not in use by placing
the rotative arm in a parallel position to the unit head.
8 X-ray On/Off button: Enables or disables X-ray emission.
9 Ready Indicator LED
• Green indicates the unit is ready to start acquisition.
• Black indicates the unit is not ready to start acquisition.
10 Exit button: Closes the Acquisition interface.
11 X-ray Emission indicator: Yellow, indicates the X-ray emission status.
12 Selector Button: Selects different acquisition setting options.
• Click Program to select examination type options.
• Click Patient to select patient type parameters.
• Click Parameters if you need to manually adjust the exposure parameter options.