SERVICE MANUAL
Paragraph 127
If the initial engagement pressure is correct but the
full engagement pressure is low, remove regulator
valve (15 through 20). Inspect the regulator valve
poppet (20) and seat and if in good condition, add
a shim (17). Each shim will increase the full engage-
ment pressure 20-30 psi (138-207 kPa).
NOTE:
Repeat pressure tests after adding shims
or renewing any parts,
PTO CLUTCH, SHAFTS AND GEARS
All Models
127.
R&R AND OVERHAUL. Tb remove the pto
clutch, first drain range transmission and remove
clutch cover or transfer case, as equipped. Rotate up-
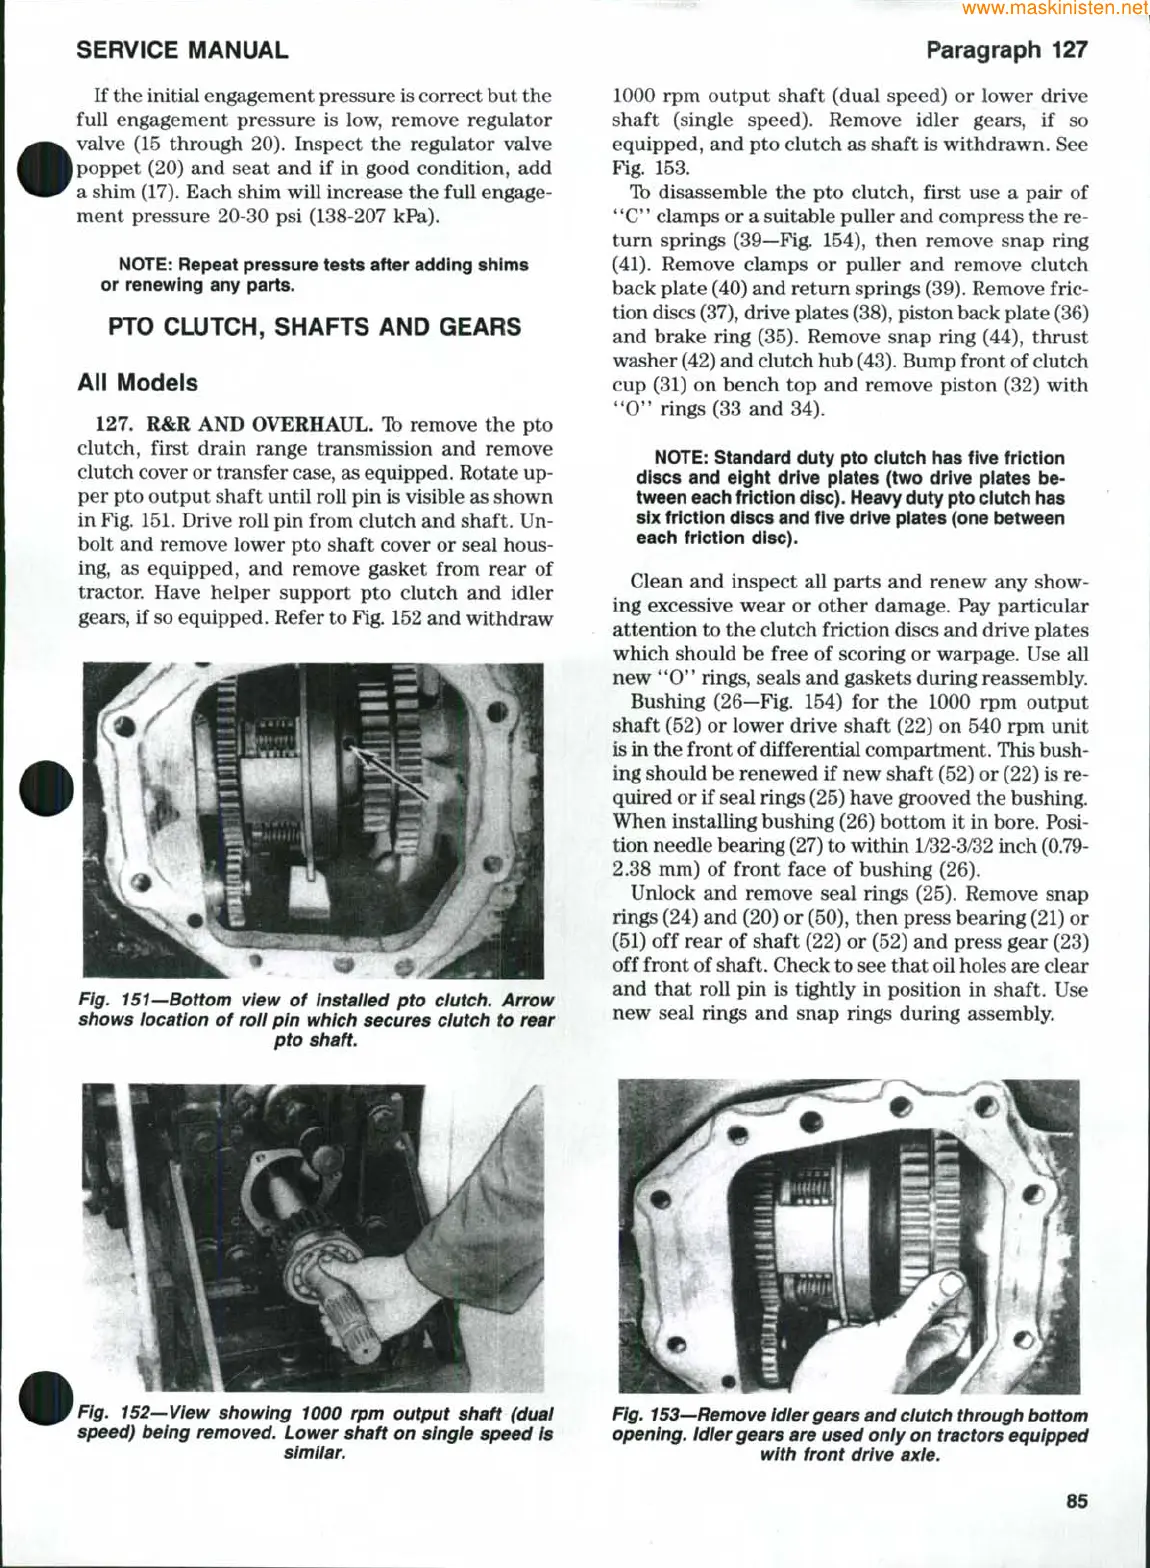
per pto output shaft until roll pin is visible as shown
in Fig.
151.
Drive roll pin from clutch and shaft. Un-
bolt and remove lower pto shaft cover or seal hous-
ing, as equipped, and remove gasket from rear of
tractor. Have helper support pto clutch and idler
gears,
if so equipped. Refer to Fig. 152 and withdraw
Fig. 151—Bottom view of Installed pto clutch. Arrow
shows location of roll pin which secures clutch to rear
pto shaft.
1000 rpm output shaft (dual speed) or lower drive
shaft (single speed). Remove idler gears, if so
equipped, and pto clutch as shaft is withdrawn. See
Fig. 153.
Tb disassemble the pto clutch, first use a pair of
'*C*'
clamps or a suitable puller and compress the re-
turn springs (39—Fig. 154), then remove snap ring
(41).
Remove clamps or puller and remove clutch
back plate (40) and return springs
(39).
Remove fric-
tion discs
(37),
drive plates
(38),
piston back plate (36)
and brake ring (35). Remove snap ring (44), thrust
washer (42) and clutch hub
(43).
Bump front of clutch
cup (31) on bench top and remove piston (32) with
**0'^
rings (33 and 34).
NOTE:
Standard duty pto clutch has five friction
discs and eight drive piates (two drive piates be-
tween each friction disc),
i-ieavy
duty pto ciutch has
six friction discs and five drive piates (one between
each friction disc).
Clean and inspect all parts and renew any show-
ing excessive wear or other damage. Pay particular
attention to the clutch friction discs and drive plates
which should be free of scoring or warpage. Use all
new
**0*'
rings, seals and gaskets during reassembly.
Bushing (26—Fig. 154) for the 1000 rpm output
shaft (52) or lower drive shaft (22) on 540 rpm unit
is in the front of differential compartment. This bush-
ing should be renewed if new shaft (52) or (22) is re-
quired or if seal rings (25) have grooved the bushing.
When installing bushing (26) bottom it in bore. Posi-
tion needle bearing (27) to within
1/32-3/32
inch
(0.79-
2.38 mm) of front face of bushing (26).
Unlock and remove seal rings (25). Remove snap
dngs (24) and (20) or (50), then press bearing (21) or
(51) off rear of shaft (22) or (52) and press gear (23)
off front of shaft. Check to see that oil holes are clear
and that roll pin is tightly in position in shaft. Use
new seal rings and snap rings during assembly.
Fig, 152—View showing WOO rpm output shaft (dual
speed) being removed. Lower shaft on single speed Is
similar.
Fig. 153—Remove Idler gears and clutch through bottom
opening. Idler gears are used only on tractors equipped
with front drive axle.
85