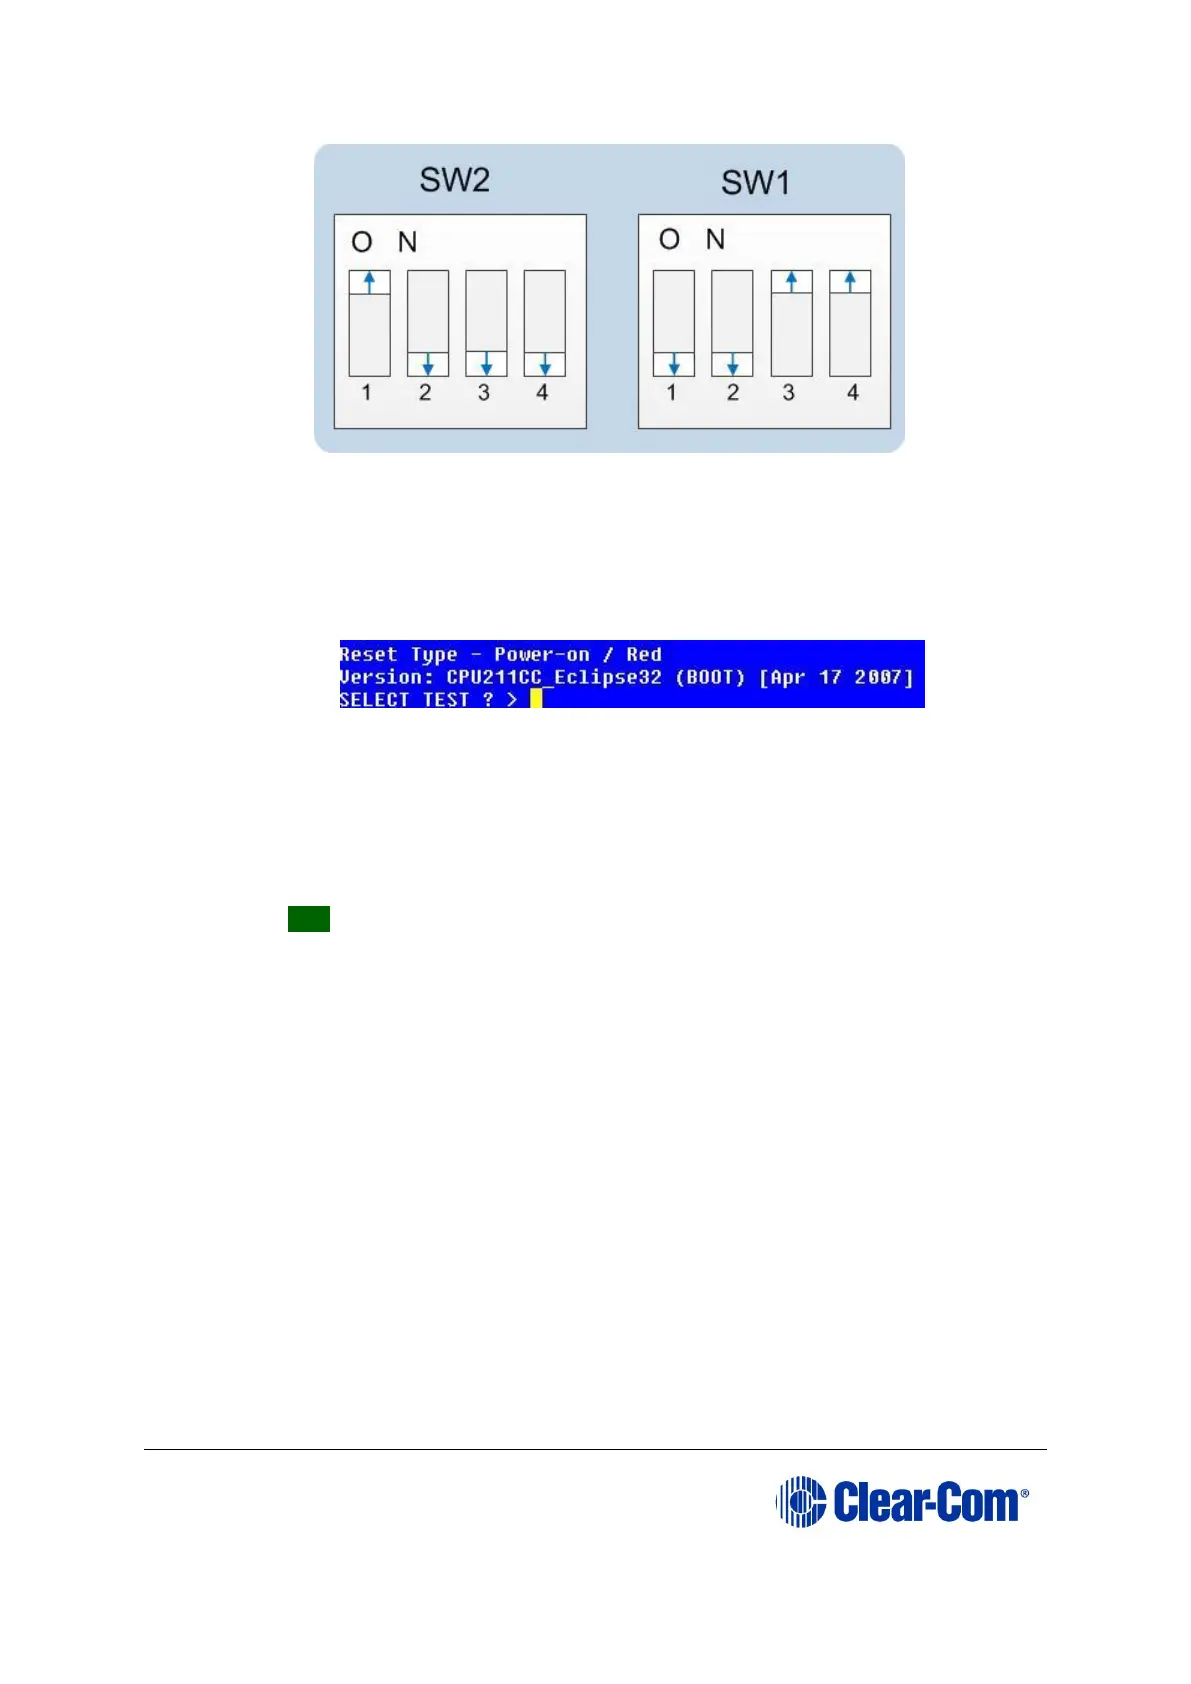
Figure 6-8: Eclipse HX-PiCo dip switches in Test mode
d. To bring the DIP switch changes into effect, power cycle or reset the
matrix.
e. To confirm that the matrix has entered Test mode, check the display
screen. Information similar to the following should be displayed:
Figure 6-9: Tera Term CPU test mode
Note: If you do not see the data above, press the enter button on the
PC.
Tip: To see all the available options in test mode, press ? on your
keyboard. To see all the current applications loaded onto the CPU, press i.
f. On your PC keyboard, press number 1. To start the erasure of Flash
memory, press Enter (or Return). Select y and Enter to confirm.
Note: It takes approximately 1 minute to erase Flash.
g. When the Flash has been erased, press number 2 on your keyboard. To
start the erasure of NVRAM, press Enter (or Return). When the NVRAM
erase is complete, remove the CPU card.
9) Download the new application code to the CPU, using Tera Term:
a. Place the erased CPU in serial download mode. Set the DIP switches on
the CPU as follows: