Circular milling
P/N 63674, Rev. 9 Page 79
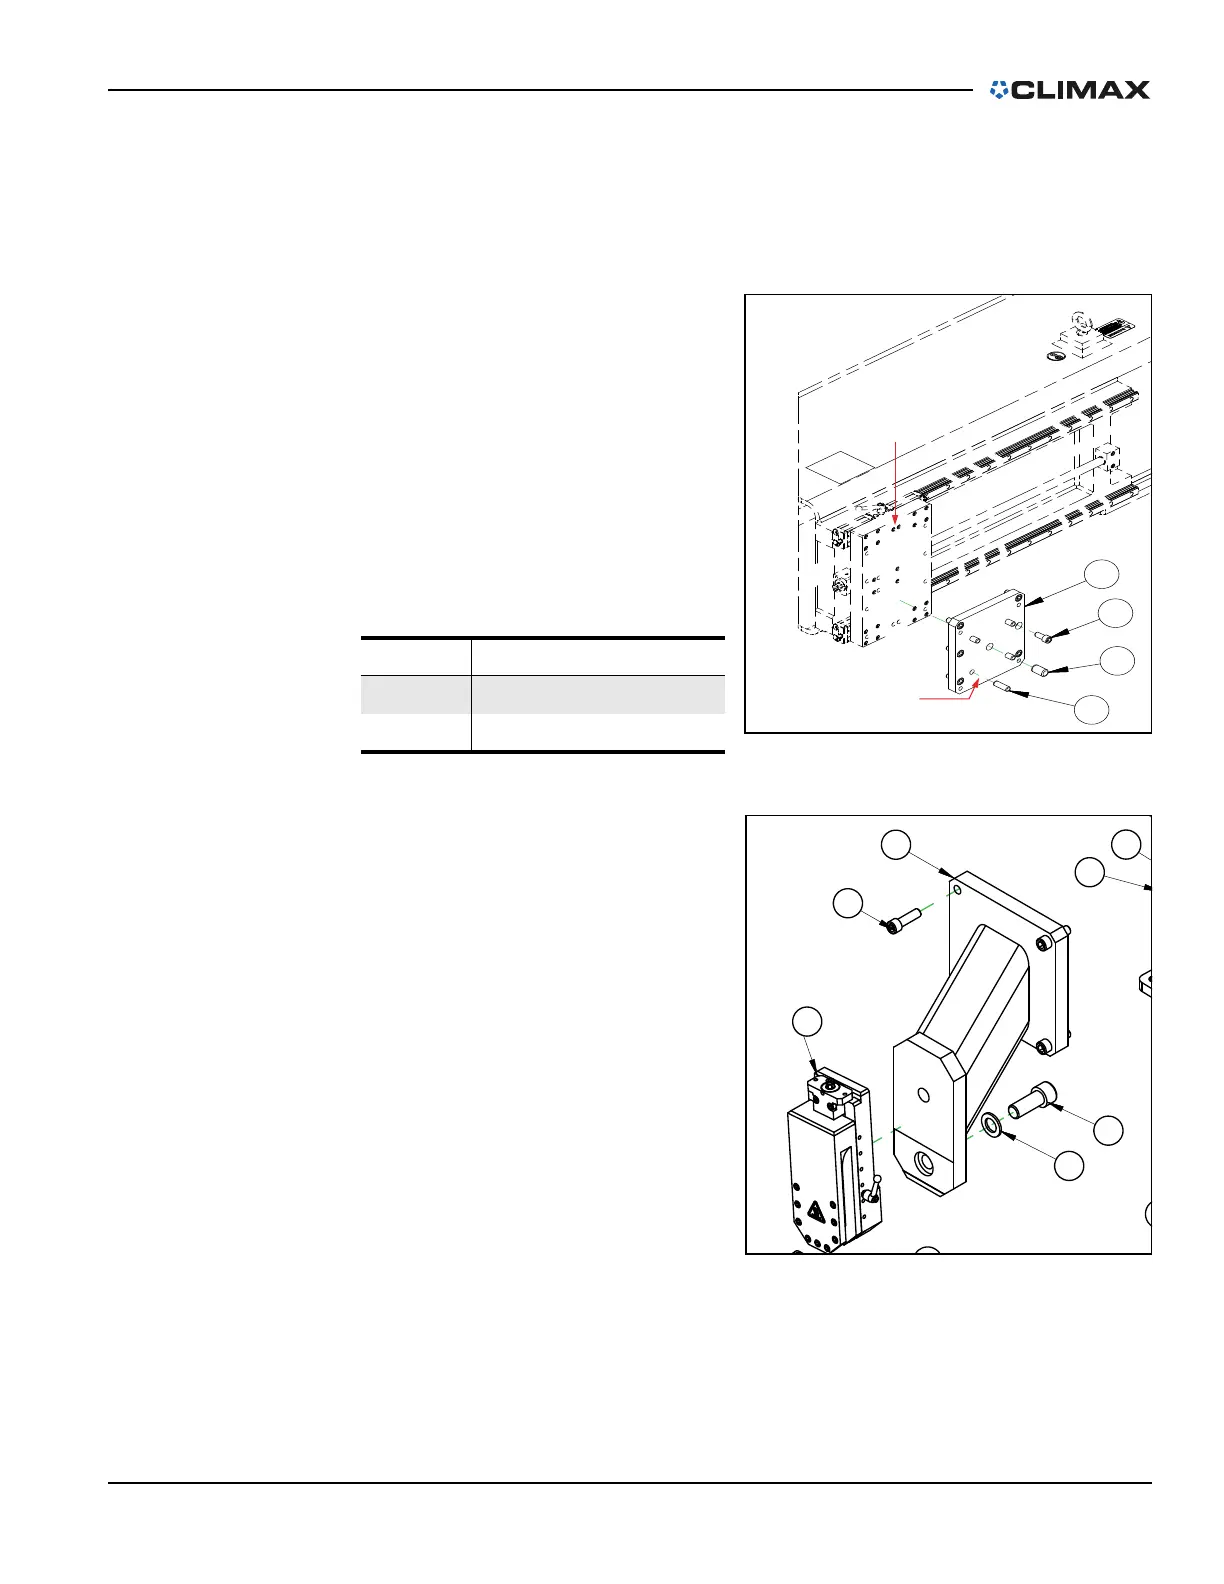
4.3.4 Replacing the milling assembly
Do the following to replace the milling assembly with the single-point tool head
assembly:
1. Completely de-energize and lock out the power source.
2. Remove the milling head
assembly, including the miller
head adapter plate, from the
cross-slide plate (see Figure 4-
38, which is also seen in Fig-
ure A-11 on page 130).
3. Attach the single-point tool
head assembly (P/N 62984) to
the cross-slide plate.
4. Attach the tool head assembly
to the adapter (see Figure 4-
39, which is seen in Figure A-
27 on page 146).
TABLE 4-5. CROSS-SLIDE PLATE IDENTIFI-
CATION
Number Component
1 Saddle plate
2 Milling head adapter plate
FIGURE 4-29. CROSS-SLIDE PLATE
FIGURE 4-30. TOOL HEAD ASSEMBLY ADAPTER