Mounting the machining arm
P/N 63674, Rev. 9 Page 35
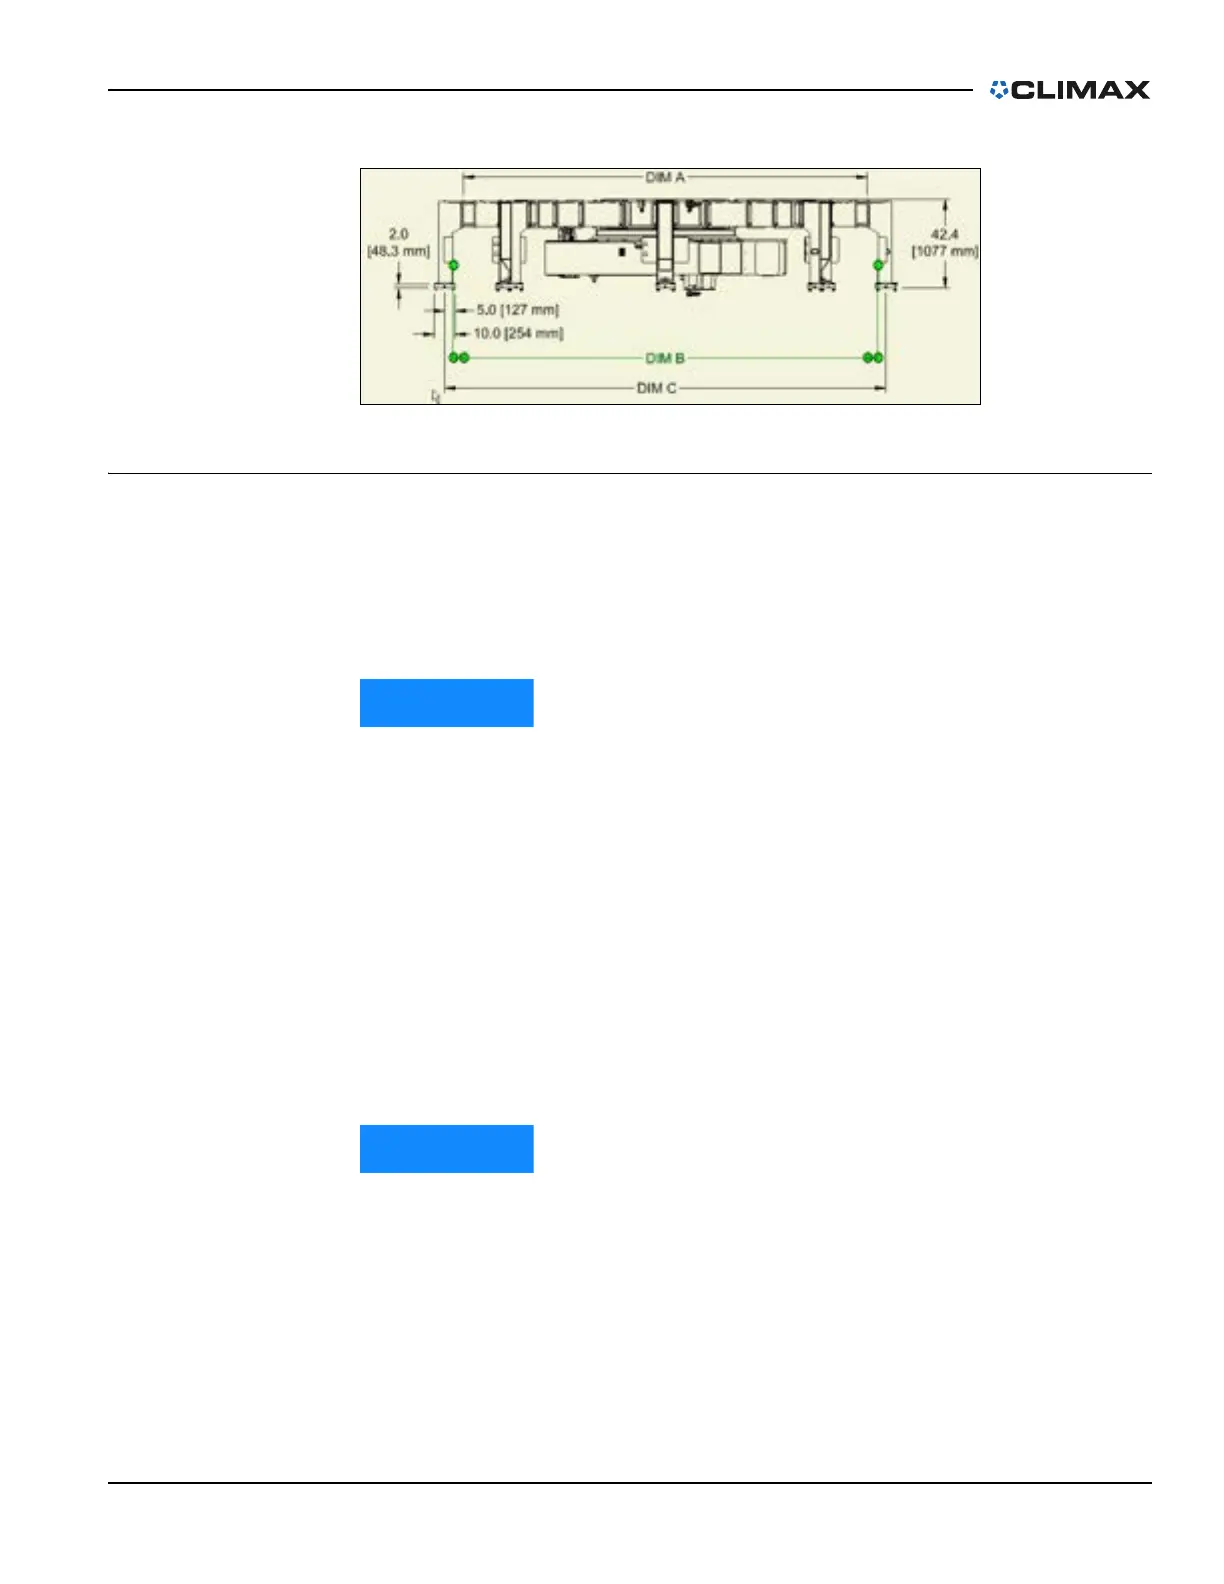
FIGURE 3-18. OD CHUCKING LEG DIMENSIONS
3.6 MOUNTING THE MACHINING ARM
3.6.1 Mounting the machining arm to the rotary table
After the chuck legs are correctly configured and assembled on the chuck hub, the
machining arm should be mounted on the machine.
If the machine will be mounted in the vertical position, then this step
must be completed before mounting the machine.
The machining arm may be mounted in a horizontal orientation after the chuck is
mounted to the workpiece, but the machining arm should be mounted first.
The CM6200 machining arm is attached to the rotary table with clamps. Two of
the clamps (closest to the center hole of the table) attach directly to the CM6200
rotary table top and do not need to be removed.
Do the following to mount the machining arm to the rotary table:
1. Keep the machining arm level and flat when lifting by using two of the lift-
ing eyes mounted on top of the machining arm.
2. Position the machining arm against the two fixed clamps.
The machining arm mounting surface, opposite the milling head, is
notched to allow access by the safety clamp. Make sure the notches fit
against the safety pin in the clamp.
3. Install the two remaining clamps and install the 5/8-SHCS screws to secure
the clamps.