Mounting machine to workpiece
P/N 63674, Rev. 9 Page 41
5. Center and level the machine on the flange as described in Section 3.9 on
page 47.
3.8.2 OD mounting the machine horizontally
Do the following to OD mount the machine to a horizontal flange:
1. Position the machining arm (see Section 3.6 on page 35) and the counter-
weight arm (see Section 3.7 on page 39) before lifting (see Section 3.3 on
page 22).
2. Lift the machine over the flange using the four indicated lift points (as
shown in Figure 3-2 on page 23).
3. Center and level the machine on the flange as described in Section 3.9 on
page 47.
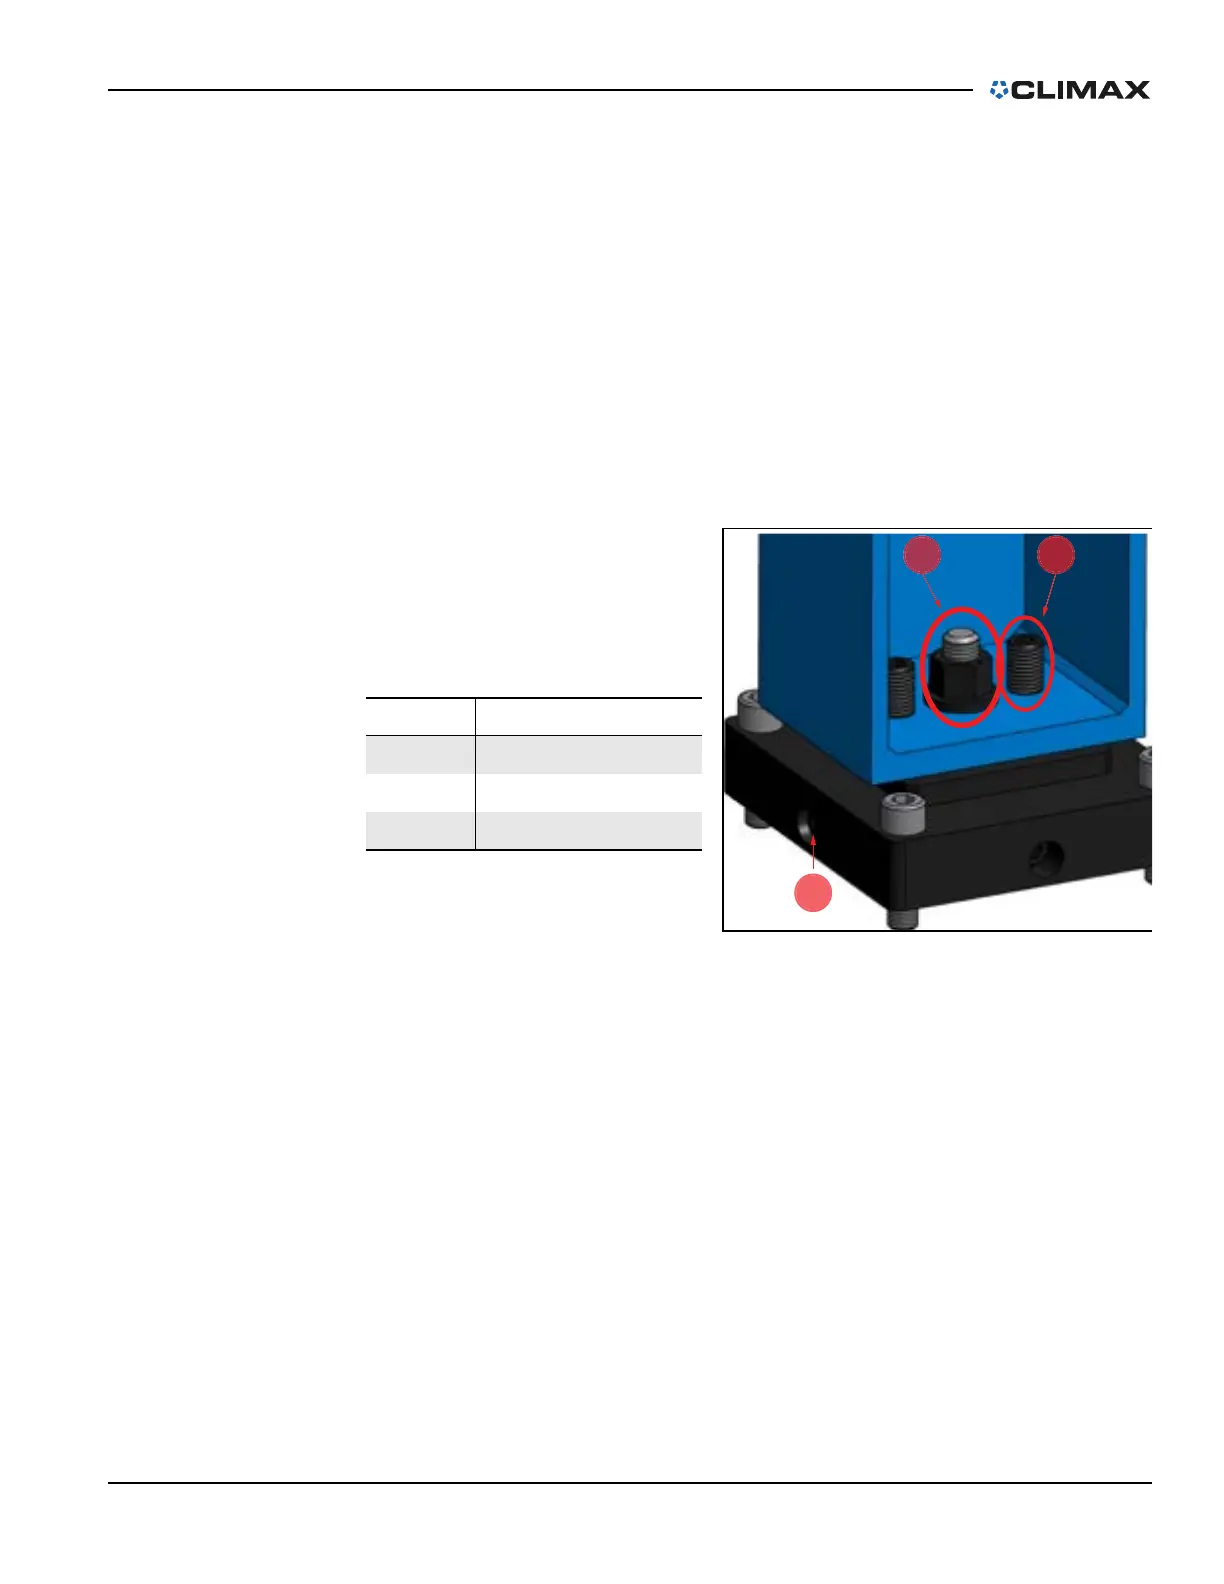
4. Tighten the nut (shown in
the middle of Figure 3-26)
to 230 ft-lbs (310 Nm).
3.8.3 ID mounting the machine vertically
When mounting the CM6200 in the vertical position, make sure that the lifting
assembly (P/N 68425 in Figure 3-9 on page 28) is properly installed on the
machine. This lifting device will help keep the machine stable and perpendicular,
making it safer and easier to mount the machine vertically.
Do the following to ID mount the machine to a vertical flange:
1. Set the ID mounting chuck feet to a dimension that is 0.01" (0.254 mm)
less per leg than what is required.
2. Position the machining arm (see Section 3.6 on page 35) and the counter-
weight arm (see Section 3.7 on page 39) before lifting (see Section 3.3 on
page 22).
TABLE 3-9. OD MOUNT CENTERING
PLATE IDENTIFICATION
Number Component
1 Tightening
2 Leveling
3 Centering
FIGURE 3-26. OD MOUNT CENTERING PLATE ADJUSTMENTS