iJET Panel Quick Reference Guide 11-19
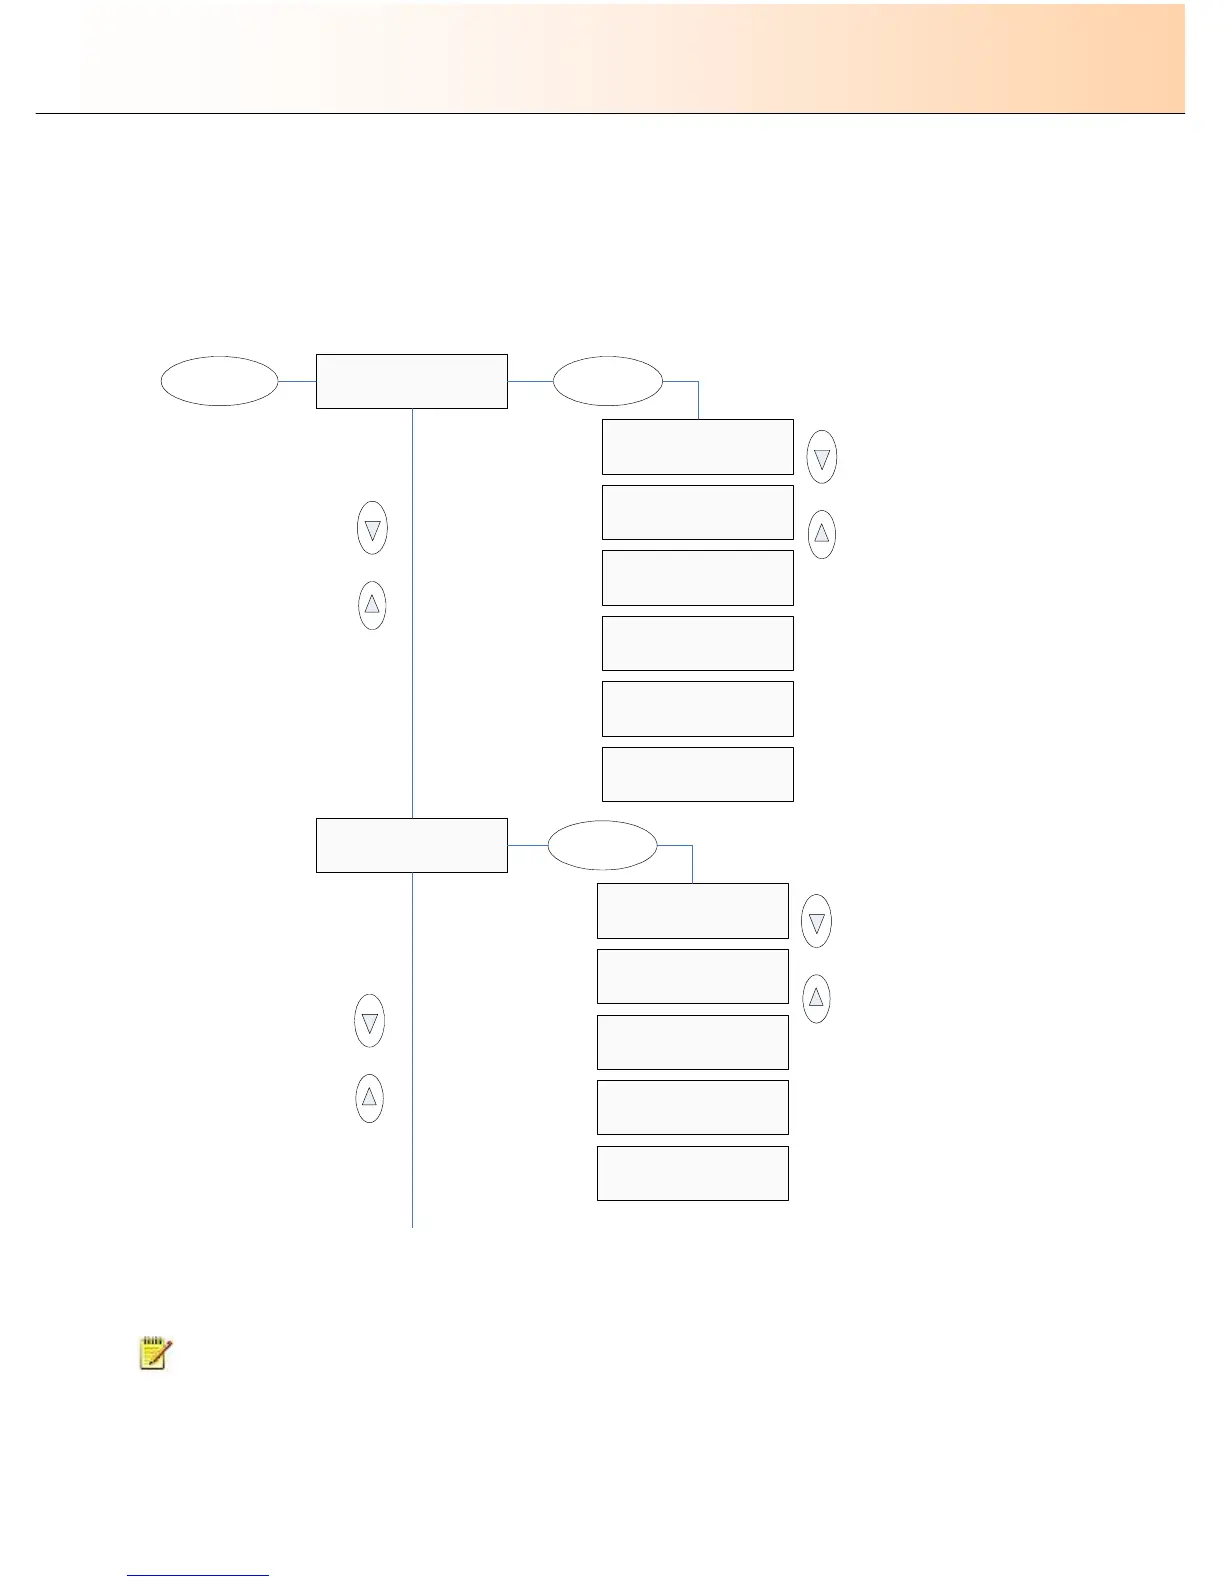
The first 2 Menu button options as they actually look in the iJET panel display window and the
buttons you need to press to reach them.
Note that there are two menu rows in the display window: 1 Options row 2. Value row. Note that the “>” marker is
moved down to the second display row (value row for the option) when you press Enter to indicate that this row is
active and values can be changed.
Menu
Org. Type-Color
>Photo
> Org. Type-Color
Photo
Org. Type-Color
>Photo (Ink)
Org. Type-Color
>Brochure
Org. Type-Color
>Brochure (Ink)
Enter
Org. Type-B&W
>Photo
> Org. Type-B&W
Photo
Org. Type-B&W
>Blueprint
Org. Type-B&W
>Sepia
Org. Type-B&W
>Line
Enter
Org. Type-Color
>CAD/Map
Org. Type-Color
>CAD/Map (Ink)
Org. Type-B&W
>CAD
The Complete iJET Panel Menu Diagram (starts on the next page):
NOTE: For optimal viewing of the options, it is recommended to print the Complete iJET Panel Menu Diagram on
a large format printer. Use “A2” or a similar standard size as the selected output size.