SiEN18-622 Troubleshooting for Outdoor Unit
Troubleshooting 363
Troubleshooting
Check No.02
Refer to P.405
NO
YES
NO
YES
NO
YES
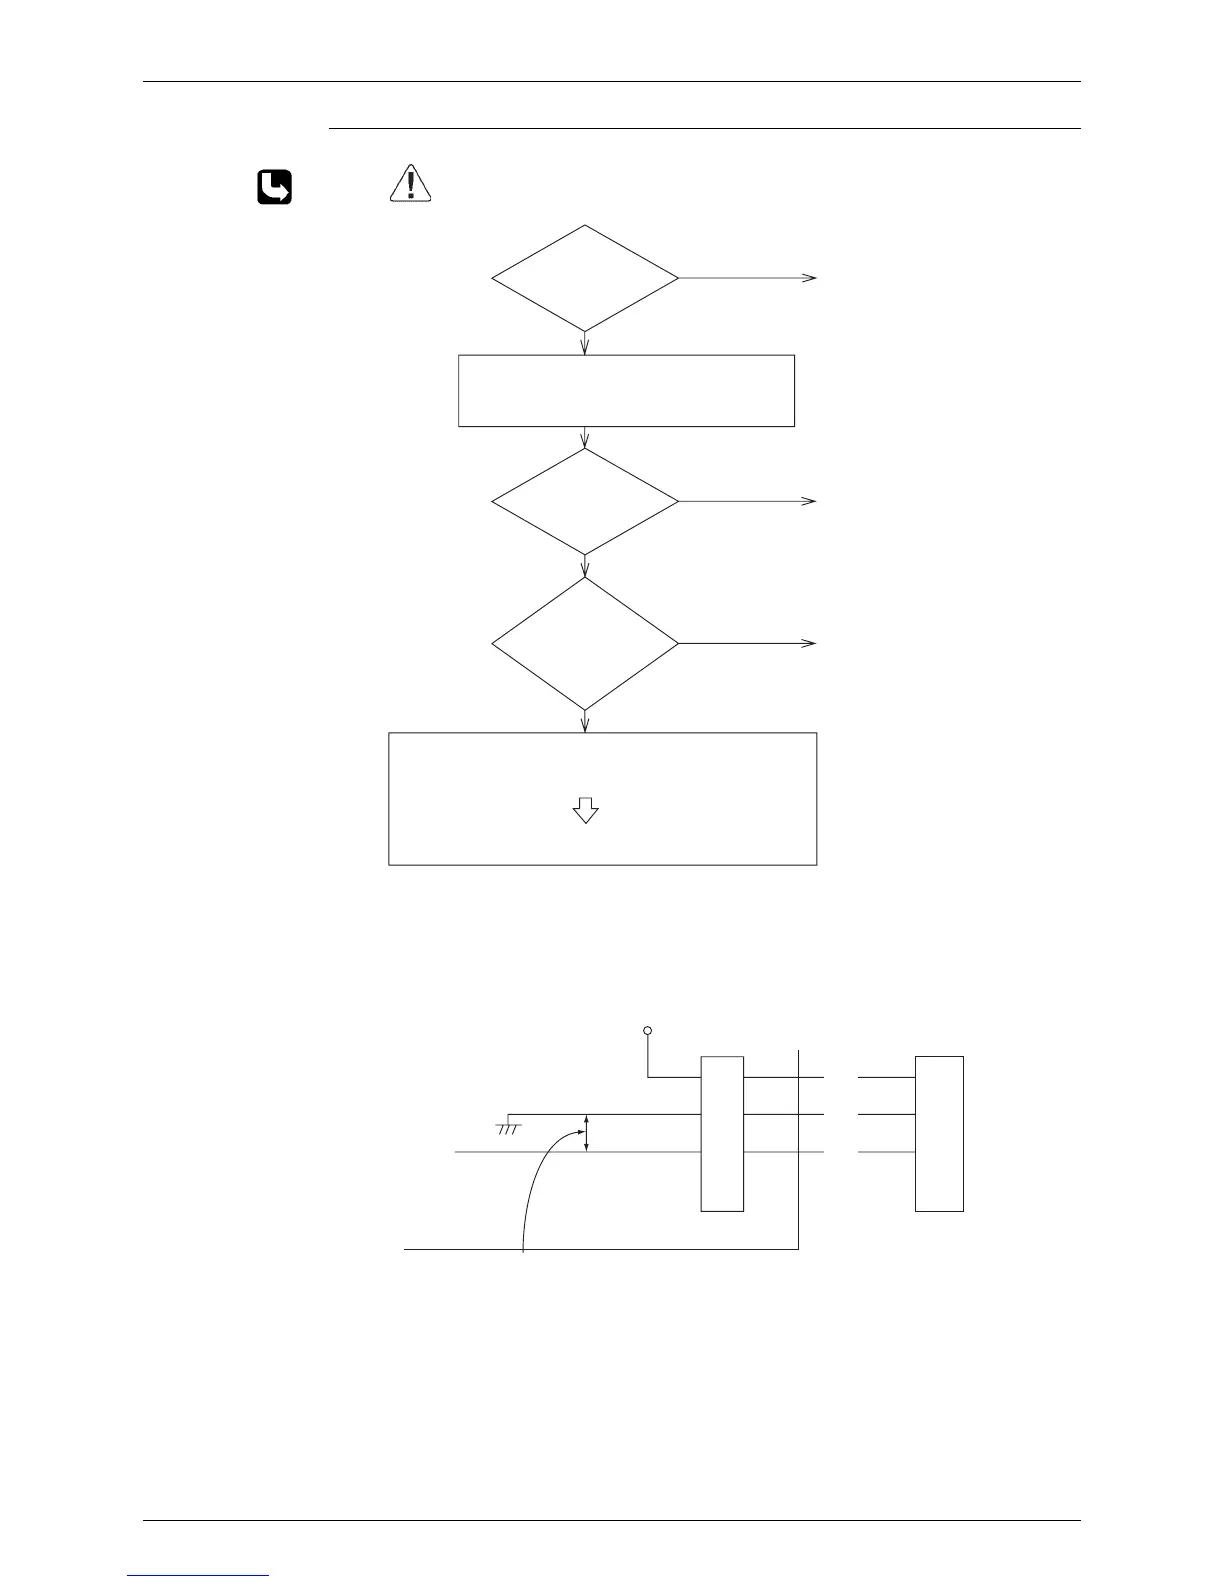
Open the stop valve.
Replace the low pressure sensor.
Replace the main PCB.
Caution
Be sure to turn off power switch before connect or disconnect connector,
or parts damage may be occurred.
Is the stop
valve open?
1 Mount a pressure gauge on the low-pressure service port.
2 Connect the Service Checker.
3 Reset the operation using the remote control, and then
restart the operation.
Are the
characteristics of
the low pressure
sensor normal?
(See *1.)
Is the
pressure detected
with the PCB
normal?
(See *2.)
· The low pressure sensor is normal, and the pressure
detected with the PCB isalso normal.
· The low pressure has really become low.
Check No.2
Referring to information on page 404, remove the
causesby which the low pressure has become low.
*1: Make a comparison between the voltage of the pressure sensor and that read by
the pressure gauge.
(As to the voltage of the pressure sensor, make measurement of voltage at the
connector, and then convert it to pressure according to information on page 409.)
*2: Make a comparison between the low pressure value checked with the Service
Checker and the voltage of the pressure sensor (see *1).
*3: Ma
ke measurement of voltage of the pressure sensor.
+5V
(4)
(3)
(2)
(1)
(Blue)
Red
White
Connector for low pressure sensor
Micro controller
A/D input
Make measurement of DC voltage between these wires.
Black
Low
pressure
sensor