ENGLISH
HDMlln
Assign
Digital
In
Assign
iPodAssign
Component
In
Assign
Video
Convert
Audio
Delay
EXT.
IN
Subwoofer
Level
Auto
Preset
Memory
Parental Lock
Edit
Lock Code
0-10
II-D
II
m-m
1m-1m
1m
II
1m
1m
Pm
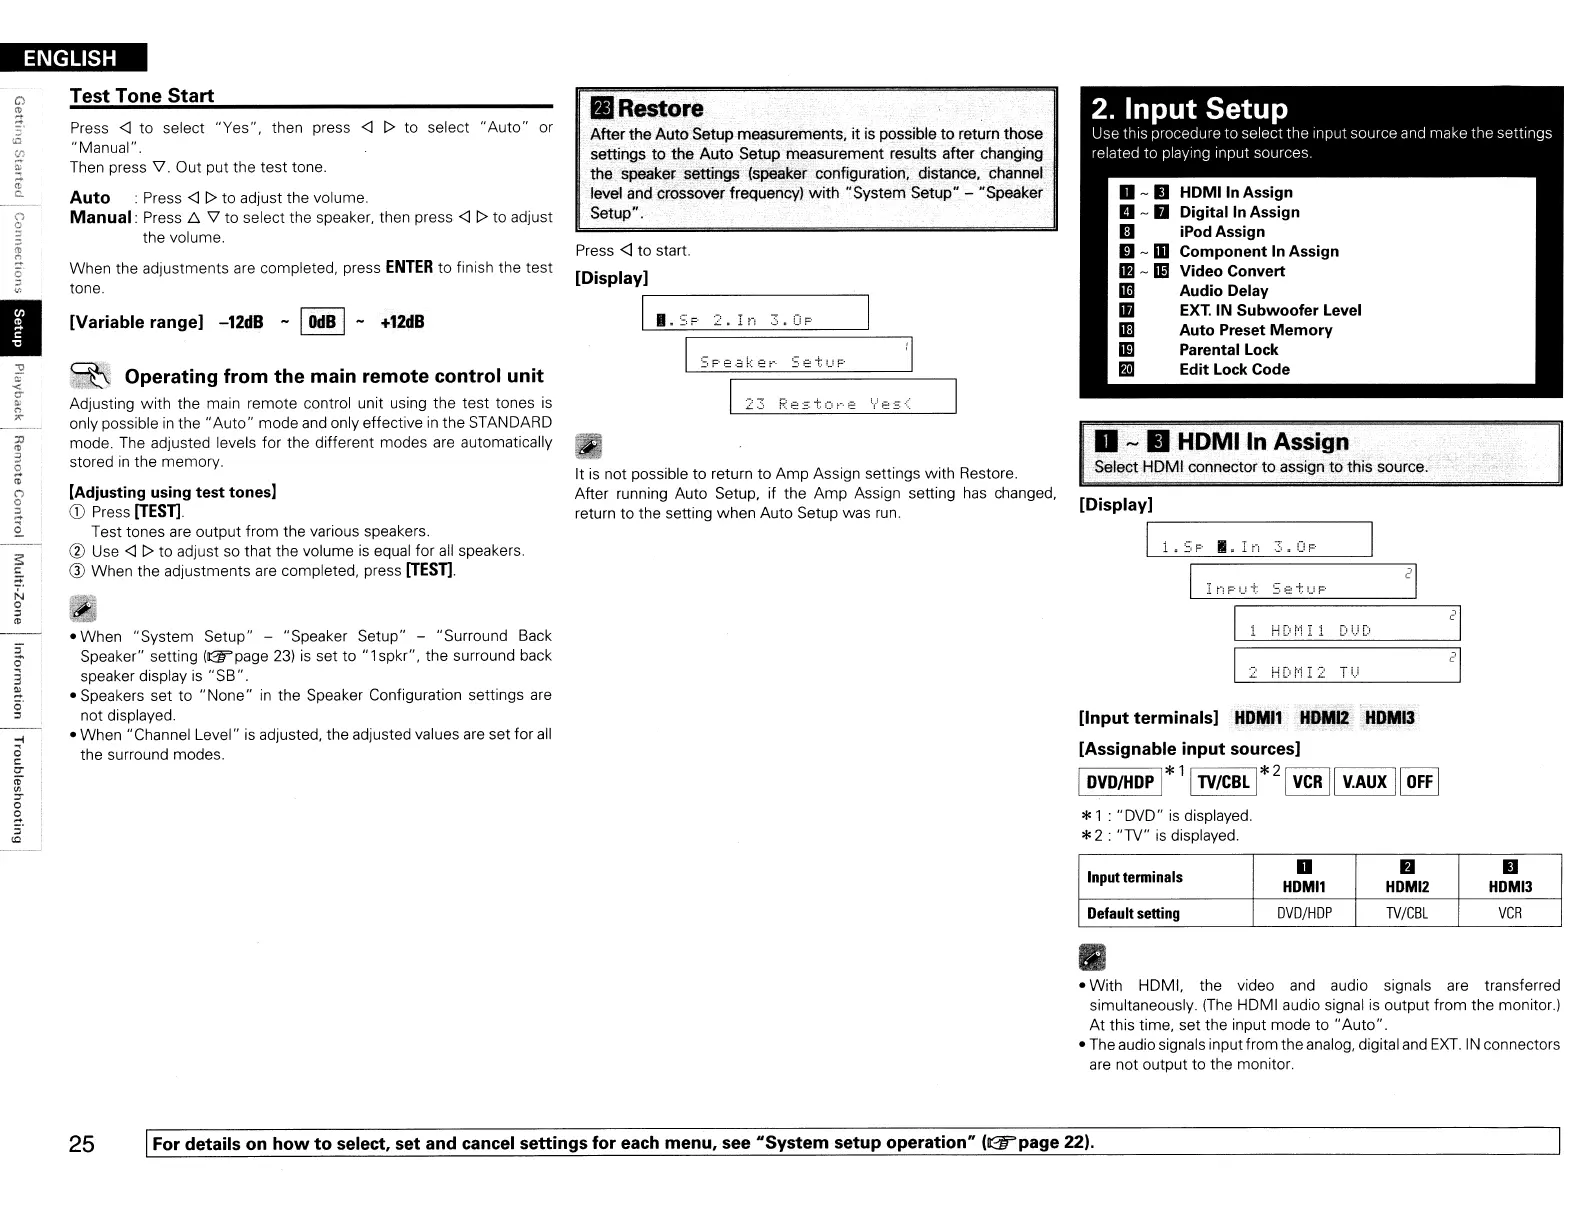
*1 : "OVO"
is
displayed.
*2 :
"TV"
is
displayed.
2
HC'f'i
I 2
H.I
HDI'1
I 1
DUC'
I
nF'ui:
SetuF
• -
II
HOMI
In
Assign
Select HOMI connector to assign
to
this source.
2. Input Setup
Use this procedure to select the Input source and make the settings
related to playing input sources.
[Display]
1
--.-.
I-r'"
--
1.SF'
:;.C!F
[Input
terminals]
HOMI1
HDMI2
HOMI3
[Assignable
input
sources]
I
OVD/HDP
1*
11
TV/cBll*
21
VCR
II
V.AUX
II
OFF
I
PI
Restore
After
the
Auto
Setup measurements,
it
is
possible
to
return those
settings
to
the
Auto
Setup measurement results after changing
the speaker settings (speaker configuration, distance, channel
level and crossover frequency)
with
"System Setup" - "Speaker
Setup".
Press <l to start.
[Display]
1r-.-.-
S
-
P
-
2
-.-
I
-r'-,
-:-,
.-c-,
F-'
--
It
is
not possible to return
to
Amp Assign settings with Restore.
After running Auto Setup, if the
Amp
Assign setting has changed,
return to the setting
when
Auto Setup was
run.
[Variable
range]
-12dB
- I
OdB
I-
+12dB
-When
"System Setup" - "Speaker Setup" - "Surround Back
Speaker" setting
(~page
23)
is
set to
"lspkr",
the surround back
speaker display
is
"SB".
- Speakers set to
"None"
in the Speaker Configuration settings are
not displayed.
- When "Channel Level" is adjusted, the adjusted values are set for
all
the surround modes.
When the adjustments are completed, press
ENTER
to
finish the
test
tone.
Test Tone
Start
Press
<l
to select
"Yes",
then press
<l
I>
to select
"Auto"
or
"Manual".
Then press 'V. Out put the
test
tone.
Auto
: Press
<l
I>
to adjust the volume.
Manual:
Press
f:"
'V to select the speaker, then press <ll> to adjust
the volume.
% Operating
from
the
main
remote
control
unit
Adjusting with the main remote control unit using the
test
tones
is
only possible
in
the
"Auto"
mode
and
only effective
in
the STANOARO
mode. The adjusted levels for the different modes are automatically
stored
in
the memory.
[Adjusting
using
test
tones]
CD
Press [TESn.
Test tones are output from the various speakers.
(1)
Use <ll> to adjust
so
that the volume
is
equal for
all
speakers.
® When the adjustments are completed, press [TESn.
I
Input tenninals
0
If)
10
HDMI1
HDMI2
HDMI3
Default setting
DVD/HDP
TV/CBL
VCR
•
•
With
HOM!. the video and audio signals are transferred
simultaneously.
(The
HOMI audio signal
is
output from the monitor.)
At this time, set the input mode to
"Auto".
• The audio signals input from the analog, digital
and
EXT.
INconnectors
are not output to the monitor.
25 I
For
details
on
how
to
select,
set
and
cancel
settings
for
each
menu,
see
"System
setup
operation"
l(jT'page
22).
 Loading...