ENGLISH
Remote
Control
Unit
Operations
•
The
signals for the pressed buttons
are
emitted while setting the
preset memory.
To
avoid
accidental operation, cover the remote
control unit's transmitting window while setting the preset memory.
• Depending
on
the model
and
year of manufacture, this function
cannot
be
used for some models, even if they
are
of makes listed
in
the list of preset codes.
• Some manufacturers
use
more than one type of remote control code.
Refer to the included list of preset codes to change the number
and
verify correct operation.
•
The
preset memory
can
be
set for one component only among the
following: DVDNDP
and
SAT/CABLE.
or"AUDIO"
~
Operating Preset Components
1
Set
[SOURCE
CONTROL
1]
to
"VIDEO".
3Operate the audio component.
*
For
details, refer to the component's operating instructions.
*While this remote control unit
is
compatible with a wide range
of infrared controlled components, it
may
be
the case that some
component models cannot
be
operated with this remote control
unit.
2
Set
[SOURCE
CONTROL
2]
to the position for the
component to be operated (CD, iPodINETWORK or
TUNER).
II
Operating DENON Audio Components
1Set
[SOURCE
CONTROL
1]
to "AUDIO".
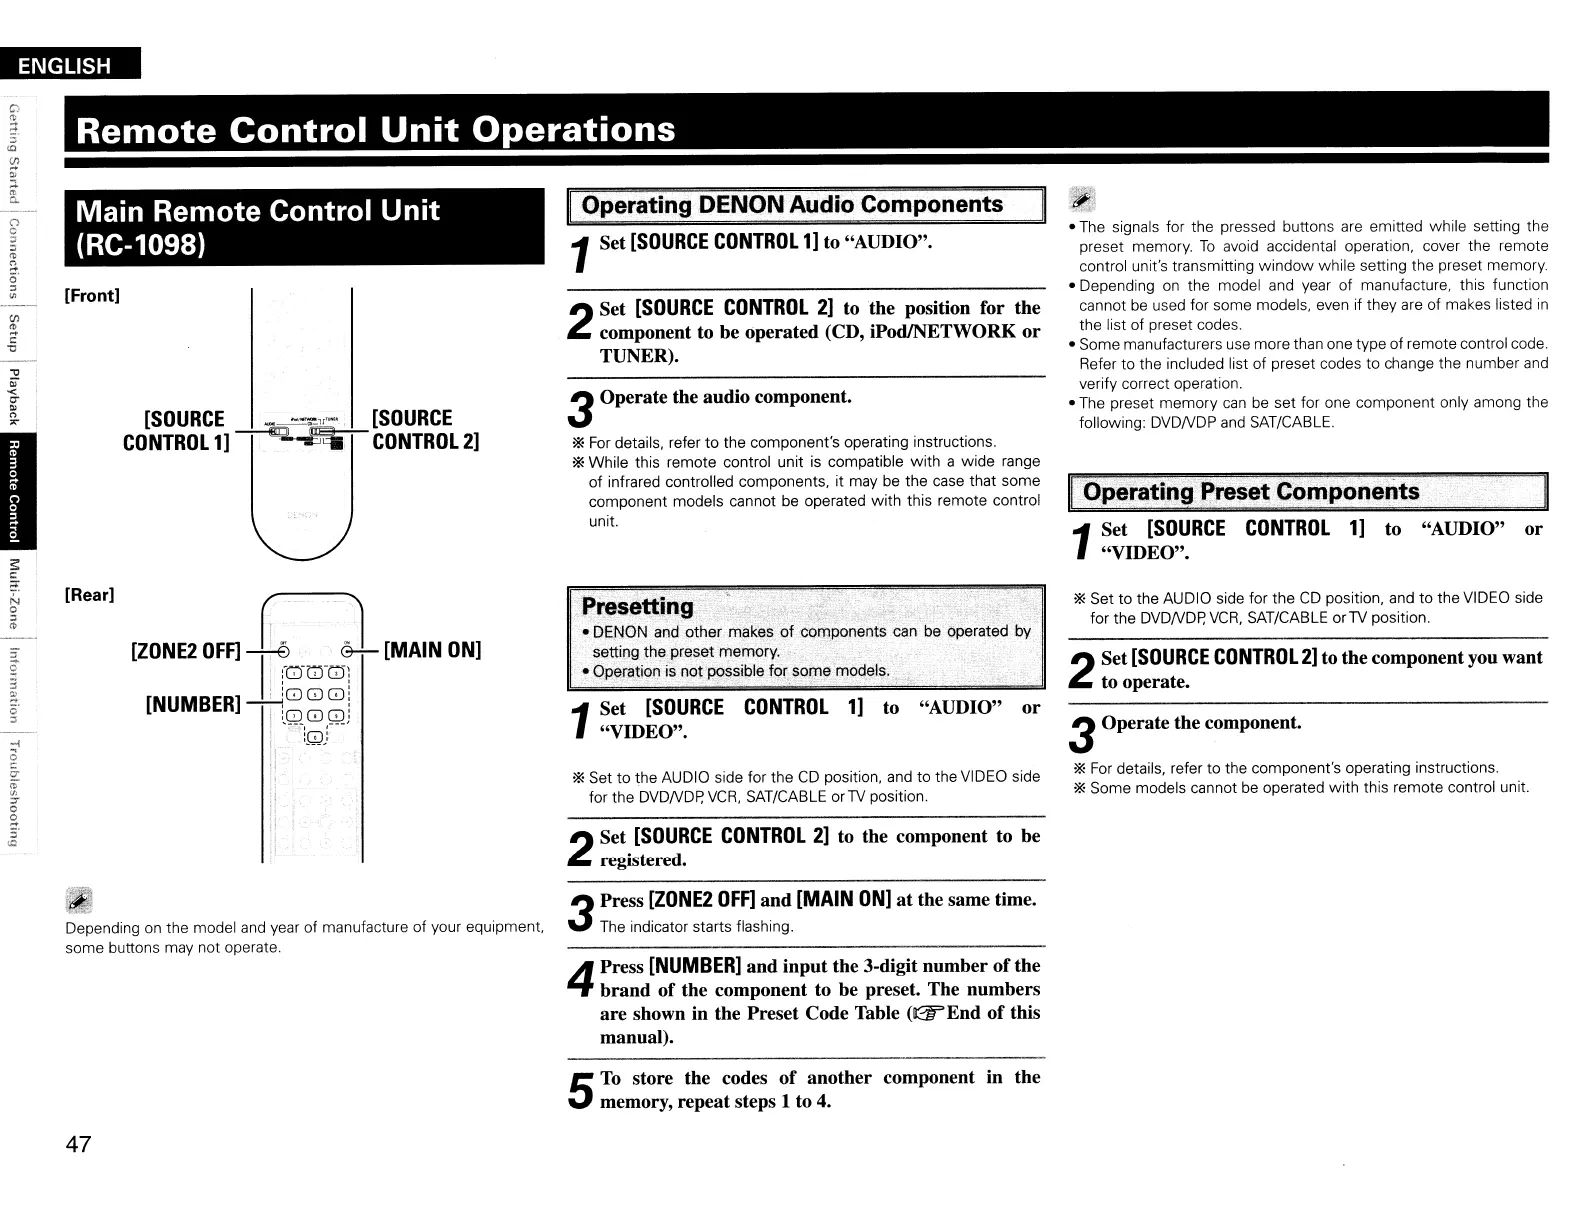
[SOURCE
_
--,,-
[SOURCE
CONTROL
1]
~
CONTROL
2]
Main Remote Control
Unit
(RC-1098)
[Front]
I
*Set to the AUDIO side for the
CD
position,
and
to the
VIDEO
side
for the DVDNDp,
VCR,
SAT/CABLE
or
TV
position.
2
Set
[SOURCE
CONTROL
2]
to the component to be
registered.
*Set to the AUDIO side for the
CD
position, and to the
VIDEO
side
for the DVDNDp,
VCR,
SAT/CABLE
orTV position.
2
Set
[SOURCE
CONTROL
2]
to the component you want
to operate.
3Operate the component.
*
For
details, refer to the component's operating instructions.
*Some models cannot
be
operated with this remote control unit.
"AUDIO" orto
CONTROL
1]
Presetting
• DENON
and
other makes
of
components
can
be
operated by
setting the preset memory.
• Operation is not possible for some models.
1
Set
[SOURCE
"VIDEO".
[ZONE2
OFF]
I~
pmm
J
[MAIN
ONI
[NUMBER]
-'"+-{)
0
GJ
i
I
'QO~;
I .
':0:
!
l.!_}
i
I;
[Rear]
Depending
on
the model
and
year of manufacture of your equipment.
some buttons
may
not operate.
3
Press
[ZONE2
OFF]
and
[MAIN
ON]
at the same time.
The
indicator starts flashing.
4
Press
[NUMBER]
and input the 3-digit number
of
the
brand
of
the component to be preset. The numbers
are shown in the Preset Code Table
(B2ff"
End
of
this
manual).
5
To
store the codes
of
another component in the
memory, repeat steps 1 to 4.
47
 Loading...