80
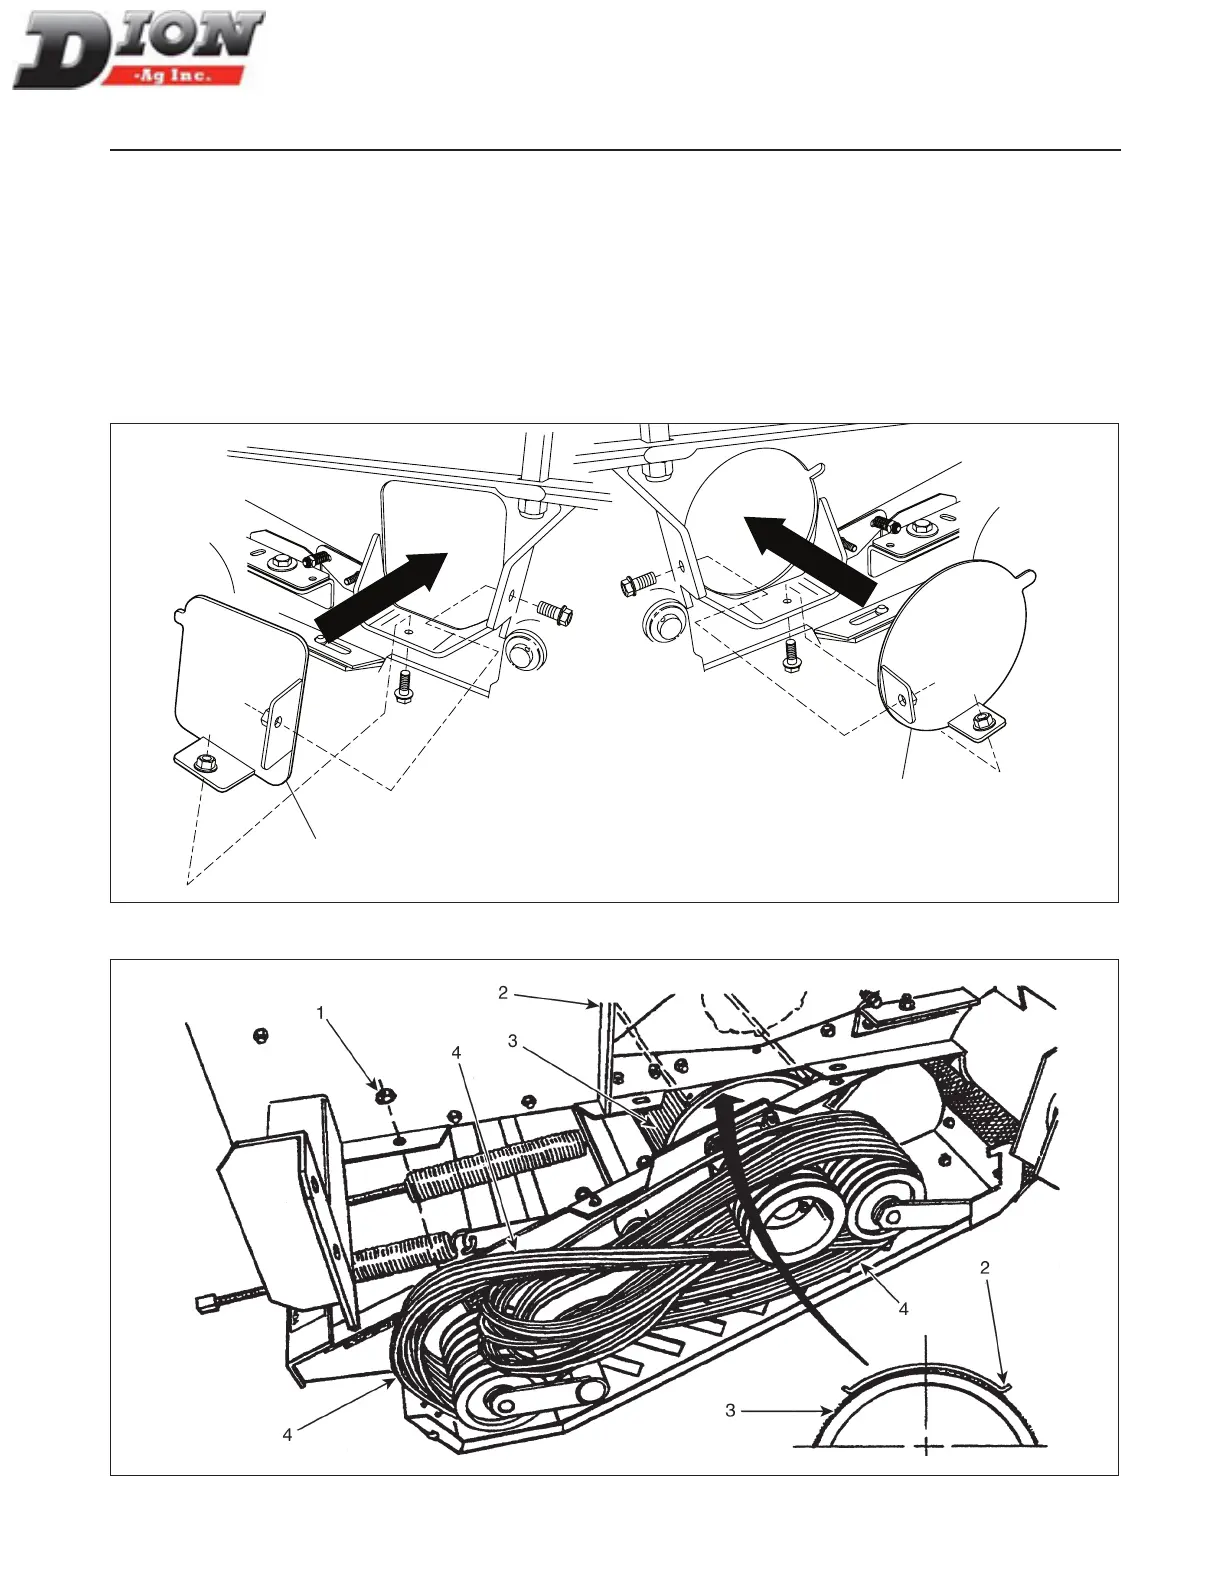
STEP 7 - FIGURE 103
Reinstall the left-hand cover-plate (item 1) as well as the
one on the right-hand side (item 2). Use the 1/2” X 1”
lg ange bolts. The nuts are already welded to the cov-
er-plates.
STEP 8 - FIGURE 104
Remove the right and left-hand rear bolts (item 1) then
lower the Corn Cracker unit to the ground. Install the
stainless steel bottom plate (item 2) on top of the low-
er cracker roll (item 3) as shown. Proceed with the belt
arrangement (item 4) as shown. Grease the outside roll
before installing the stainless steel bottom plate to pre-
vent the grooves from rusting.
NOTE: Do not change the adjustments.
PARTIAL DISMANTLING OF THE CORN CRACKER FOR HAY CROP
1
2
Figure 103
Figure 104
Manual No. F4117E987E V1.1