147ECLYPSE APEX
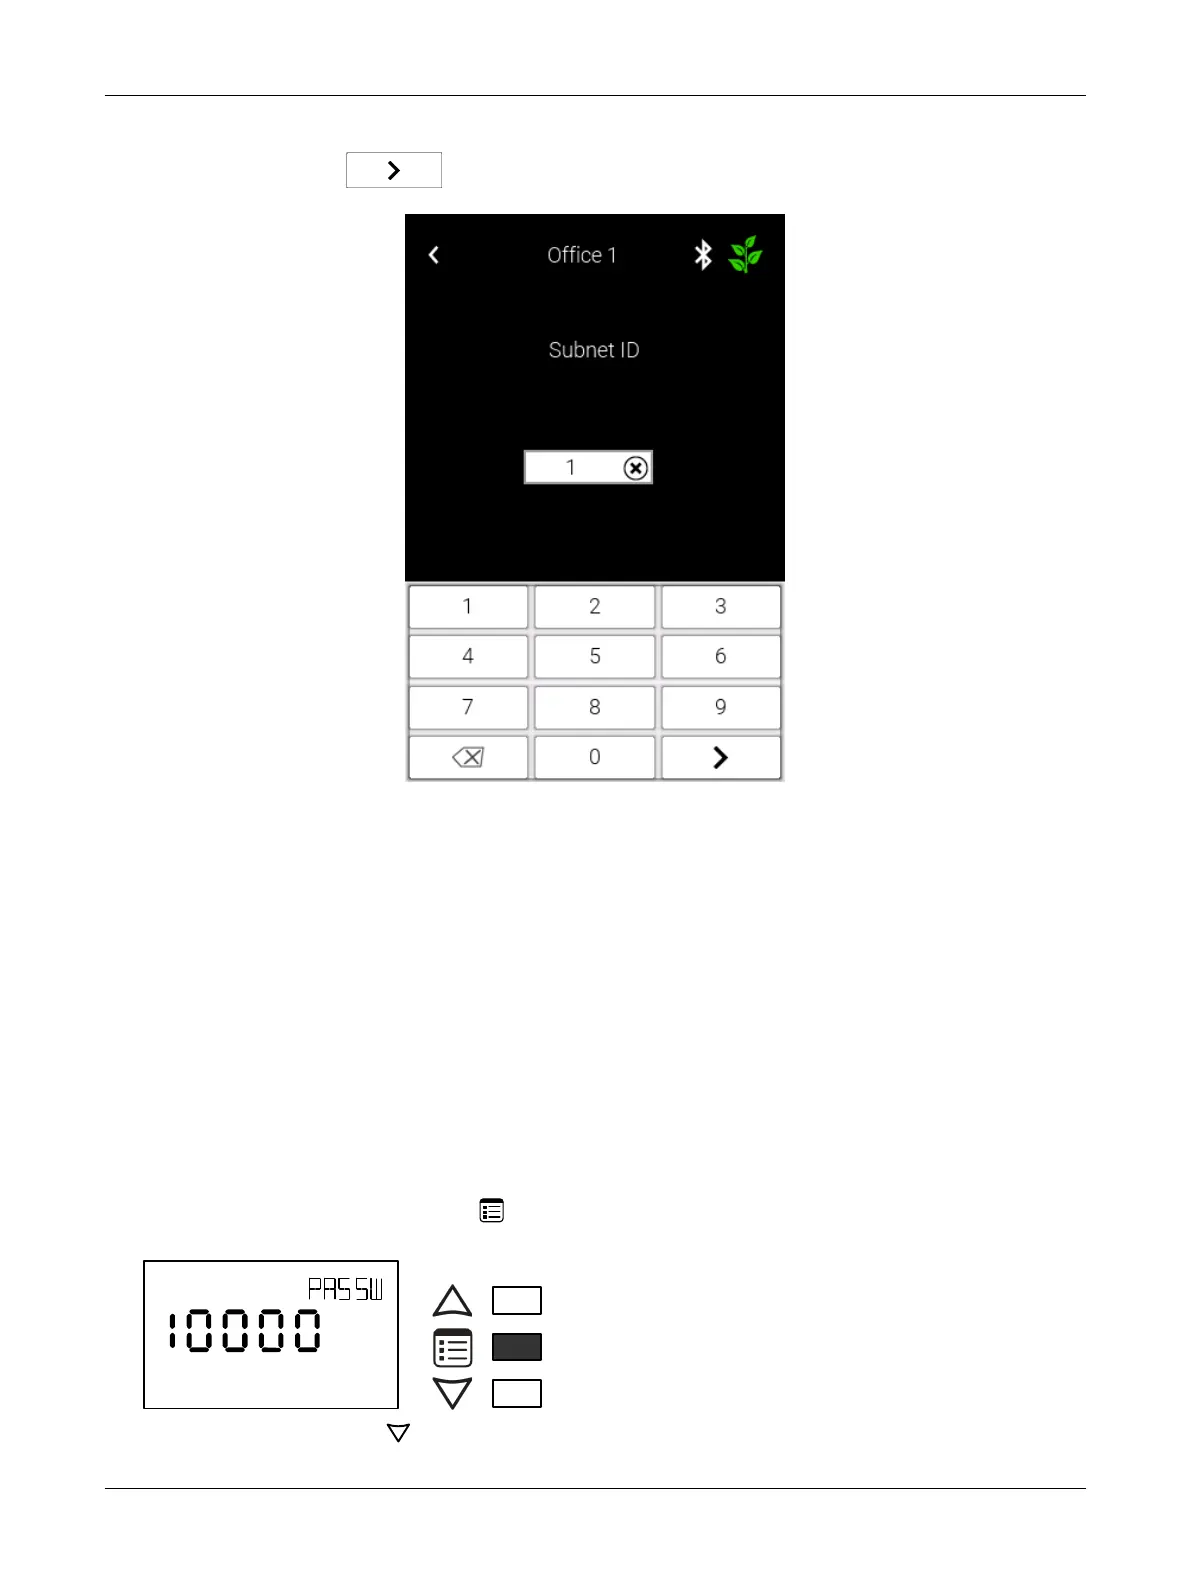
5. Tap the input box in the middle of the screen to access the number pad. Now choose the correct
Subnet ID. Tap the button to enter your new Subnet ID.
Setting the Allure EC-Smart-Vue Sensor’s Subnet ID
Address
An Allure EC-Smart-Vue sensor’s Subnet ID corresponds to the ComSensor block instance pro-
grammed in the controller with EC-
gfx
Program. The Allure EC-Smart-Vue sensor’s Subnet ID can be
set in the procedure below.
ECLYPSE Connected VAV Controllers can be commissioned with an Allure EC-Smart-Vue sensor.
The default Subnet ID for an Allure EC-Smart-Vue sensor is 1. To commission an ECLYPSE Con-
nected VAV Controller, the Allure EC-Smart-Vue sensor’s Subnet ID must be set to 1. If the Allure EC-
Smart-Vue sensor’s Subnet ID has been set to another value (for example, the display flashes error
code 1 with the Bell icon when the Allure EC-Smart-Vue sensor is connected to a controller for com-
missioning), change the Subnet ID to 1 as follows:
1) Connect an Allure EC-Smart-Vue sensor to the controller with a Cat 5e patch cable. Wait for the
Bell icon and the number 1 to flash on the display.
2) Press and hold the Menu button for 5 seconds to enter the password menu. 10000 is shown
on the display.
OR
Screen Timeout: 15 seconds
1) Press the down button to set the number to 9995 (this is the default password).
Subnetwork Installation Guidelines