150 ECLYPSE APEX
Setting the EC-Multi-Sensor Series’ Subnet ID Address
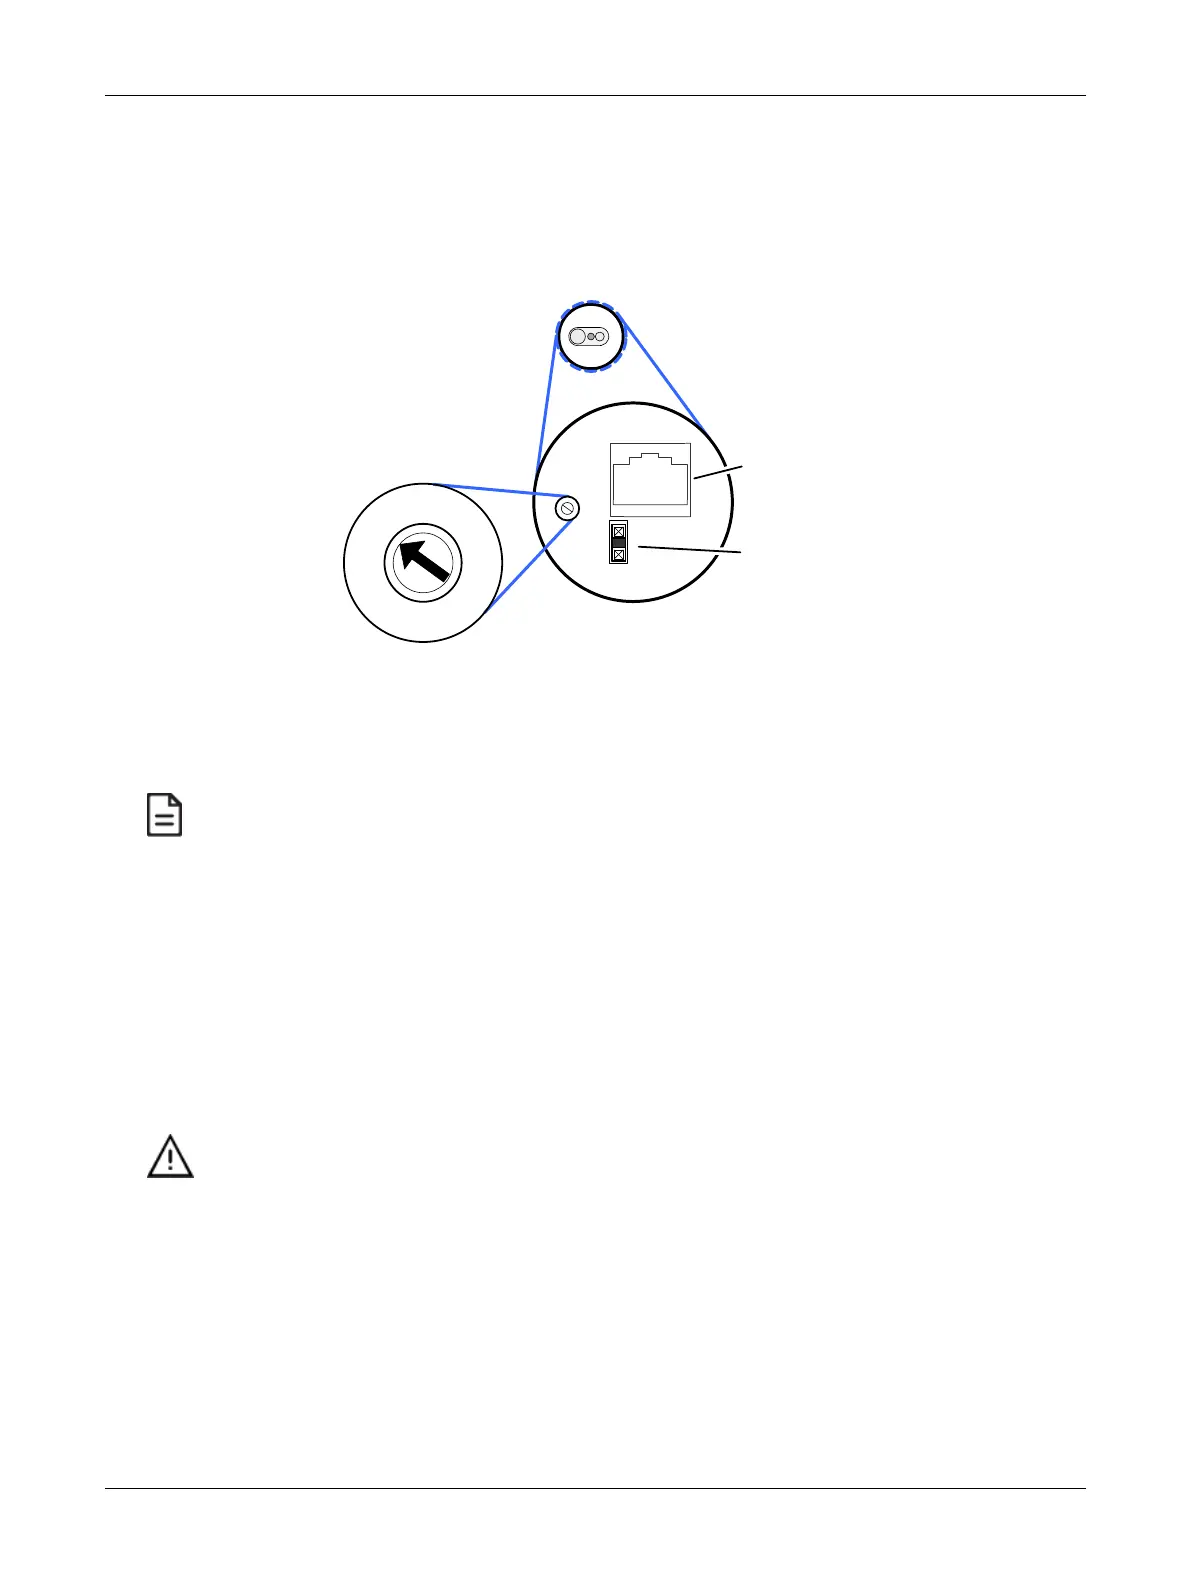
Each EC-Multi-Sensor connected to a controller’s Subnet Port must be set to a unique subnet ID ad-
dress. This address should correspond to the block number of the associated Multi Sensor block in
EC-
gfx
Program. The address is set through the rotary selector located next to the Subnet Port con-
nector.
Back of
EC-Multi-Sensor
EOL Jumper: EOL is enabled
when present; remove to
disable EOL
RJ-45 Subnet Connector
Set the Subnet
ID Address with
a Small
Screwdriver
1
0
2
3
4
5
6
7
8
9
Figure123: Setting the EC-Multi-Sensor Series’ Subnet ID Address
Use a small screwdriver (for example, a precision or jeweler’s screwdriver) to set the selector. The fig-
ure above shows an example of how to set the EC-Multi-Sensor Series’ Subnet ID address DIP switch
to 1 and the EOL termination is ON.
Once an EC-Multi-Sensor is installed, the following tip can be used during system commissioning to verify if the EC-
Multi-Sensor is set to the correct subnet ID address for the zone in which it is physically located.
Run EC-
gfx
Program in debug mode for the controller with 4 Multi Sensor block instances, 1 to 4. Set a remote control
to zone ID 0, then aim it at the EC-Multi-Sensor and press a command (fan speed button for example). In EC-
gfx
Program, see which block instance shows an output (RemoteFanSpeed).
Usually it is easier to reassign Multi Sensor block numbers in EC-
gfx
Program code than it is to change the Subnet ID
Address of an installed EC-Multi-Sensor.
Setting the EC-Multi-Sensor-BLE Subnet ID Address
Each EC-Multi-Sensor-BLE on the ECx Subnetwork must be set to a unique subnet ID address. The
address is set with the rotary switch located at the rear of the sensor using a small screwdriver (≤ 2.5
mm - 0.1’’).
The Subnet ID address must be set before installing the sensor, as the rotary switch might not be accessible
once the rear spring is installed.
5 different Subnet ID codifications are used on the ECx Subnetwork :
£ 1 for Allure UNITOUCH™ sensors and EC-Multi-Sensor-BLE sensors
£ 1 for Allure EC-Smart-Vue sensors
£ 1 for Allure EC-Smart-Comfort and Allure EC-Smart-Air sensors
£ 1 for EC-Multi-Sensors
£ 1 for ECx-Light/Blind expansion modules
Consequently, for example, the same Subnet ID can be assigned to an ECx-Light/Blind module, to an EC-Multi-
Sensor and to an Allure EC-Smart-Vue sensor without any addressing issue.
The Subnet IDs that can be allocated to EC-Multi-Sensors are 0 (factory default), 1, 2, 3, and 4. All
other addresses are not used.
Subnetwork Installation Guidelines