Adjusting the thread system
Service Instructions 967 - 02.0 - 12/2015
69
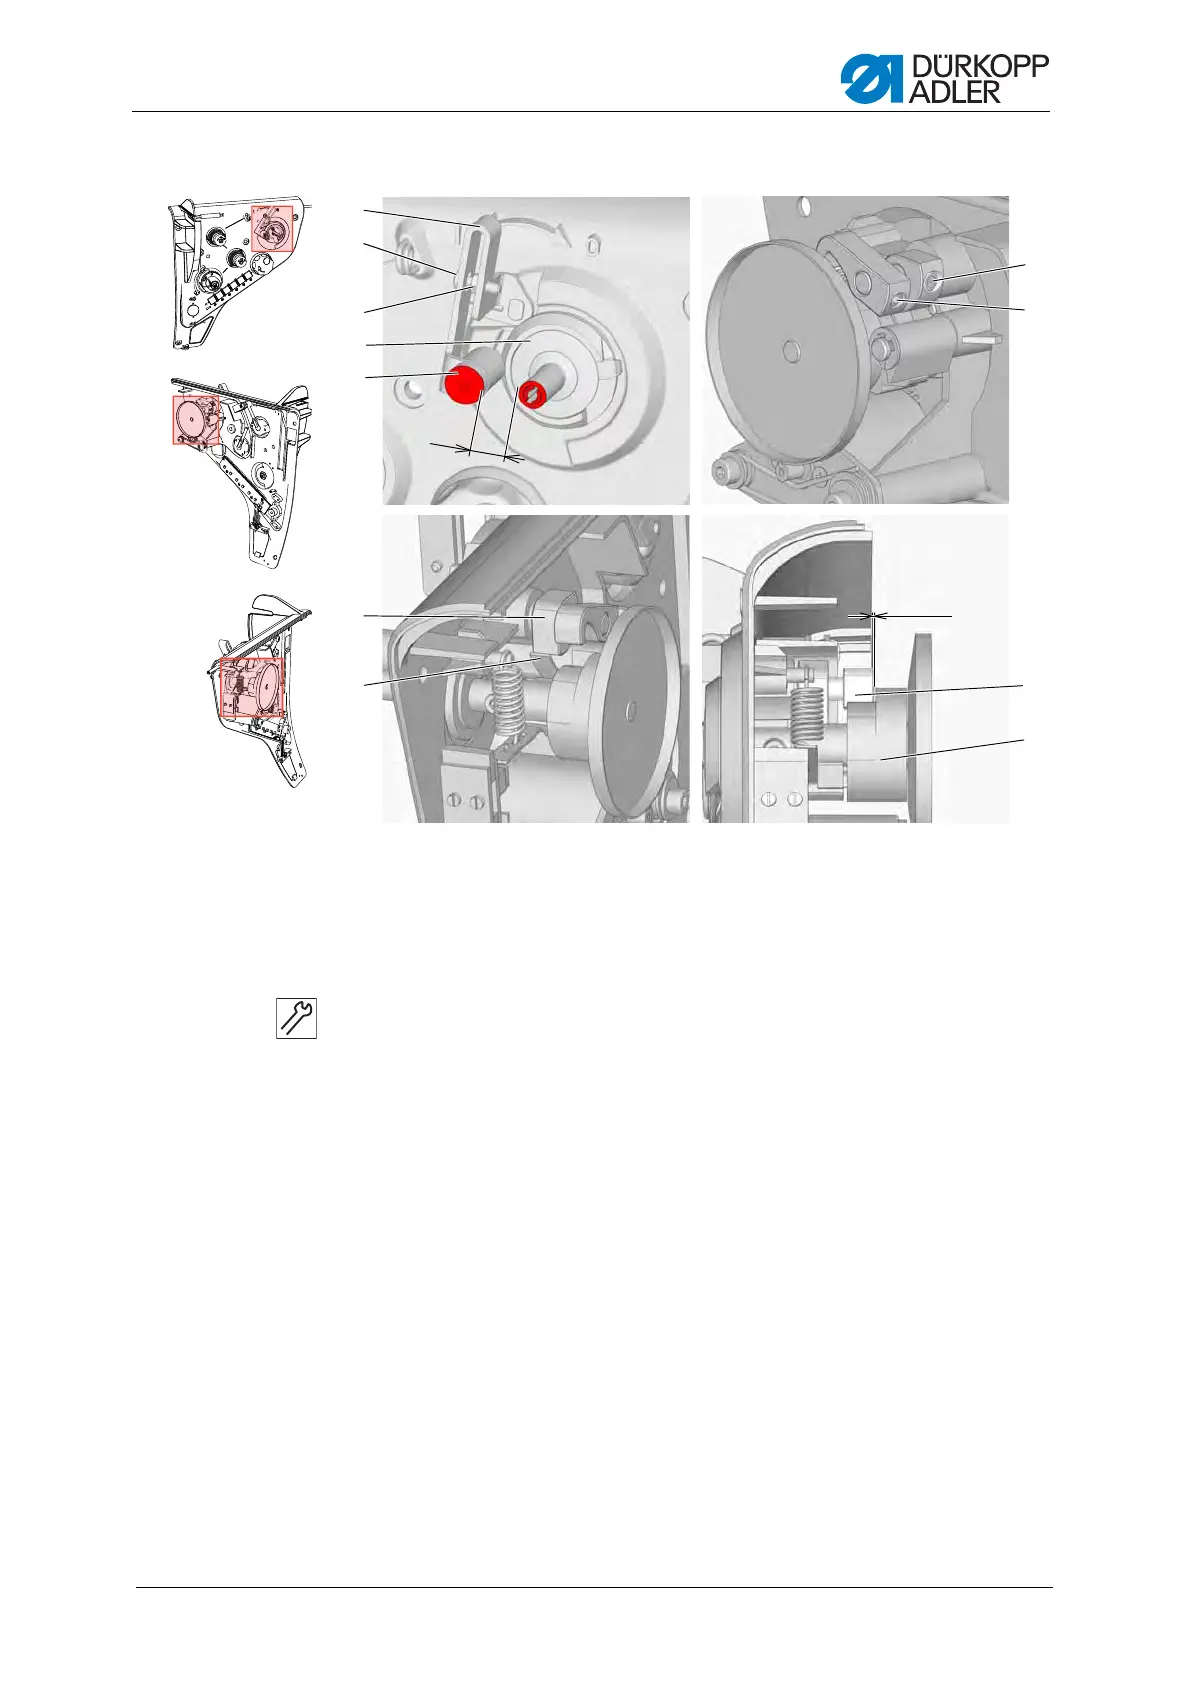
Fig. 49: Setting the winder - part 1
Setting steps
1. Loosen the counternut (3).
2. Tighten the regulating screw (2) in such a way that the arms of the winder
lever (1) are approximately parallel.
3. Adjust the winder pulley (5) to a distance of L=8 mm from the internal
diameter of the bobbin (4).
4. Loosen the screw (11).
5. Swing the switch-off lever (6) into the switch-off position, at which the
edge of the spring (7) rests against the edge of the switch-off lever (6).
6. Tighten the screw (11).
7. Check that the winder switches off when the winder pulley (5) reaches
8 mm from the internal diameter of the bobbin (4); correct the setting if
necessary.
8. Turn the winder lever (1) to the 0 position (winder switched off).
9. Loosen the screw (10).
10.Adjust the blocking lever (9) to the base of the recess in the blocking
cam (8).
(1) - Bobbin lever
(2) - Regulating screw
(3) - Counternut
(4) - Bobbin
(5) - Winder wheel
(6) - Switch-off lever
(7) - Spring
(8) - Blocking cam
(9) - Blocking lever
(10) - Screw
(11) - Screw
①
②
③
④
⑤
⑥
⑧
⑨
⑩
⑦
⑪
0.5 mm
L

 Loading...


