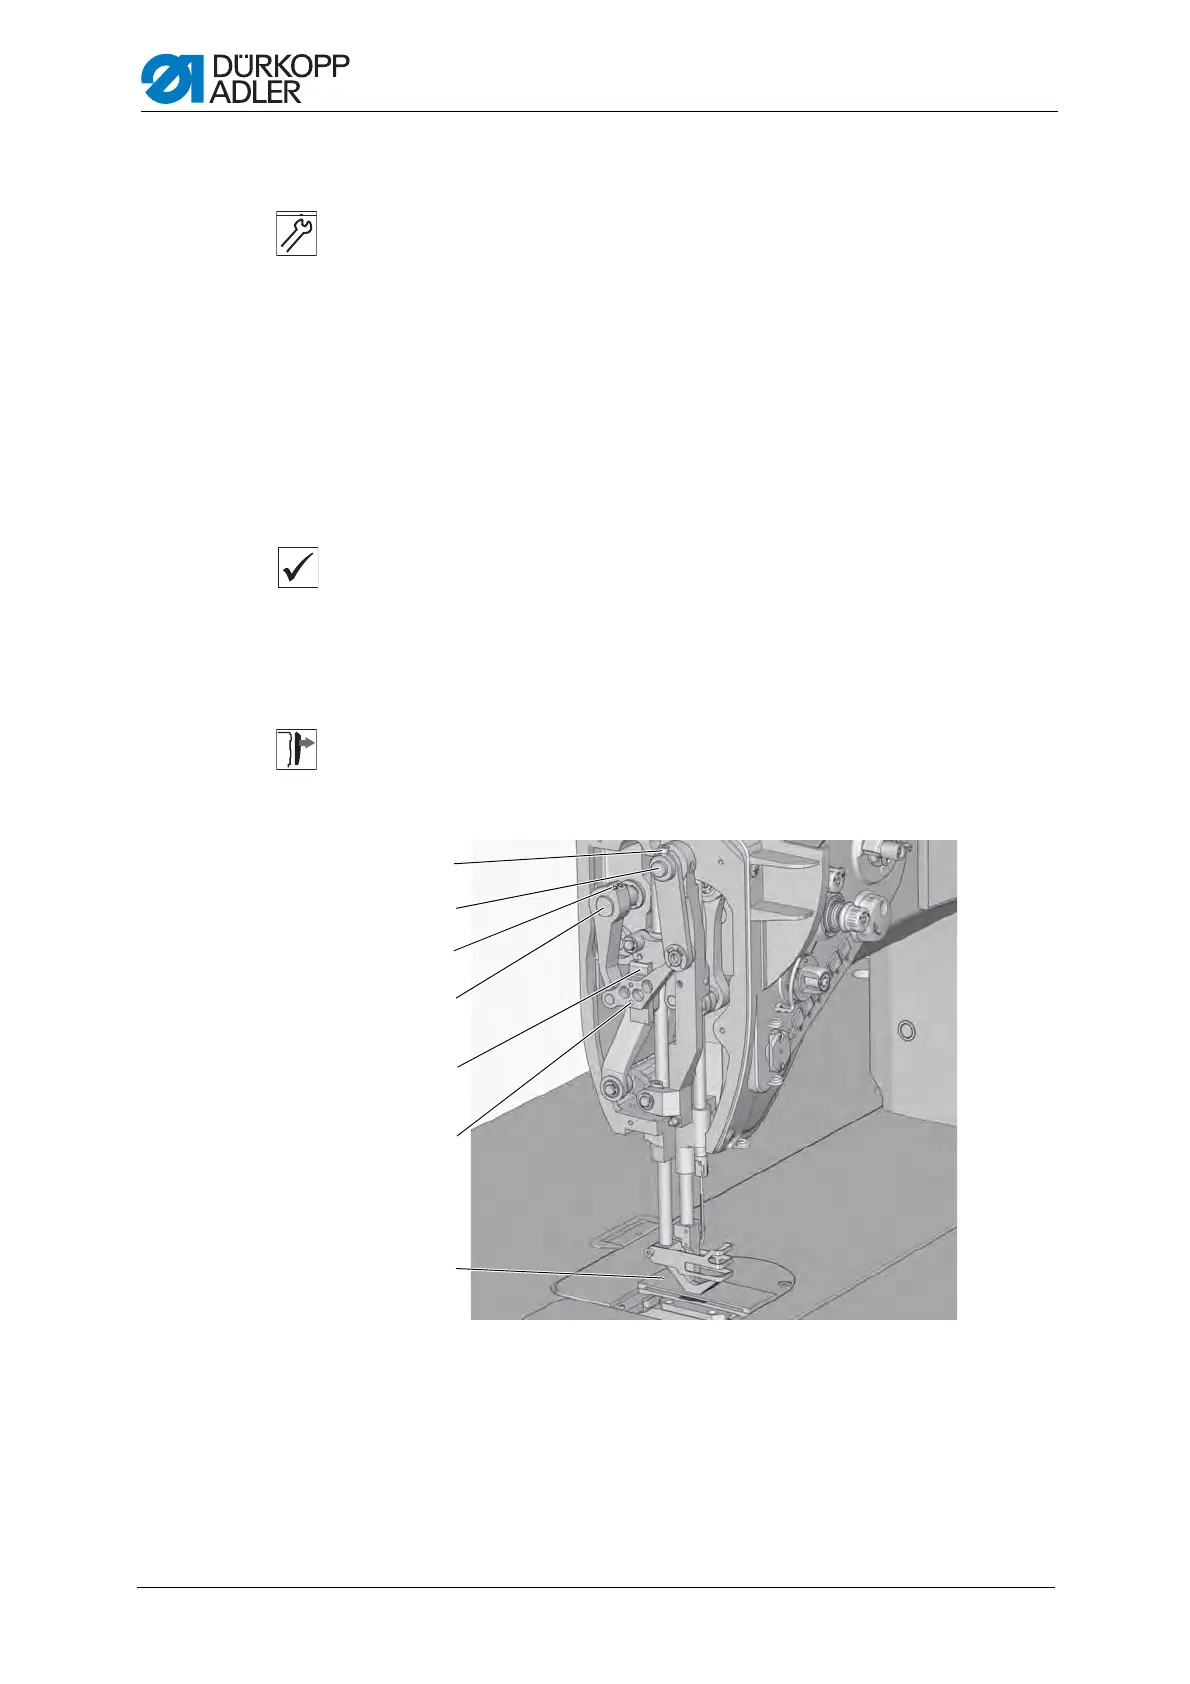
Adjusting the sewing foot feed
60
Service Instructions 967 - 02.0 - 12/2015
Setting steps
1. Loosen the screw in the opening (4).
2
. Loosen the counternut (8).
3. Rotate the frame (2) such that the connecting rods (1) are in a line.
4. Turn the stop screw (9) such that the ball-ended pin (7) is in contact with
it and the connecting rods (1) remain in a line.
5. Tighten the counternut (8).
6. Turn the torsion spring (5) with the pin (3) 15° to 20° in the direction of
the arrow and tighten the screw in the opening (4).
11.2 Adjusting the drive dog for the presser foot bar
Proper setting
When the stitch length is set to 0 and both feet (8) and (9) are at the same
he
ight:
Th
e drive dog (15) is attached to the presser foot bar (10) in such a
position that the needle shaft inserted into the opening (11) touches
the presser foot bar (10).
Cover
• Arm cover ( p. 11).
• Head cover (
p. 12).
Fig. 41: Adjusting the presser foot bar drive dog I
(1) - Screw
(2) - Pin
(3) - Screws
(4) - Shaft
(5) - Gully
(6) - Assembly
(7) - Plate
(8) - Presser foot
(9) - Sewing foot
(10) - Presser foot bar
(11) - Opening for the needle shaft
(12) - Slide nut
(13) - Lever
(14) - Drive dog screw
(15) - Drive dog
 Loading...