Setting the stitch length adjusting wheels
Service Instructions 967 - 02.0 - 12/2015
33
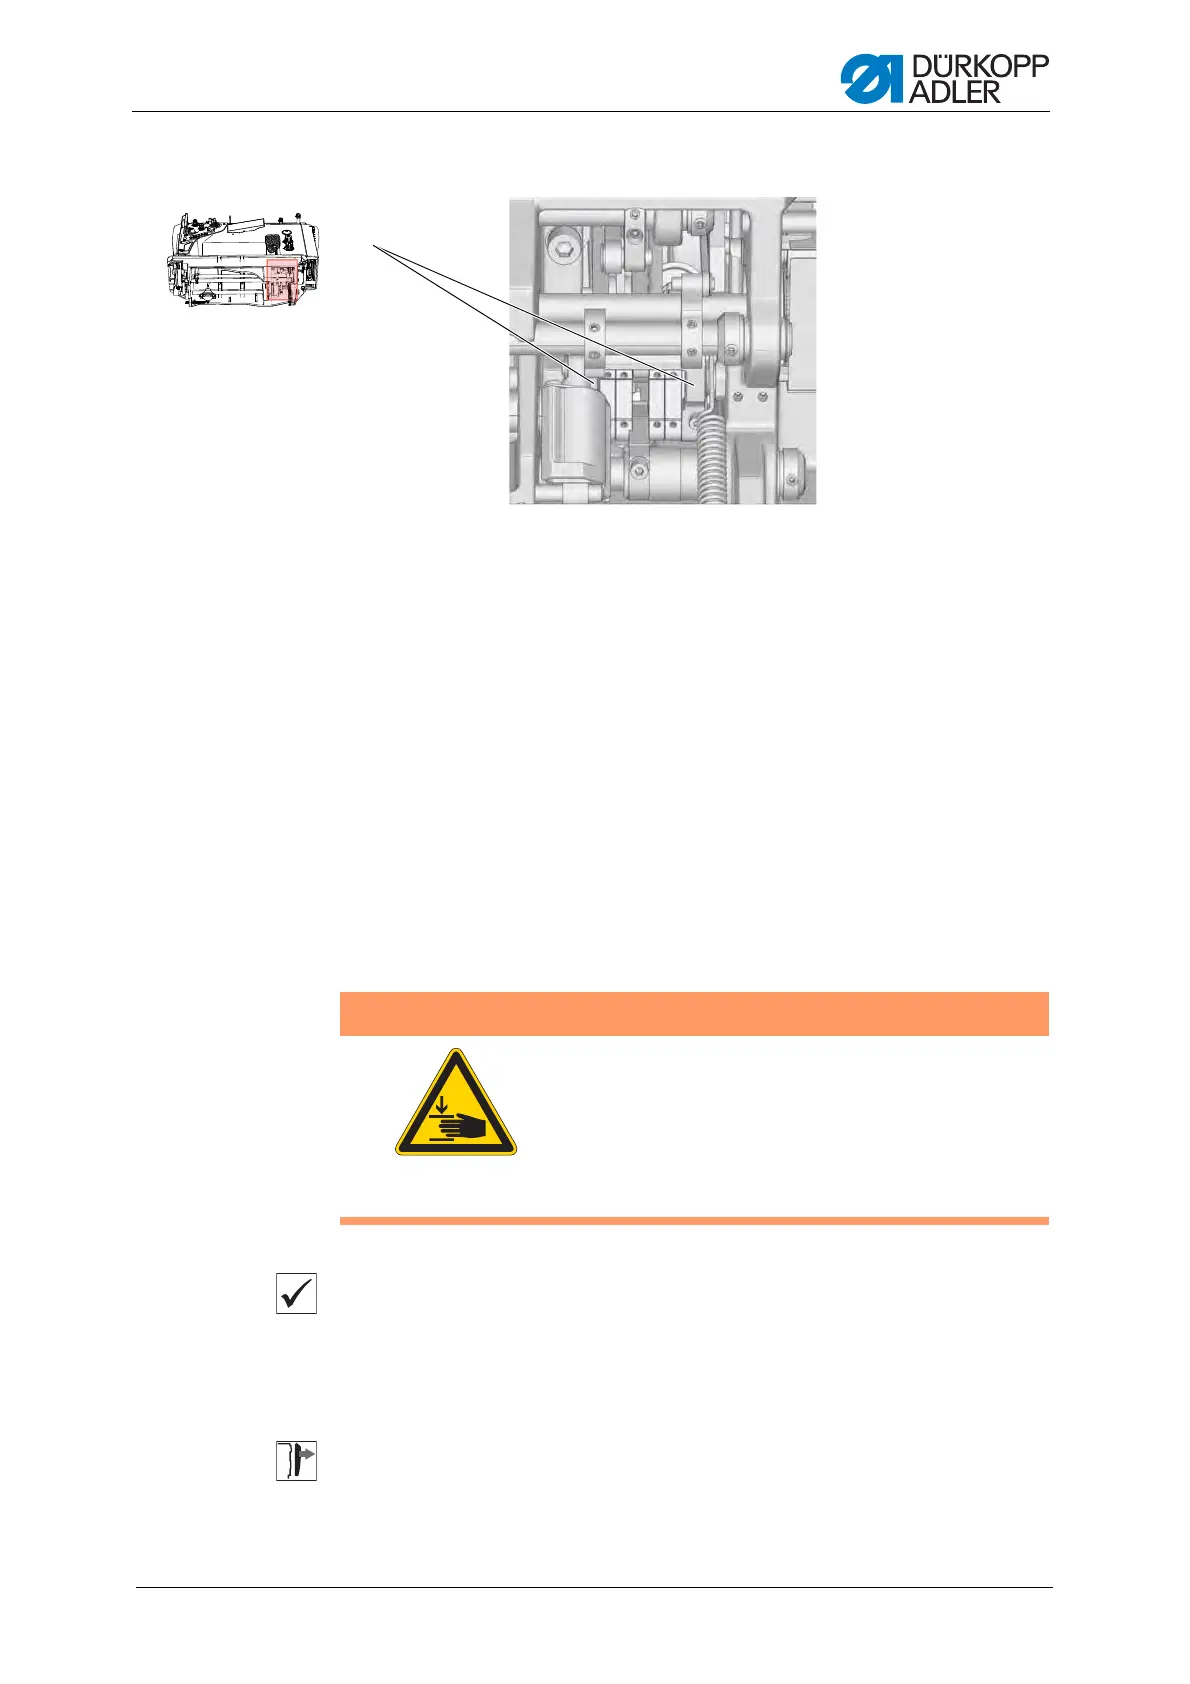
Fig. 22: Setting the upper stitch length adjusting wheel II
6. Check whether the frame (8) for the stitch regulator gear can be moved
by pressing the stitch setting lever.
7. As soon as the frame (8) no longer moves: Remove the wrench from
the shaft (5).
8. Turn the scale (6) such that the 0 is exactly next to the adjusting mark (4).
9. Place the upper stitch length adjusting wheel (1) onto the shaft (5) and
tighten it with a wrench (7).
10.Tighten the upper stitch length adjusting wheel (1) using screw (2).
7.2 Setting the lower stitch length adjusting wheel
Checking the correct setting
Sewing with 2 different stitch lengths:
• The stitch lengths on the seam correspond with the set stitch lengths.
• The lower stitch length adjusting wheel can only be turned up to the
stitch length
set on the upper stitch length adjusting wheel.
Cover
• Tilt the machine head ( p. 10)
(8) - Frame for the stitch regulator gear
⑧
Risk of injury!
The lower stitch length adjusting wheel has to be
set when the machine is switched on because a
switchover is automatically made to the upper ad-
justing wheel when the machine is switched off.
Carry out all work with extreme caution.
WARNING
 Loading...