Adjusting the thread system
72
Service Instructions 967 - 02.0 - 12/2015
10.Mount the thread tensioning plate with the winder on to the machine.
11.Test the winder for correct operation. Check if the winder switches off
when the thread has been wound up to 0.5 to 1 mm below the outer
diameter of the bobbin (4).
If this is not the case, tighten the screw (2) or back it off, and repeat the
test. Once the desired result has been obtained, tighten the counternut
(3).
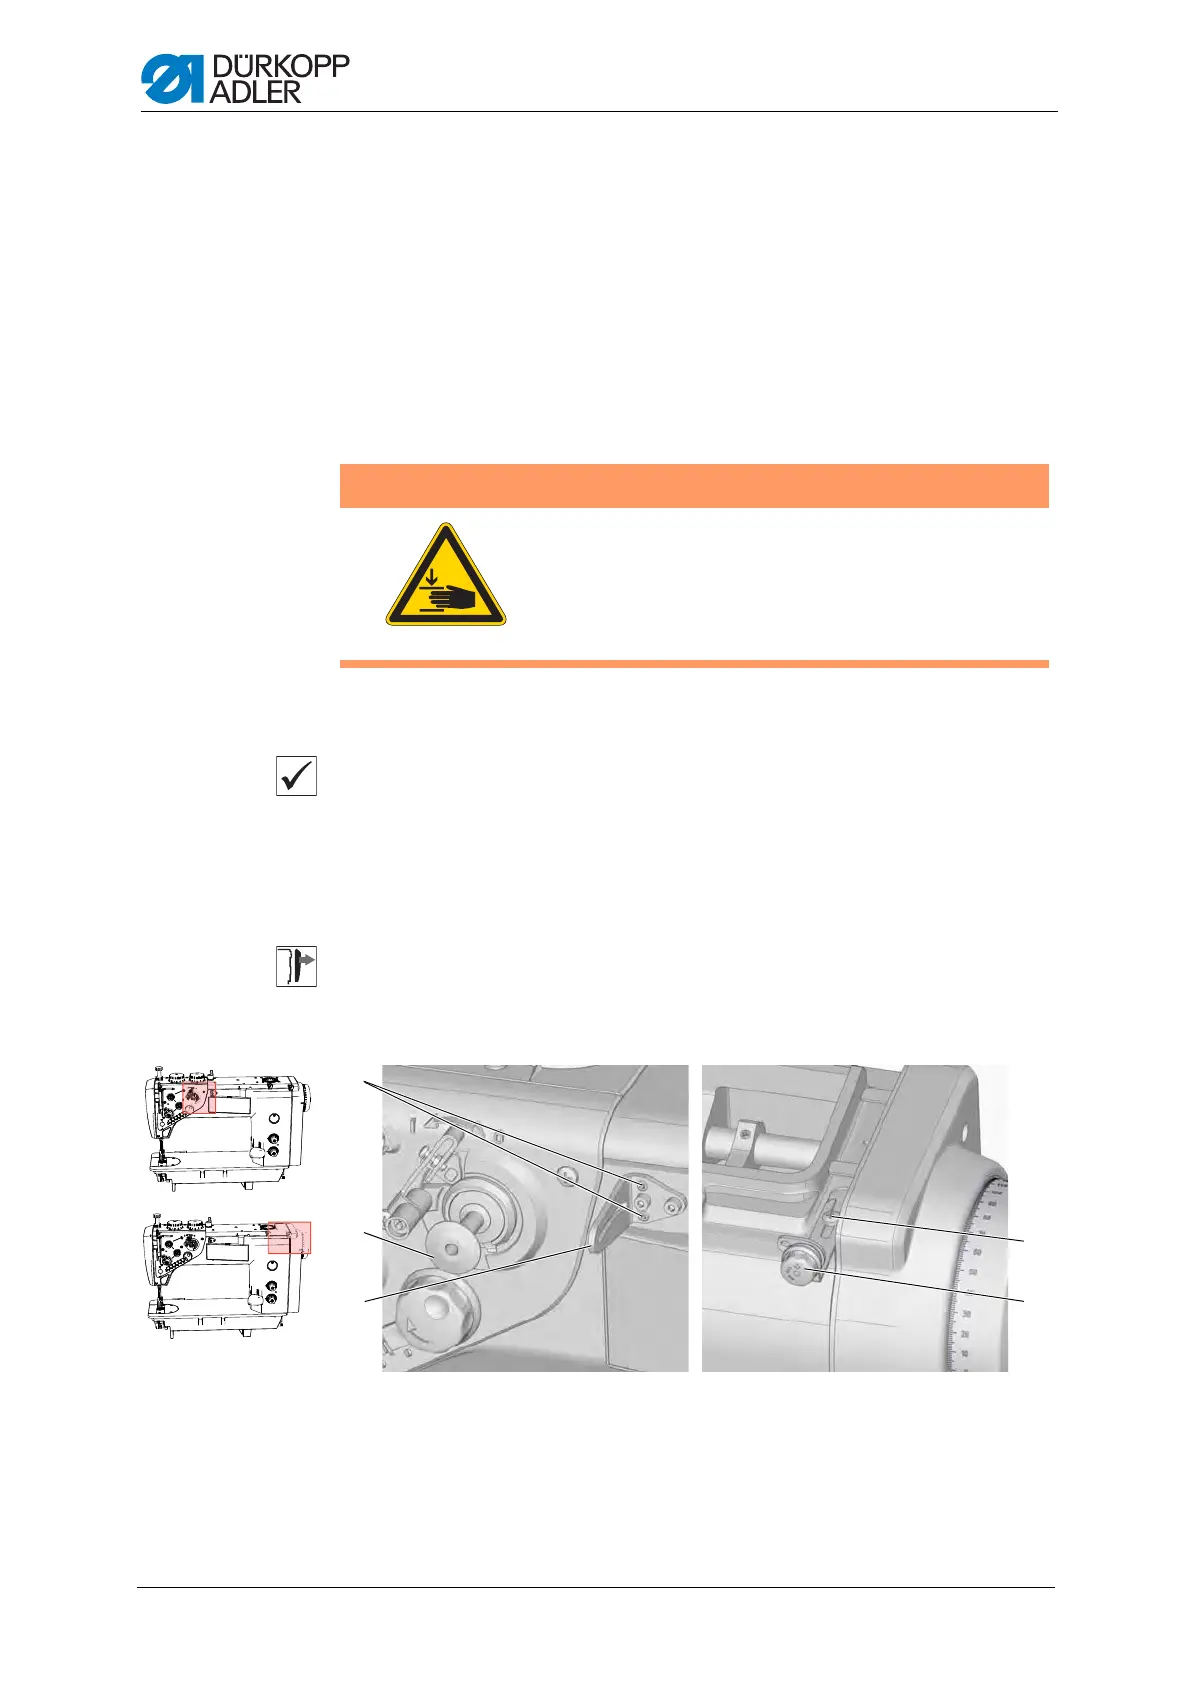
13.3 Setting the hook thread guide
Proper setting
The thread tensioning element (4) must be at a distance from the machine
a
rm so that the bobbin (2) is wound equally at both ends.
If, due to the position of the thread tensioning element (4), the bobbin (2)
cann
ot be wound equally at both ends, the inclination of the hook thread
guide (3) must be changed to achieve this purpose.
Cover
• Upper right cover ( p. 11).
Fig. 51: Adjusting thread tensioner and thread guide ahead of the winder
WARNING
Risk of injury!
Crushing injuries from moving parts.
Switch off the machine before checking and setting
th
e hook thread guide.
(1) - Setscrews
(2) - Bobbin
(3) - Hook thread guide
(4) - Thread tensioning element
(5) - Screw
①
②
③
④
⑤

 Loading...


