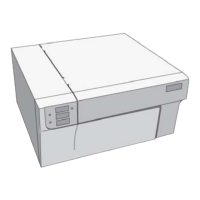
Testing the Printer
Before connecting your printer to a computer, use the built-in
self-test function to see that the printer is working properly.
Before running the self test, you need to connect your printer to
an electrical outlet.
Plugging in the printer
1. Make sure that the printer is turned off.
2.
Check the label on the back of the printer to make sure the
power rating required by the printer matches that of your
electrical outlet.
CAUTION: If the rated voltage and your outlet voltage
do not match, contact your dealer for assistance. Do not
plug in the power cord.
3.
If necessary, connect the power cord to the AC inlet on the
printer’s back panel.
4.
Plug the power cord into a properly grounded electrical outlet.
Running the self test
The self test runs in draft or Near Letter Quality (NLQ) mode,
depending on which button you hold down as you turn on the
printer.
1.
Make sure that the printer is turned off and then push the
paper release lever back to the single-sheet position.
2.
While holding down the LINE FEED button (draft mode) or FORM
FEED button (NLQ mode), turn on the printer. The POWER and
PAPER OUT lights come on.
1-10
Setting Up the Printer

 Loading...