Disassembly and Assembly 2-22 Rev. A
Confidential
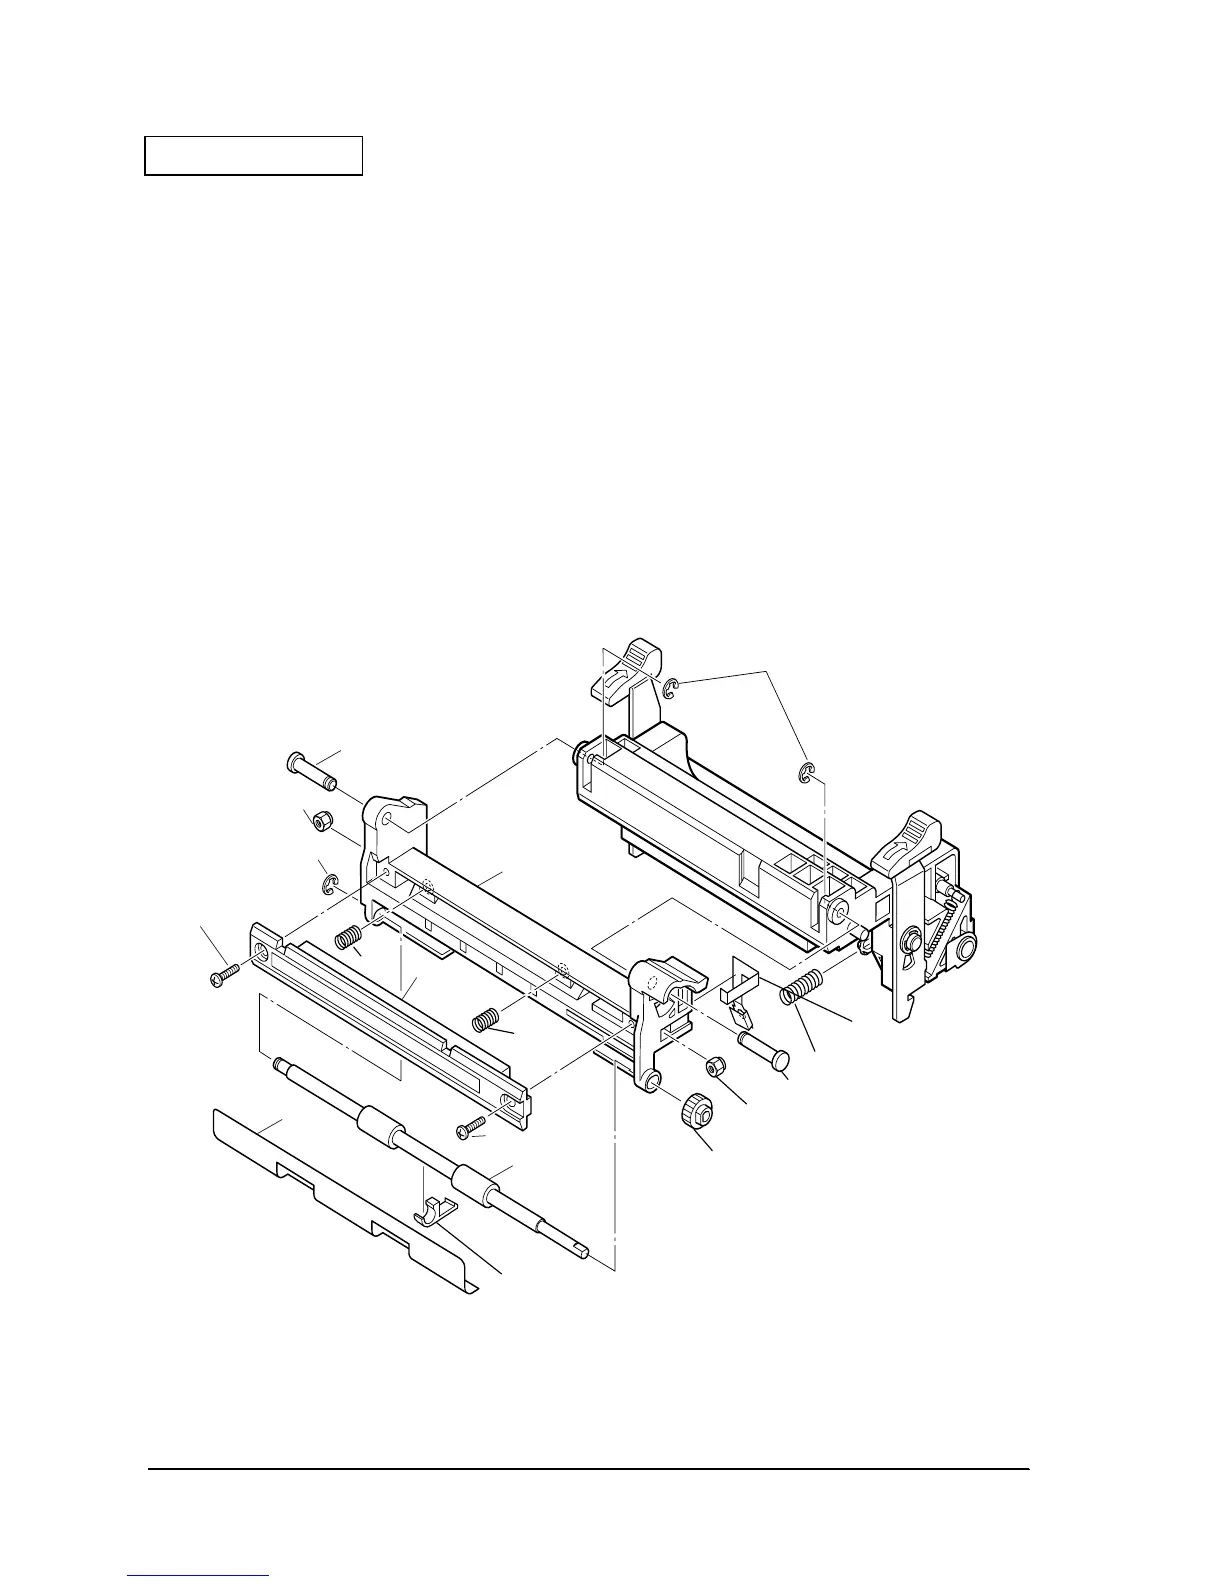
69. Fix one M3 nylon lock nut to the platen lever. Attach so that the blue part comes below the
screw hole.
70. Attach the platen earth plate A to the platen lever.
71. Hook two platen springs to the platen lever.
72. Fix one M3 nylon lock nut.
73. Attach the platen assembly to the platen lever in two places. Tighten two screws to the
platen and the platen lever.
74. Attach the slip paper guide to the platen lever. Attach the platen lever in three places in the
rack, and install the slip paper guide. Insert the two nibs.
75. While attaching the platen lever spring to the platen earth plate B, attach the platen assembly
to the frame platen lever assembly frame.
76. Assemble the platen lever shaft L.
Figure 2-19
686
E-ring(3)
625
Platen lever shaf
623 Platen lever
678
Platen
assembly
650
Slip paper
guide
649
Slip feed roller
683
Nylon lock nut(M3)
686
E-ring(3)
603
658
Platen adjustment screw
658
Platen adjustment screw
643
Slip feed roller holder
603
Platen
spring
639
Slip drive gear
683
Nylon lock nut(M3)
625
Platen lever shaft
651
Platen ground plate (type A)
624
Platen lever spring
 Loading...