XTP CrossPoint Series • Operation 53
4. Change the audio level: Press and release the View (
<
) button once (see figure 38) to
decrease the input audio level by 1 dB.
Press and release the View (
<
) button several more times (see figure 36) to decrease
the input audio level by 1 dB per button press. Note the output button indication
changes that occur each time the View (
<
) button is pressed.
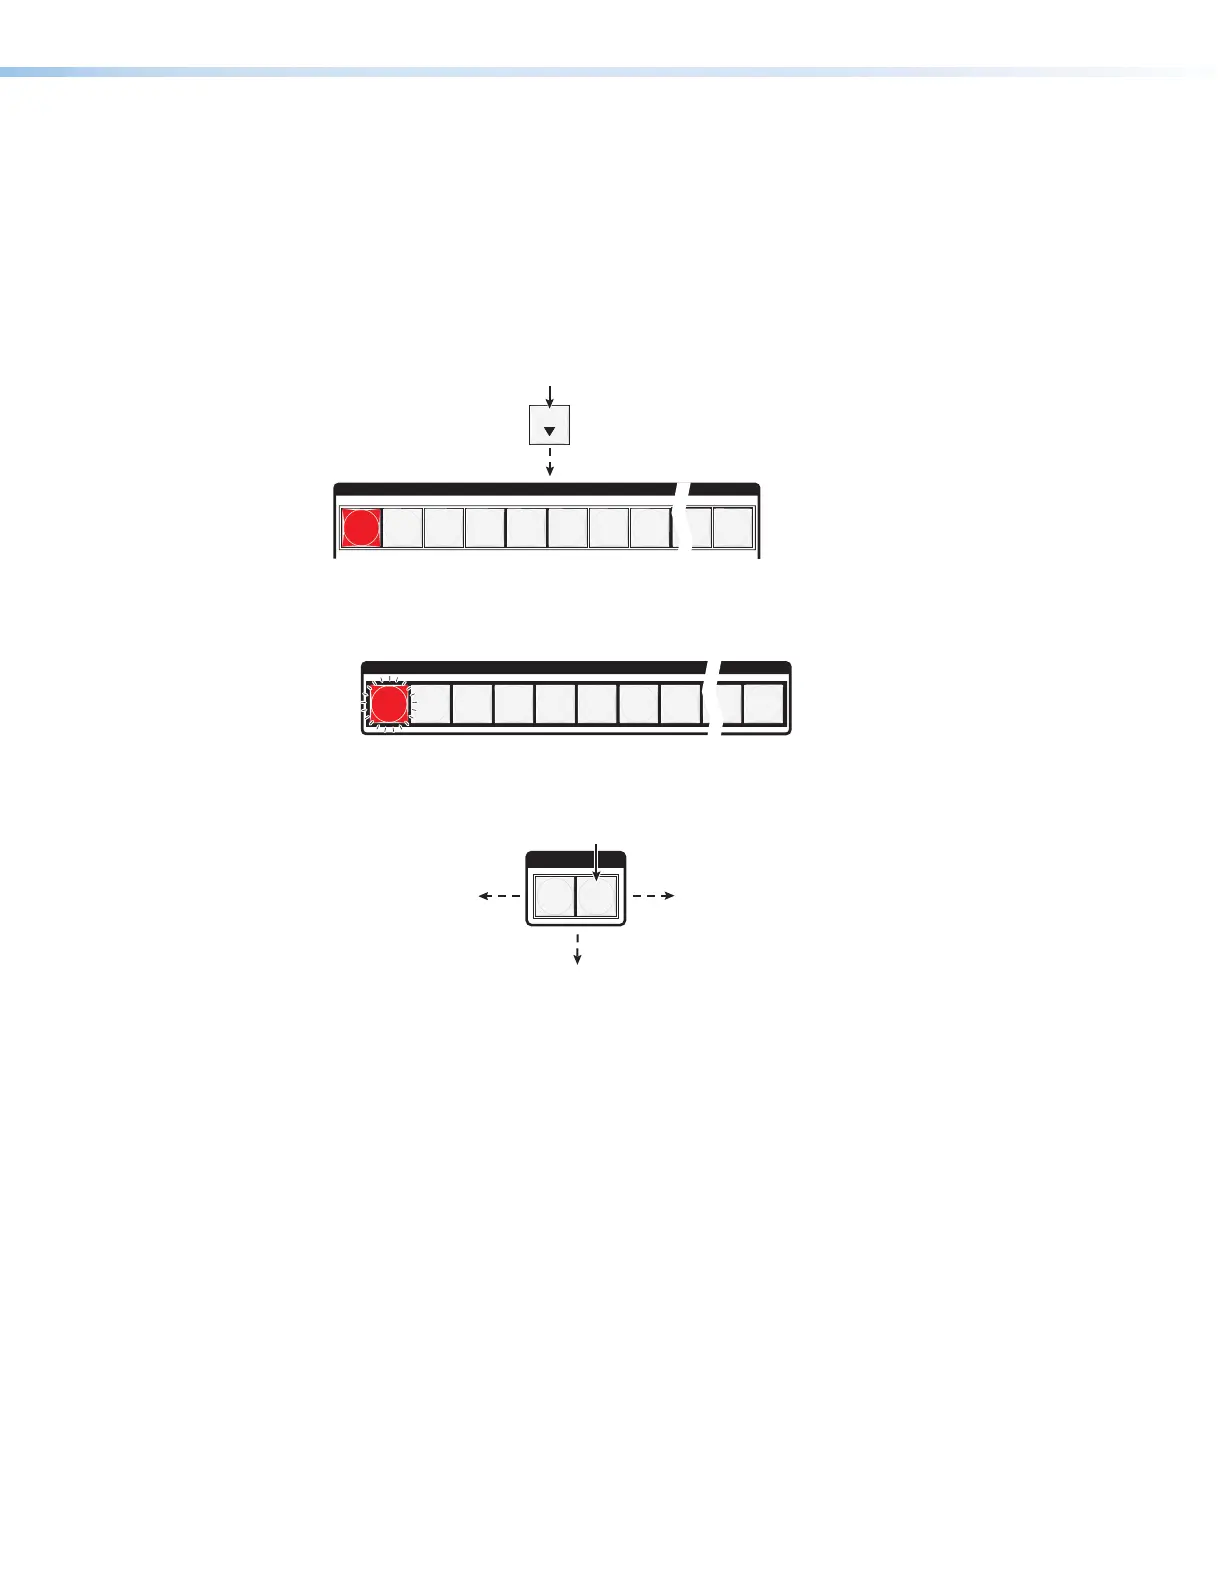
Figure 38 and figure 39 show the result of pressing the View (
<
) button a total of nine
times, an audio attenuation level of -1 dB. Note that the level is now displayed in red to
indicate a negative level.
VIEW
OUTPUTS
1
2
3
4
5
6 7
8
15
16
Press the button.
The output buttons display the audio level and
polarity (gain or attenuation) of the selected input.
Each output button indicates 1 dB when lit.
When the buttons are lit green, they indicate a
gain (+) audio level.
When the output buttons are lit red, they indicate
an attenuation (-) level.
•
•
Figure 38. Adjust the Analog Input Audio Level
Figure 39 shows the same –1 dB level as in figure 38, but displayed on an
XTP CrossPoint 1600 matrix switcher.
1
2
3
4
5
6 7
8
15
16
Figure 39. Level Display on an XTP CrossPoint 1600 Matrix Switcher
5. Exit Audio mode: Press and release the Audio button.
I / O
VIDEO AUDIO
The Audio button stops
blinking and lights.
Press the button.
All input buttons and output buttons
return to unlit or background illumination.
The Video button
lights green.