XTP CrossPoint Series • Installation 11
Installation
This section details the installation and configuration of the XTP CrossPoint Series matrix
switchers, including:
• Setup and Installation Checklist
• Rear Panel Cabling and Features
• Front Panel Configuration Port and Power LEDs
Setup and Installation Checklist
Get ready
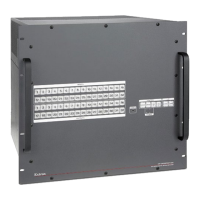
Familiarize yourself with the XTP CrossPoint Series matrix switcher.
Obtain IP setting information for the matrix switcher from the local network administrator
(see Ethernet Connection on page 152).
Configure the matrix switcher
Install the desired input and output boards (see Installing an Input or Output Board
or Blank Panel on page 147). Use a screwdriver to tighten the captive screws that
lock the boards in place.
Perform physical installation
If desired, create and replace button labels (see Removing and Installing Button
Labels on page 148).
If desired install the matrix switcher in a rack (see Mounting the Matrix Switcher on
page 145).
Cable input and output devices to the input and output boards (see Input and Output
Boards on page 14).
If desired, connect computers or control systems to any of the remote control ports (a
serial port [see Remote Control Ports on page 26], a USB port [see Configuration
port on page 27], and a LAN port [see Ethernet Connection on page 26]) on the
matrix switcher.
Connect power (see Power on page 27).
Test the matrix switcher by creating a tie (see Example 1: Create a set of video and
audio ties on page 38).
Ancillary operations
Install the XTP System Configuration software (see the XTP System Configuration
Software Help file).