XTP CrossPoint Series • Operation 41
4. Select the output: Press and release Output 4.
C O N T R O L
PRESET
ENTER
ESCVIEW
OUTPUTS
1
2
3
4
5
6 7
8
15
16
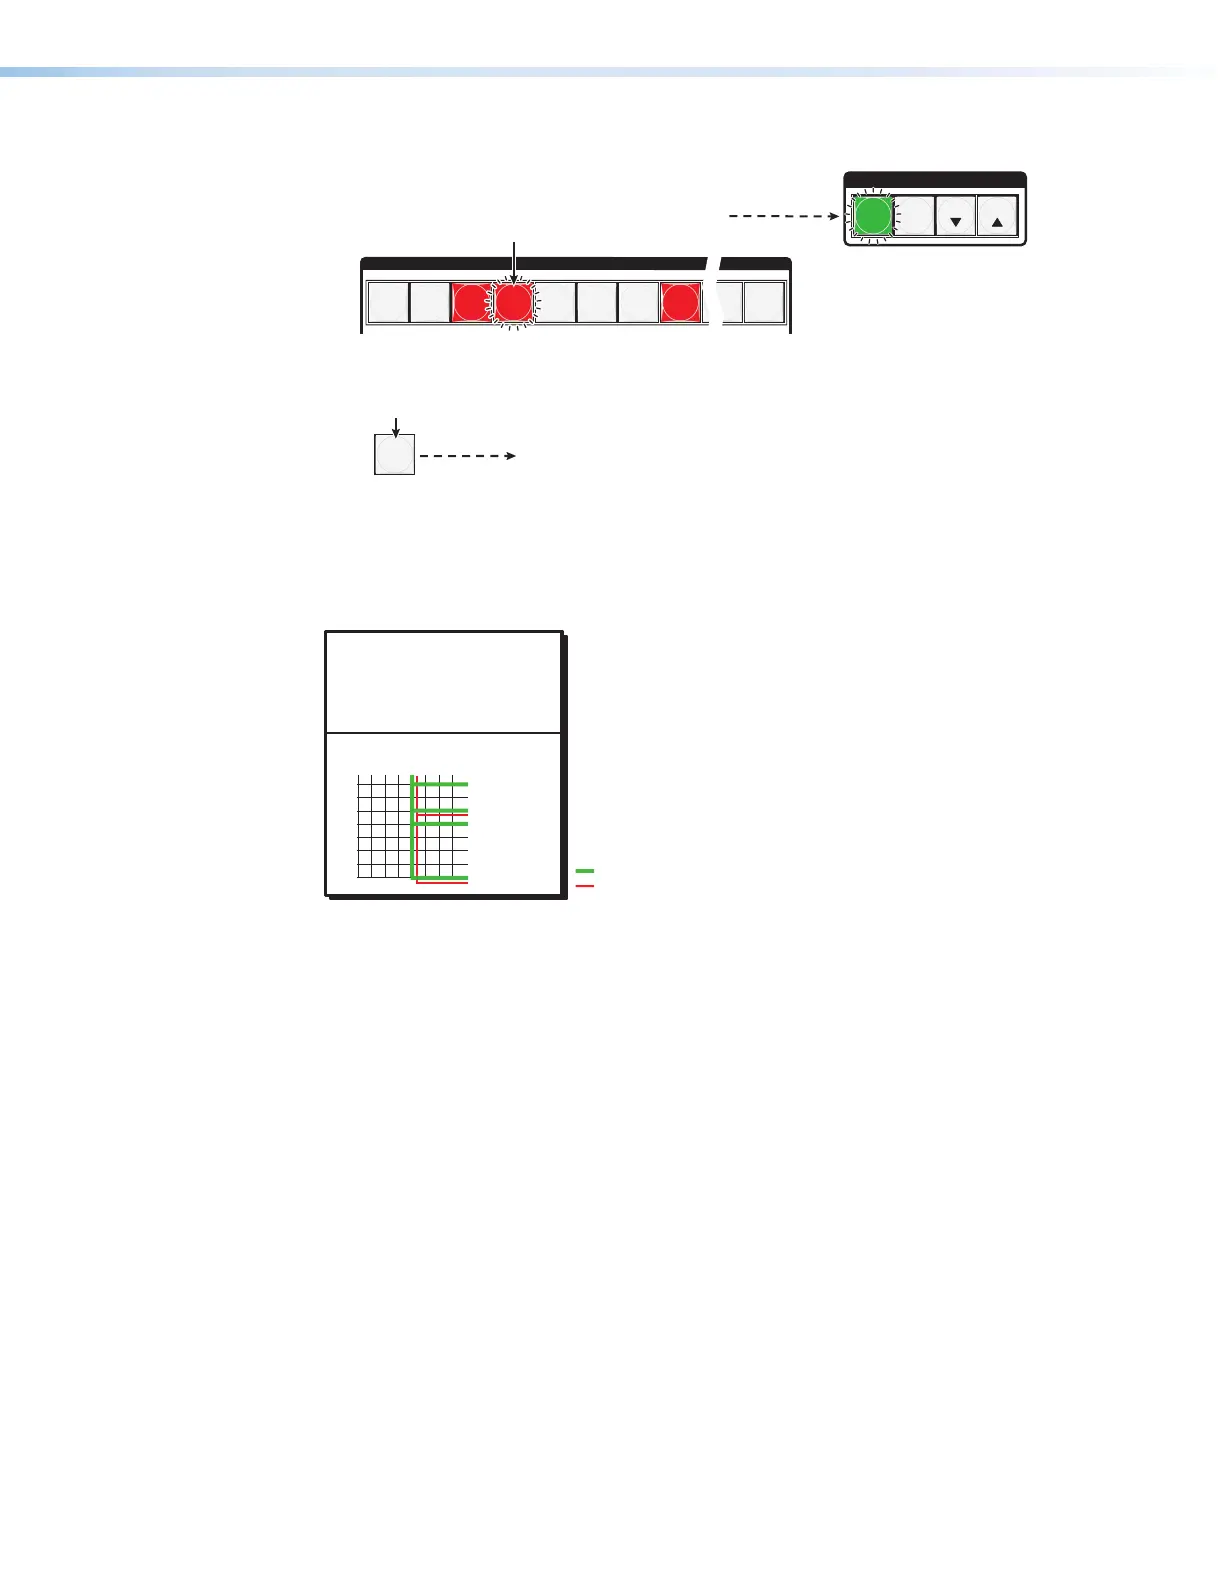
Press the button.
The button blinks red to indicate the pending change:
audio input will be untied.
The Enter button blinks
green to indicate the need to
confirm the change.
5. Confirm the change: Press and release Enter.
ENTER
All input buttons and output buttons
return to unlit or background illumination.
Press the Enter button to confirm
the configuration change.
The Enter button returns to
unlit or background illumination.
The current configuration (see figure 33) is now:
• Video — Input 5 video is tied to output 1, output 3, output 4, and output 8.
• Audio — Input 5 audio is tied to output 3 and output 8.
Input 5 video tied
to outputs 1, 3, 4, and 8
Input 5 audio tied
to outputs 3 and 8
Input
Output
1
3
4
8
5
Video
Audio
Figure 33. Final Configuration, Example 3
Viewing the Configuration
The current configuration can be viewed using the front panel buttons. The View-only mode
prevents inadvertent changes to the current configuration. View-only mode also provides a
way to mute audio outputs (see Muting and Unmuting Audio Outputs on page 46).
View the current configuration as follows:
1. Press the Esc button to clear any input button indications, output button indications, or
control button indications that may be on.
2. Press and release the View button. All of the buttons light for outputs that are not tied
as follows:
• Amber: No tied video or audio input
• Green: No tied video input
• Red: No tied audio input
If you press an output button for which there are no ties, the output buttons light for all
outputs without ties.
3. Select video, audio, or both to view by pressing the Video button, Audio button, or
both.