XTP CrossPoint Series • Operation 57
Example 9: Viewing and adjusting an analog output volume level
In the following example, the audio output volume is viewed and adjusted. The steps show
the front panel indications that result from your action.
Because of the different volume display schemes, the output audio levels that result from the
following example are shown twice:
• As displayed on an XTP CrossPoint 3200 matrix switcher
• As displayed on an XTP CrossPoint 1600 matrix switcher
The XTP CrossPoint 3200 drawings show the actions that led up to the display.
The XTP CrossPoint 1600 drawing shows the volume display only, not the actions that
caused it.
1. Clear all selections: Press and release the Esc button.
2. Select Audio mode: Press and hold the Audio button for approximately 2 seconds
until it blinks.
AUDIO
AUDIO
Press and hold.
2 seconds
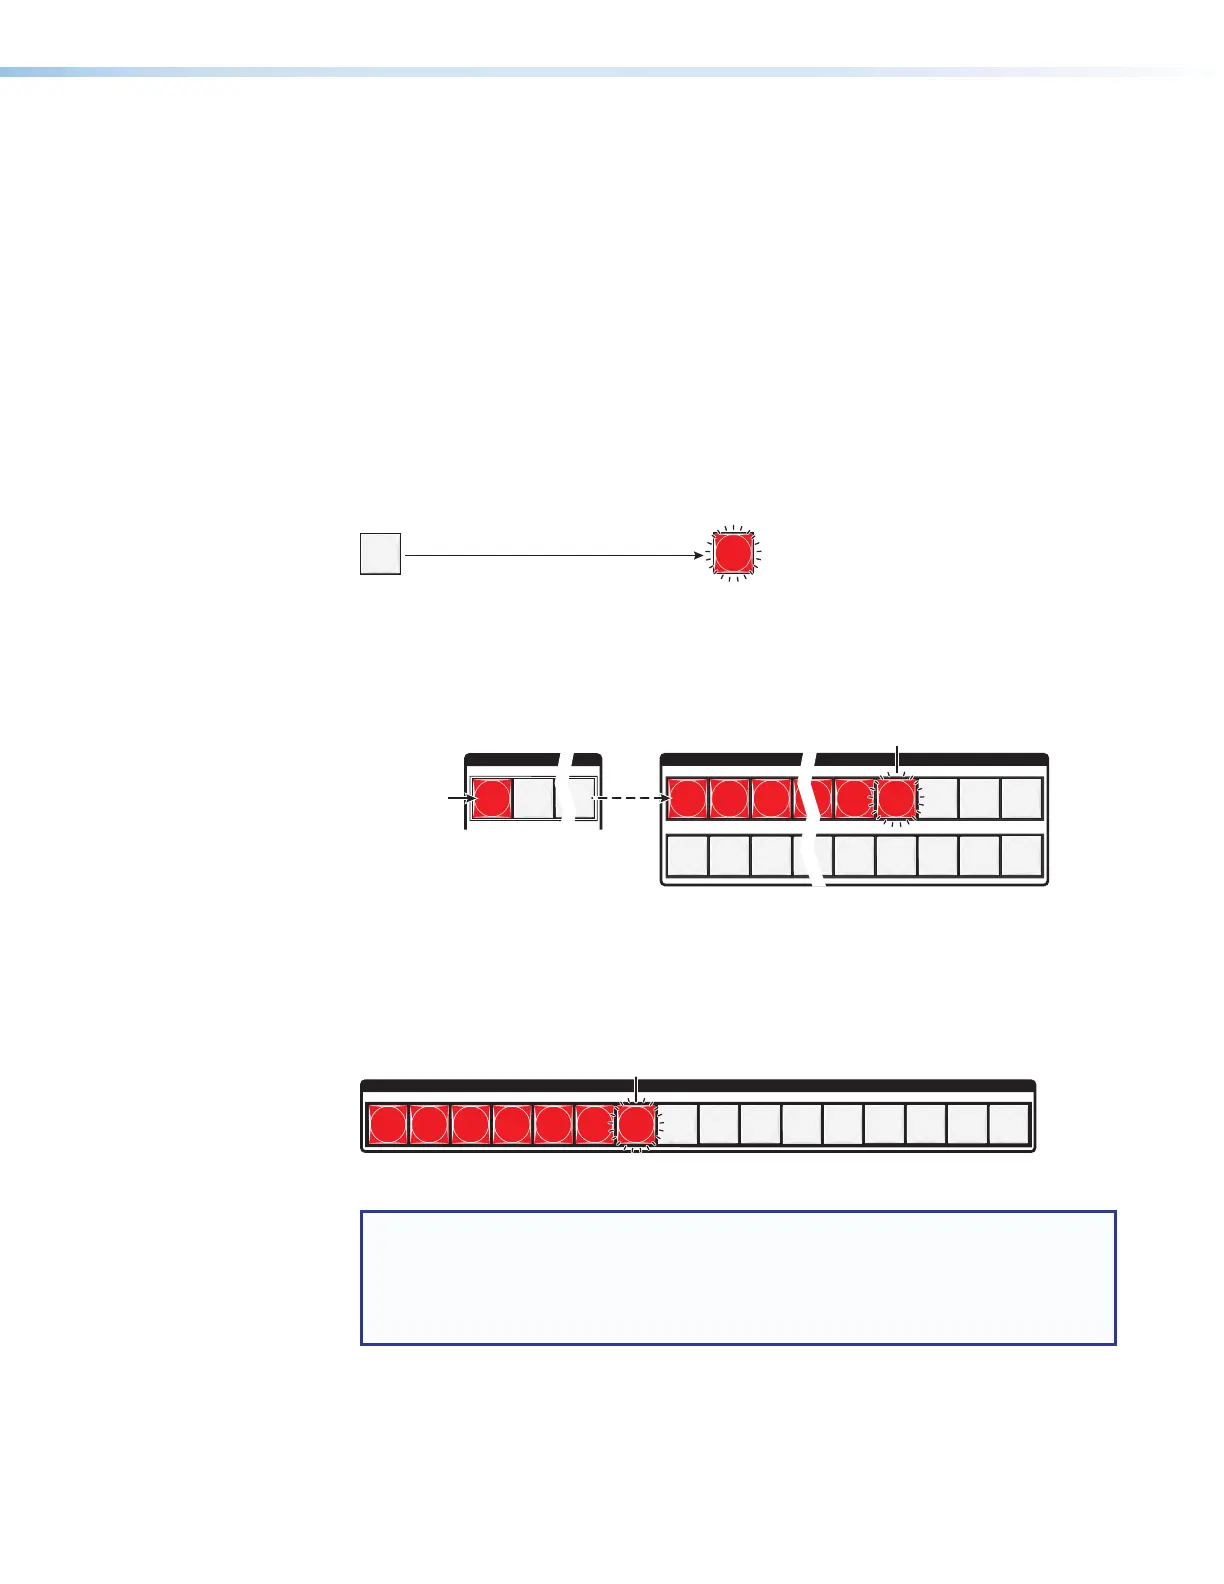
3. Select an output: Press and release the Output 1 button (see figure 38).
In figure 40 and figure 41, the lit or blinking input buttons indicate 41.5 percent of the
applied audio input. The unlit input buttons indicate an audio volume attenuation of
39 dB.
1
2
16
1
2
3
1
12
13
14
15
16
17
18
19
27
28
29 30
31
32
INPUTS
Each lit input button beyond input 1 indicates that 3 percent of the total input volume
is applied to the output. The flashing button indicates an additional 1.5 percent.
39 dB attenuation
41.5% volume
Press to light
the button.
Figure 40. Select Output 1
Figure 41 shows the same volume as figure 40, but displayed on an
XTP CrossPoint 1600.
INPUTS
1
2
3
4
5
6 7
8
9
10
11
12
14
15
16
13
41.5% volume
Figure 41. Volume Display on an XTP CrossPoint 1600 Matrix Switcher
NOTE: Volume is protected when front panel Lock mode 2 is selected. You can
view the volume in Lock mode 2 but you cannot change it from the front panel
(see Setting the Front Panel Locks (Executive Modes) on page 59).
If front panel Lock mode 2 is selected and you try to perform step 4, the actions
are ignored and the Enter, Video, and Audio buttons blink.