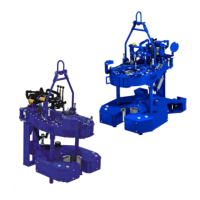
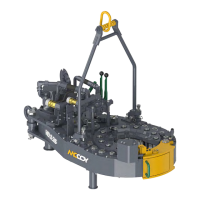
KT5500 5-
1
/
2
” Tong & CLInCHER® BaCKup
SECTIon ConTEnTS
3.13
TECHnICaL ManuaL
MaInTEnanCE
Mechanical Assembly Procedure (Continued):
5. Installsupportrollerassembliesinthelocationsexposedbytheopeningintherotarygear.Continuetorotatetherotarygear,
installingsupportrollerassembliesintherotarygearopeningasitisrotated.Finishwiththerotarygearalignedwiththeopening
inthebottomplate.
6. Presspinionbearing(PN02-0007)intobottompinionbearingcap(PN997-D15-89),andinstallbearingcapintobottomplate
oftongusingfour1/2”UNCx1-1/4”hexcapscrewsandfour1/2”lockwashers.ASSEMBLY NOTE:Donotneglecttoinstall
theclutchbearingcapspacer(PN1400-89A)betweenthebearingcapandthebottomplateofthetong.
7. Pressbottomclutchbearing(PN02-0004)intoclutchbearingcap(PN997-D11-54),andinstallbearingcapintobottomplate
oftongusingfour3/8”UNCx1-1/4”hexcapscrewsandfourlockwashers.ASSEMBLY NOTE: Donotneglecttoinstallthe
clutchbearingcapspacer(PN1400-54A)betweenthebearingcapandthebottomplateofthetong.
8. Installaretainerclip(PN02-0009)intoallthreeidlergears(PN997-A2-119).Pressanidlerbearing(PN02-0011)intoeach
gearandsecurewithasecondretainerclip.
9. Lightlygreasethelargercircumferenceofthetworotaryidlershafts(PN997-D19-117)andslidethemthroughtwobearingand
gearassemblies,centeringthegearontheshaft.
10. Slidetwobearingseals(PN02-0010)overeachendoftheidlershaftsandpressagainsttheretainerclips.Seetheexploded
viewoftherotaryidlerassemblyonpp.5.8-5.9forcorrectorientationofthebearingseals.
11. Slideabearingspacer(PN997-D20-121)overeachendoftherotaryidlershafts.
12. Placeeachrotaryidlerassemblythroughthebottomplate,ensuringtheendsoftheshaftswiththethreadedholesforthegrease
fittingsarepointedupward.
13. Placeanidlerpad(PN1400-125)overthebottomsideofeachrotaryidlershaft,andsecureeachwitha1-1/2”UNFnylocknut.
14. Placehighpiniongear(PN997-A4-87)shouldersidedownoverthelowerbearingandbearingcap,centeringasbestasable.
15. Installpiniongearshaft(PN997-A7-86)intothesplineofthebottompiniongear,andthelowerpinionbearing.
16. Slide4needlebearings(PN02-0003)ontoclutchshaft(PN997-A8-50),twooneithersideofthecentergear.Pressbearings
firmlyagainstcentregear.
17. Slidehighclutchgear(PN997-A1-51)overthebottomendoftheclutchshaft,andseatgearontheneedlebearings,ensuring
thesmallerdiameteronthehighclutchgearisorientedtowardthecentergearontheclutchshaft.Placelowerendofclutch
shaftintothelowerclutchbearingthathasbeenpre-mountedinthelowerbodyplate,andmeshthehighclutchgearwiththe
highpiniongear.
18. Installshiftingcollar(PN997-A9-62)overthetopoftheclutchshaftandmeshwiththecenterclutchgear.
19. Slidetheshiftingfork(PN997-D13-72)overtheendoftheshiftingshaft(PN1400-71),andsecuretheforkinplacewitha5/8”
UNFhexjamnutfollowedbya5/8”UNFregularhexnut.Placetheendoftheshiftingshaftinthelowershifterbushing(typically
weldedtothebottomplate)andmeshtheshiftingforkwiththeshiftingcollar.
20. Slipthelowclutchgear(PN997-A1-52)overthetopoftheclutchshaftandseatonremainingtwoneedlebearings,ensuring
thesmallerdiameteronthehighclutchgearisorientedtowardthecentergearontheclutchshaft.
21. Slidethepinionidlerhalf-shaft(PN997-D17-105)throughtheremainingidlergearassembly.Placeabearingsealovertheend
ofthehalf-shaft,andsecurethegearassemblytothehalf-shaftwitharetainerring(PN02-0008).
22. Placetheendof thepinionidlerhalf-shaft through thebottomplateand meshthepinionidlergear withthetworotary idler
gears.Securethehalf-shafttothebottomplatewiththehalf-moonidlerpad(PN1400-109),three5/8”UNCx2-1/4”hexbolts
and5/8”lockwashers,anda1-1/2”UNFhexnylocknut.
23. Installthelowpiniongear(PN997-A5-88)shouldersideupoverthetopofthepiniongearshaft,meshingwiththelowclutch
gear.
24. Carefullyremoveallsupportrollershafts,usingcautionnottoshiftthepositionoftheinstalledsupportrollerassembliesor
todamagethethreadsontheendoftheshafts.
25. Insertthree3/8”x1-1/4”hardenedproductiongrounddowelpinsintothetopedgeofthesidebody,oneintherearcenter,and
oneintheuntappedholesoneithersideofthedooropening.
26. Positionthetopplateinitsproperlocation.Usecautionnottodamagethreadswhenaligningthetopplatewiththerotaryidler
andsupportrollershafts.Ensurethetopoftheshiftingshaftissmoothlyguidedthroughtheassociatedholeinthetopplate.
27. Usearubberorwoodenmallettoevenlytapthecircumferenceofthetopplateuntilitisflushwiththesidebody.
ENSURE THE TOP PLATE REMAINS PARALLEL TO THE SIDE BODY TO AVOID BINDING ON THE
DOWEL PINS.