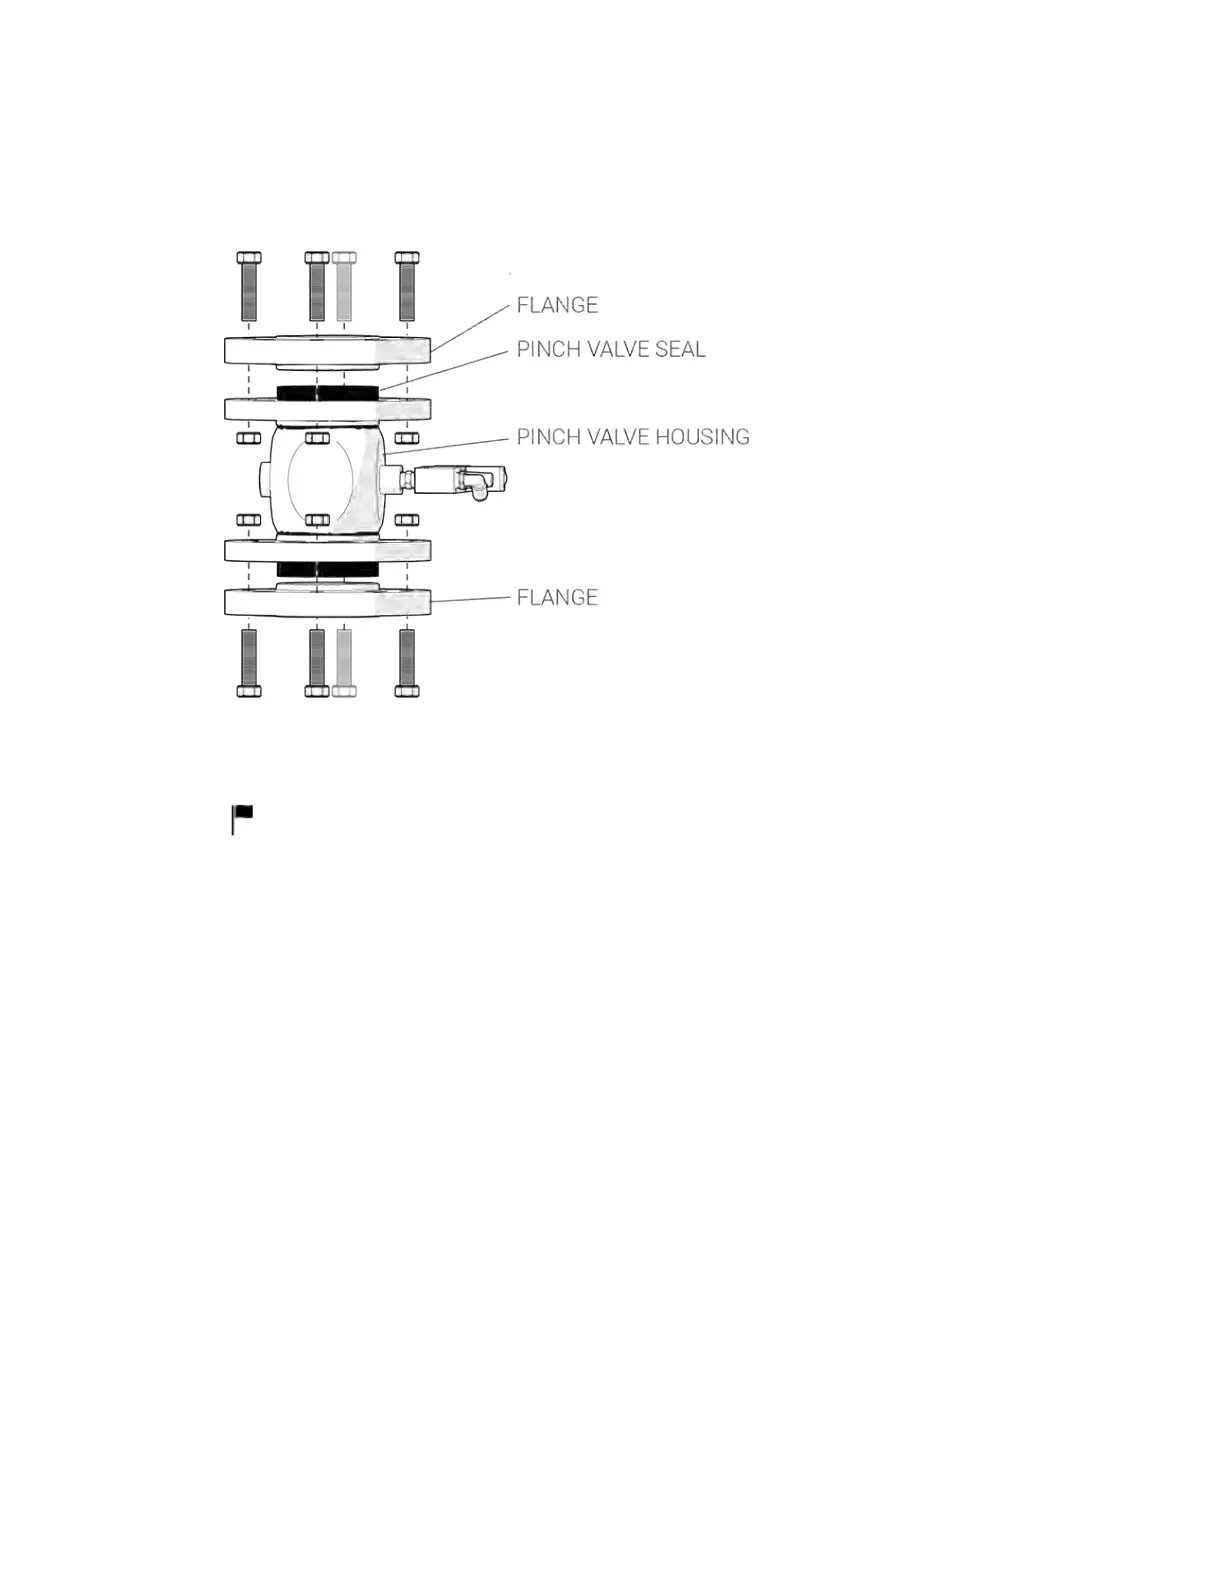
5. Push the pinch valve seal into the pinch valve housing. Adjust the pinch valve seal so that both
ends extend equally from the pinch valve housing.
6. For each flange, apply a small amount of tension to the flanges with two opposing M12 screws
and nuts. Guide the tapered surfaces of the flanges to the interior of the pinch valve seal. Do
not allow the pinch valve seal to twist during tensioning.
If the screws cannot engage the flange threads, use M12 70 mm screws to seat the
flanges until the stock flange bolts are engaged.
7. Loosely install the remaining M12 screws and nuts. Evenly tighten them in a circular pattern
until they are tight. The gap between the tapered flanges and the pinch valve housing flanges
must be even.
© 2021 Flow International Corp.
Retrieved from Flow KB on April 14, 2021 PST
Ancillary option: PASER CF900 Abrasive Delivery System