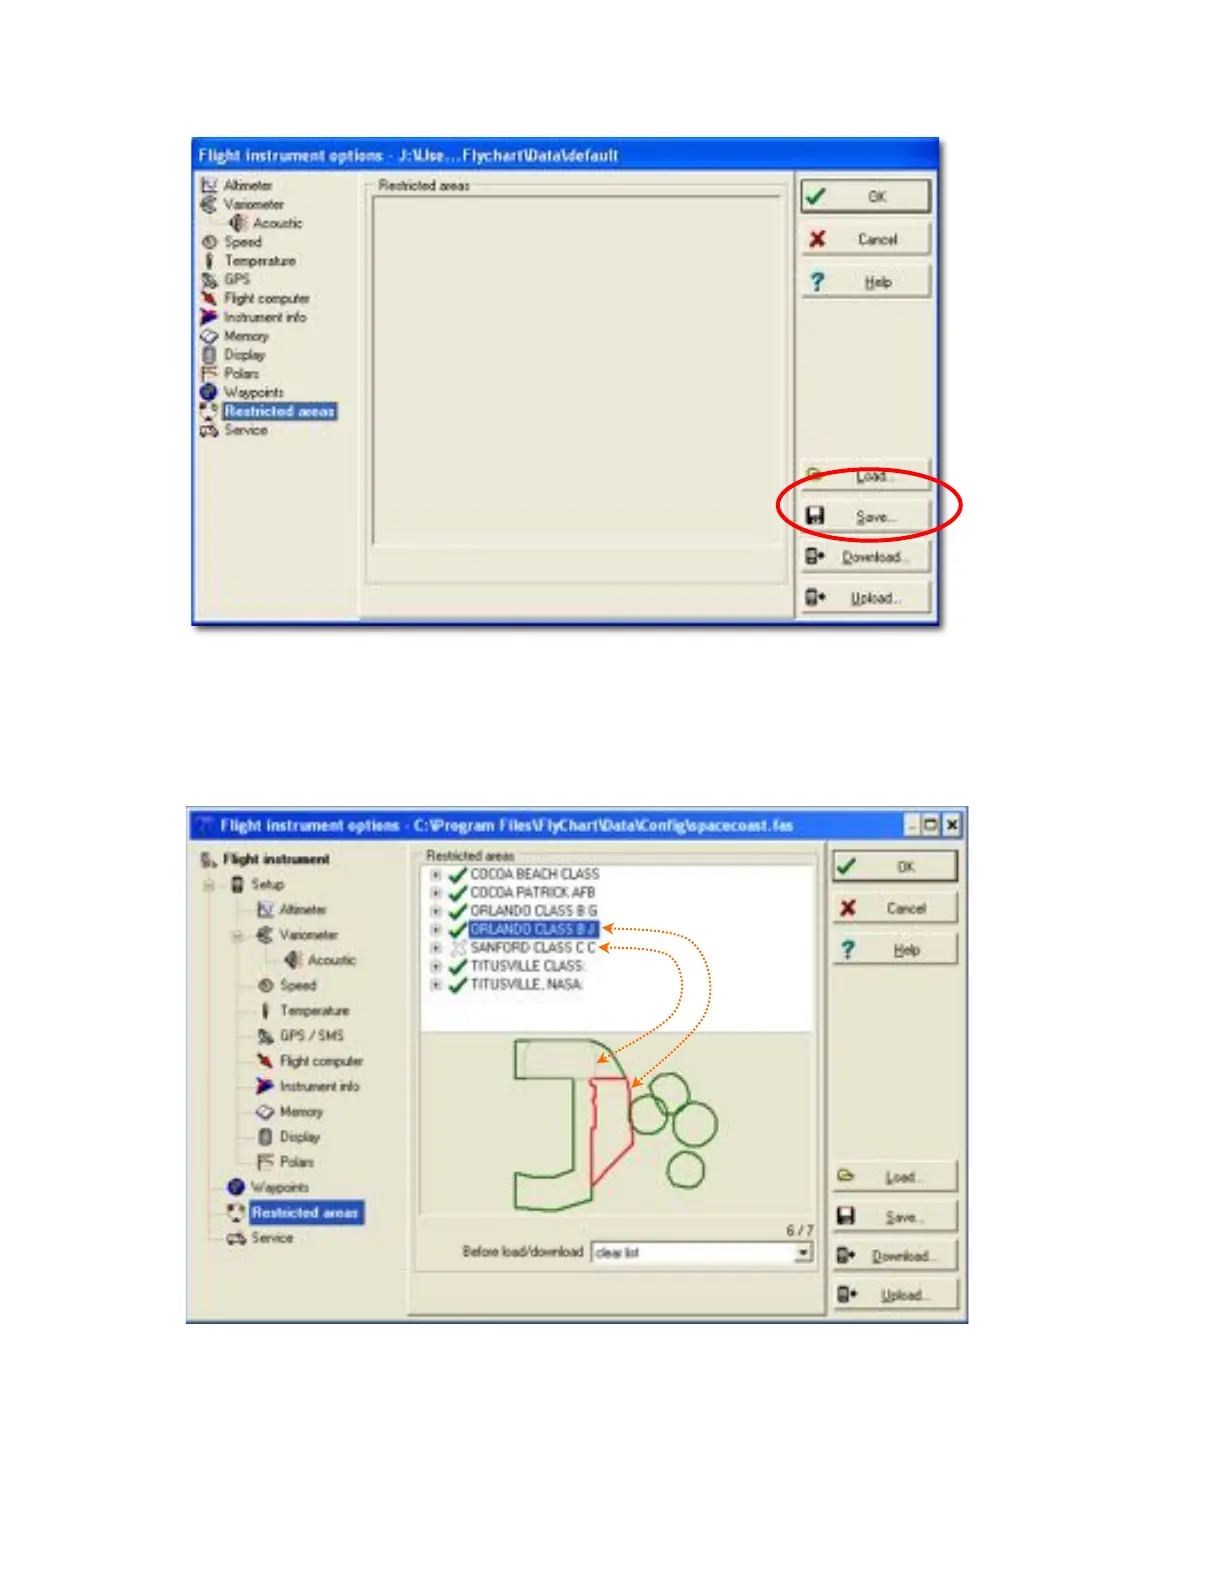
3. Click the Load button, browse to the location of your airspace file, select the desired restricted area file (*.fas,
*.fa5, *.txt or *.smo) and click Open.
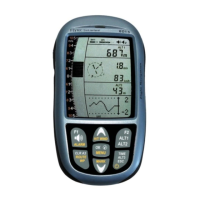
4. The boundaries of the airspaces will appear in the preview area below the airspace list. Airspaces marked
with a green checkmark are “selected” and areas marked with an X are “deselected”. Selected airspaces are
shown with a solid green boundary line and deselected airspaces are shown with a dotted green boundary.
Click on any airspace in the list and its boundary is shown in red.
Only selected areas will be uploaded to the 6030 when the Upload button is clicked. Right-click on an airspace
(in the list) to perform the following actions:
Select>Toggle: Status of selected area is reversed (green check changes to an X and vice versa).
Select>All: All restricted areas will be selected and marked with a green check mark.
Select>None: All restricted areas will be deselected and marked with an X.