To select a range of airspaces: left-click the first one and shift-left-click on the last one. To select multiple
individual airspaces: Ctrl-left-click the desired areas. When selected, the group will be highlighted in blue and
can be toggled on/off with a right-click. The desired areas will now be marked with a green checkmark and will
be drawn in the graphic area. Clicking on any active (green checked) restricted area will cause that one to be
outlined in red in the graphic area.
Since the 6030 needs considerable calculation power to refresh the map display and generate distance
calculations, when selecting which airspaces to include in a airspace file, only select the ones you can
realistically fly near.
5. After the desired Airspaces are selected and edited if necessary (see the section below on editing an
Airspace), click the Upload button to send them to the 6030. Of course the instrument must be connected to the
PC with the USB cable and turned on, and in the Airspaces menu. If the speaker is turned on, the 6030 will
beep as the airspaces are loaded. If a problem occurs during transfer, a lower-pitched beep will sound. After
uploading is complete you can confirm that the airspaces have been transferred by clicking the Download button
in FlyChart and viewing, in the Restricted Areas frame, which restricted areas are actually stored in the 6030.
6. To save the airspace list you just made as a file on you computer (for later use or to share with fellow pilots),
click the Save button, assign a file name, browse to the location you want the file saved (e.g., folder named
Airspaces) and click Save.
Editing Airspaces
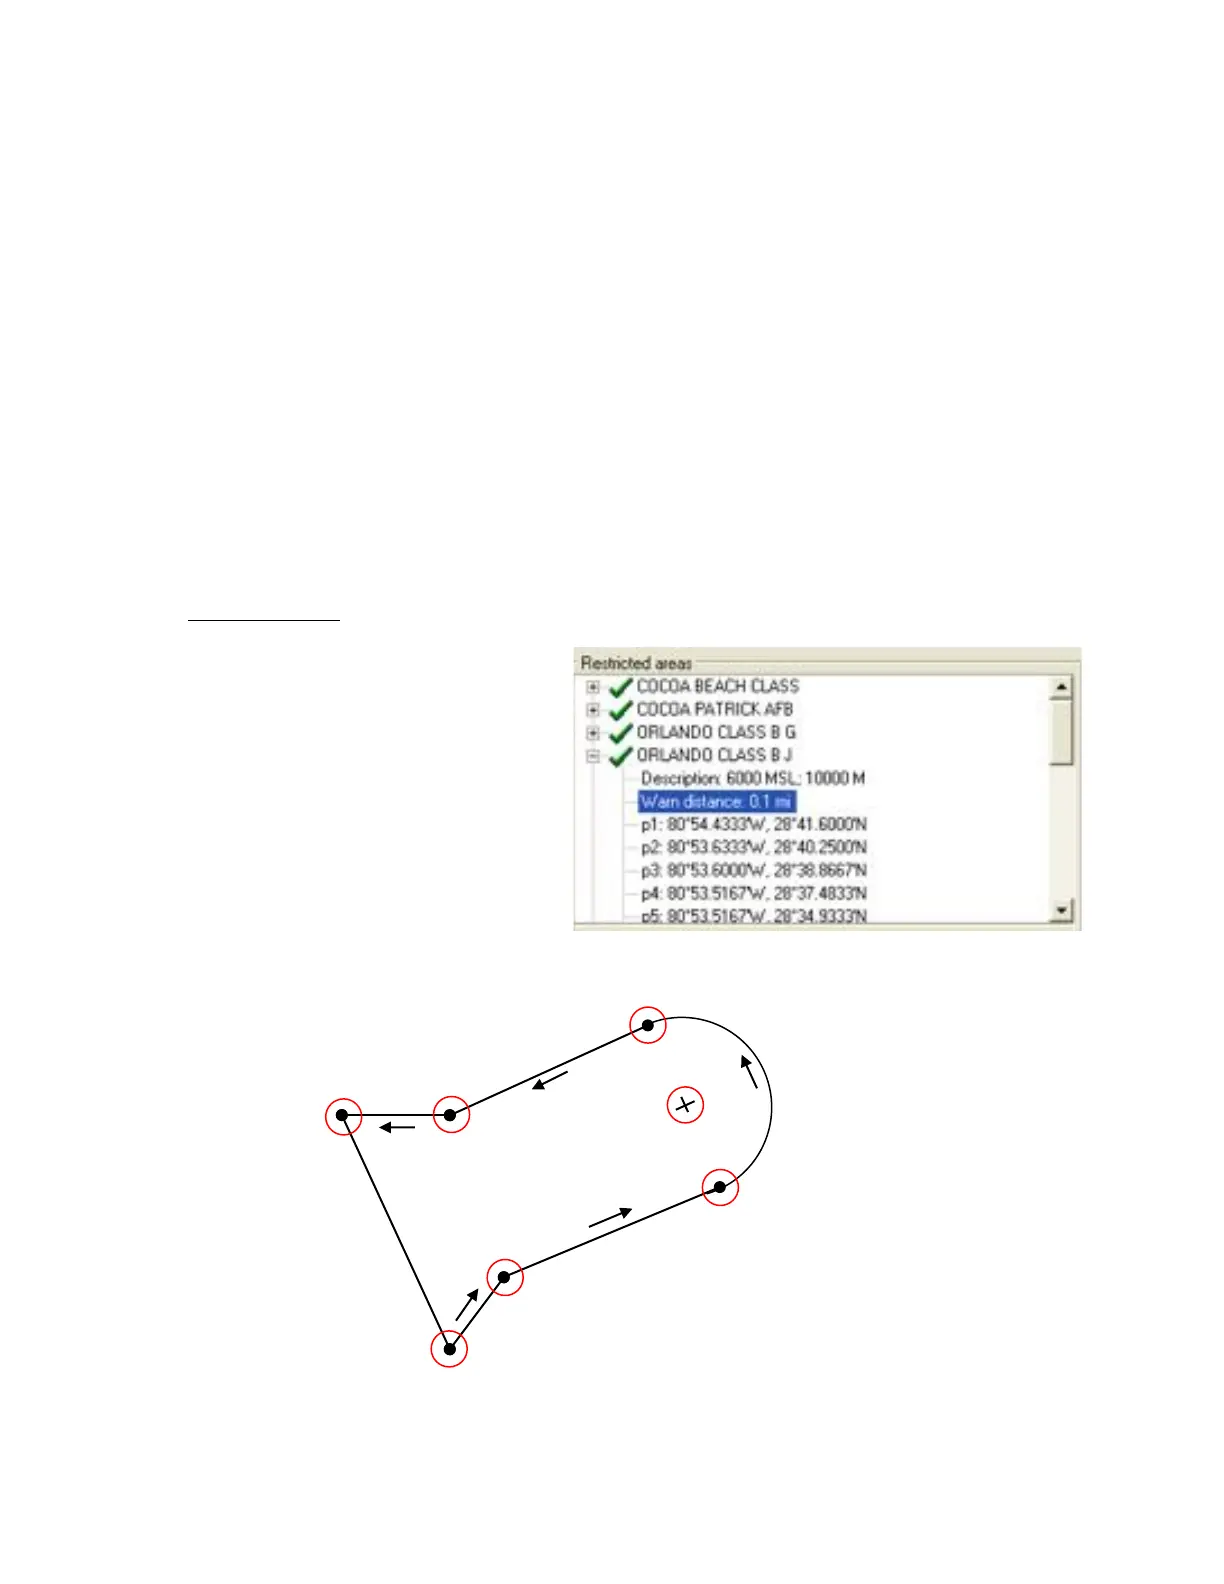
It is possible to edit the name, description,
warning distance and boundary coordinates
of an airspace. When an airspace file is
opened, the included airspaces are listed
alphabetically. Click the + symbol next to the
airspace name to show the details for the
airspace. Below the airspace name is the
description, which is used for the lower and
upper altitude limits; below the description is
the warning distance. Any attribute of the
airspace can be edited by right-clicking the
item to be changed and selecting Edit from
the dropdown menu. A name can only be
used once, and the name and comment are
limited to 17 characters each. Below the
warning distance, the coordinates of the points that define the airspace boundary are listed sequentially. An
airspace boundary is defined either by a sequence of points (p) and/or arcs (a) or as a circle (c).
Example:
Counter-Clockwise
Arc segments: Arcs are defined in the following format: Lat/Long
of the arc center; Lat/Long of the start point of the arc; Lat/Long of
the end point of the arc; rotational direction (+ clockwise, - counter-
clockwise).