EasyManuals Logo

GE Datex-Ohmeda Aisys Carestation User Manual

GE Datex-Ohmeda Aisys Carestation
498 pages
To Next Page IconTo Next Page
To Previous Page IconTo Previous Page
Page #322 background imageLoading...
Page #322 background image
Aisys
9-26 04/08 M1046983
9.11.5 To replace
the LCD display
1. Disconnect the following cables:
• Right membrane switch flex-cable at ZIF (zero insertion force) connector (A)
• Encoder assembly cable (B)
• Lower membrane switch flex-cable at ZIF (zero insertion force) connector (C)
• Fan cable (D)
• LCD cable (E)
• Left membrane switch flex-cable at ZIF (zero insertion force) connector (F)
2. Remove the ten screws (circled) that hold the mounting plate to the front enclosure.
3. Remove the mounting plate assembly from the front enclosure.
4. Disconnect the backlight harnesses (G) from the inverter boards.
5. Slide the grommet (H) out of the mounting plate slot (transfer to new LCD).
A
B D
E
C
F

Table of Contents

Questions and Answers:

Question and Answer IconNeed help?

Do you have a question about the GE Datex-Ohmeda Aisys Carestation and is the answer not in the manual?
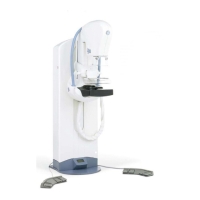
GE Datex-Ohmeda Aisys Carestation Specifications

General IconGeneral
TypeAnesthesia Machine
ManufacturerGE Healthcare
ModelAisys Carestation
Power Requirements100-240V AC, 50/60 Hz
DisplayHigh-resolution color touchscreen
Ventilator TypeElectronically controlled ventilator
Ventilation ModesVolume Control, Pressure Control, SIMV, Pressure Support, Manual
Gas DeliveryOxygen, Nitrous Oxide, Medical Air
Power SupplyAC mains, Battery backup
Integrated MonitoringYes
CommunicationEthernet
ConnectivityEthernet
AlarmsComprehensive alarm system for ventilation, gas delivery, and patient monitoring parameters

Related product manuals