DIRECTION 5750007-1EN, REV. 1 LOGIQ E10 BASIC SERVICE MANUAL
8 - 88 Section 8-7 - Replacing Top Console Parts
Main Monitor installation
Table 8-103 Main Monitor installation
Steps Corresponding Graphic
1.
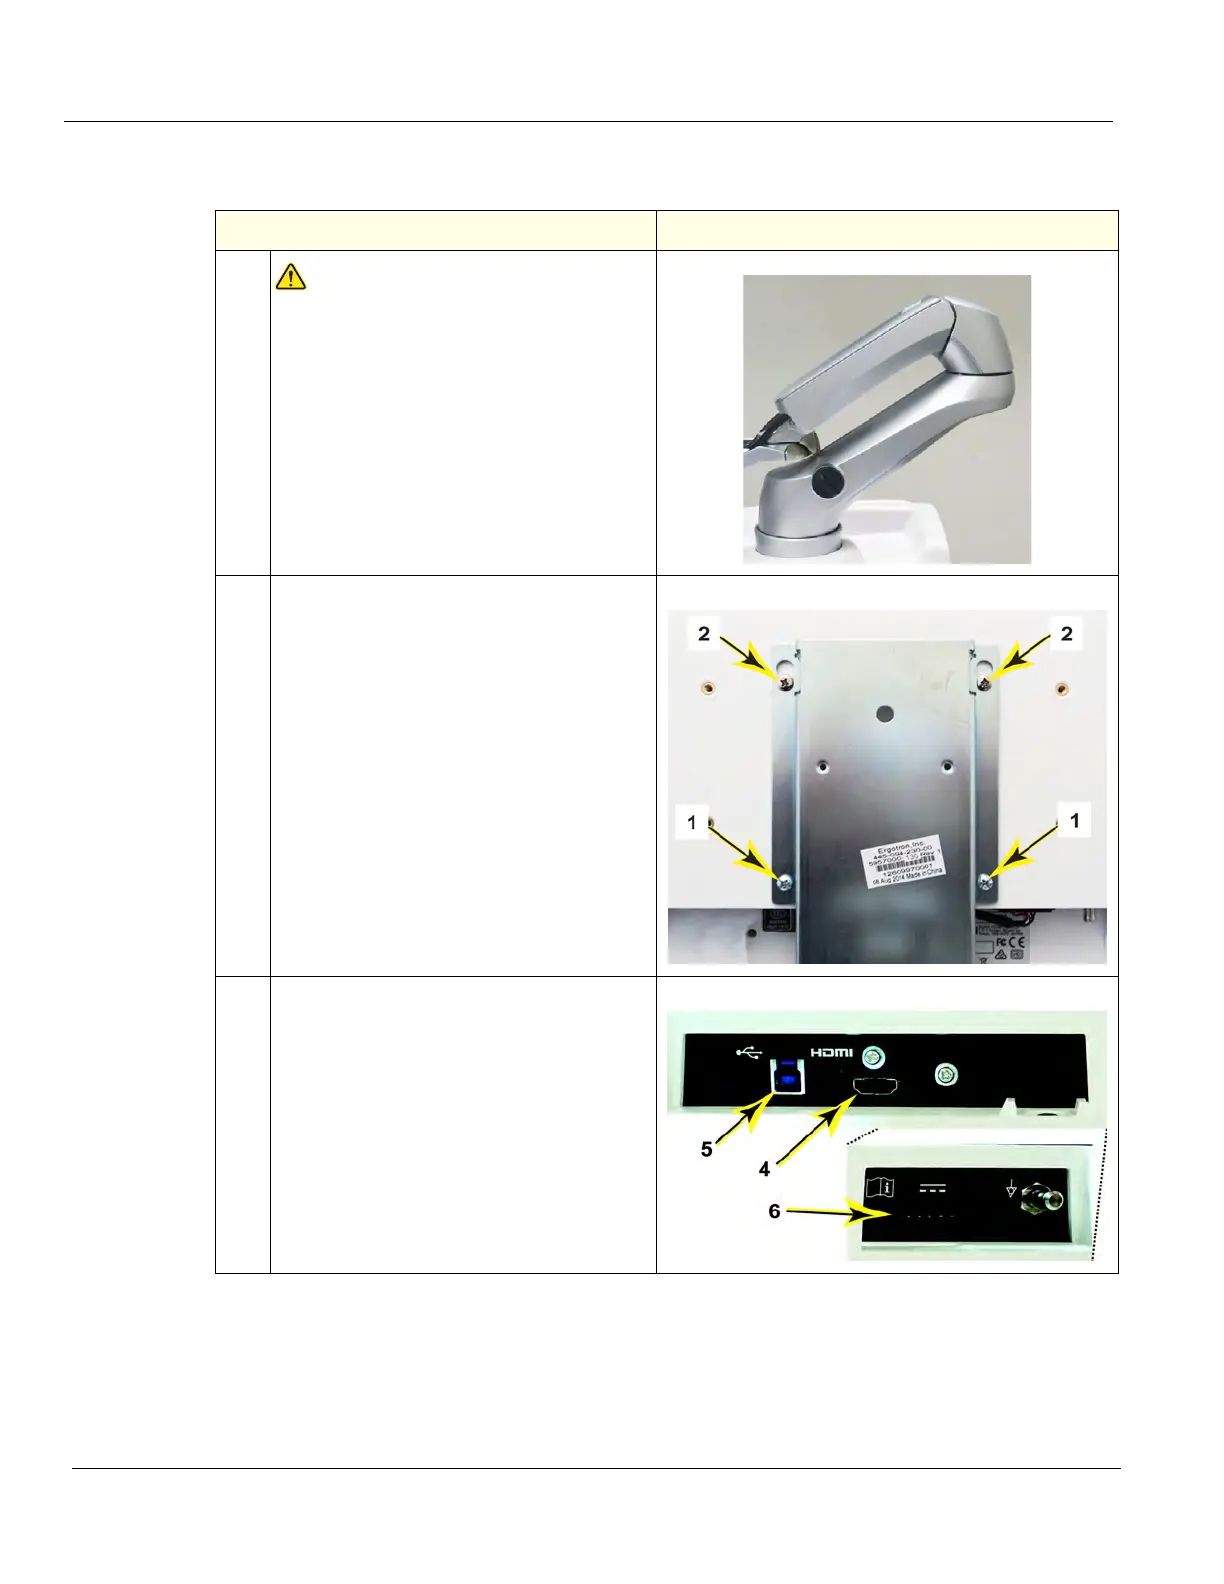
WARNINGWARNING
WHEN INSTALLING THE MONITOR TO
THE ARM, KEEP THE MONITOR ARM
ASSEMBLY IN THE LOCKED POSITION.
THE SPRINGS TO SUPPORT THE
MONITOR CAN CAUSE THE ARM TO
SPRING OPEN CAUSING SEVERE
PERSONAL INJURY AND PROPERTY
DAMAGE.
2.
Re-install the upper two Phillips screws into
the Monitor. Leave enough clearance to
slide the Monitor onto the Arm.
With the Monitor flat, slide the Monitor onto
the Arm Assembly and support the lower
portion of the Monitor while the installing
the two lower Phillips screws (1).
Tighten the upper Phillips screws (2). Make
sure the Monitor is level before tightening
the screws securely.
Monitor
3.
Re-connect the HDMI (4), the USB (5) and
the Power (6) Cables from the Monitor.
Cable connectors