DIRECTION 5750007-1EN, REV. 1 LOGIQ E10 BASIC SERVICE MANUAL
Chapter 8 Replacement Procedures 8 - 89
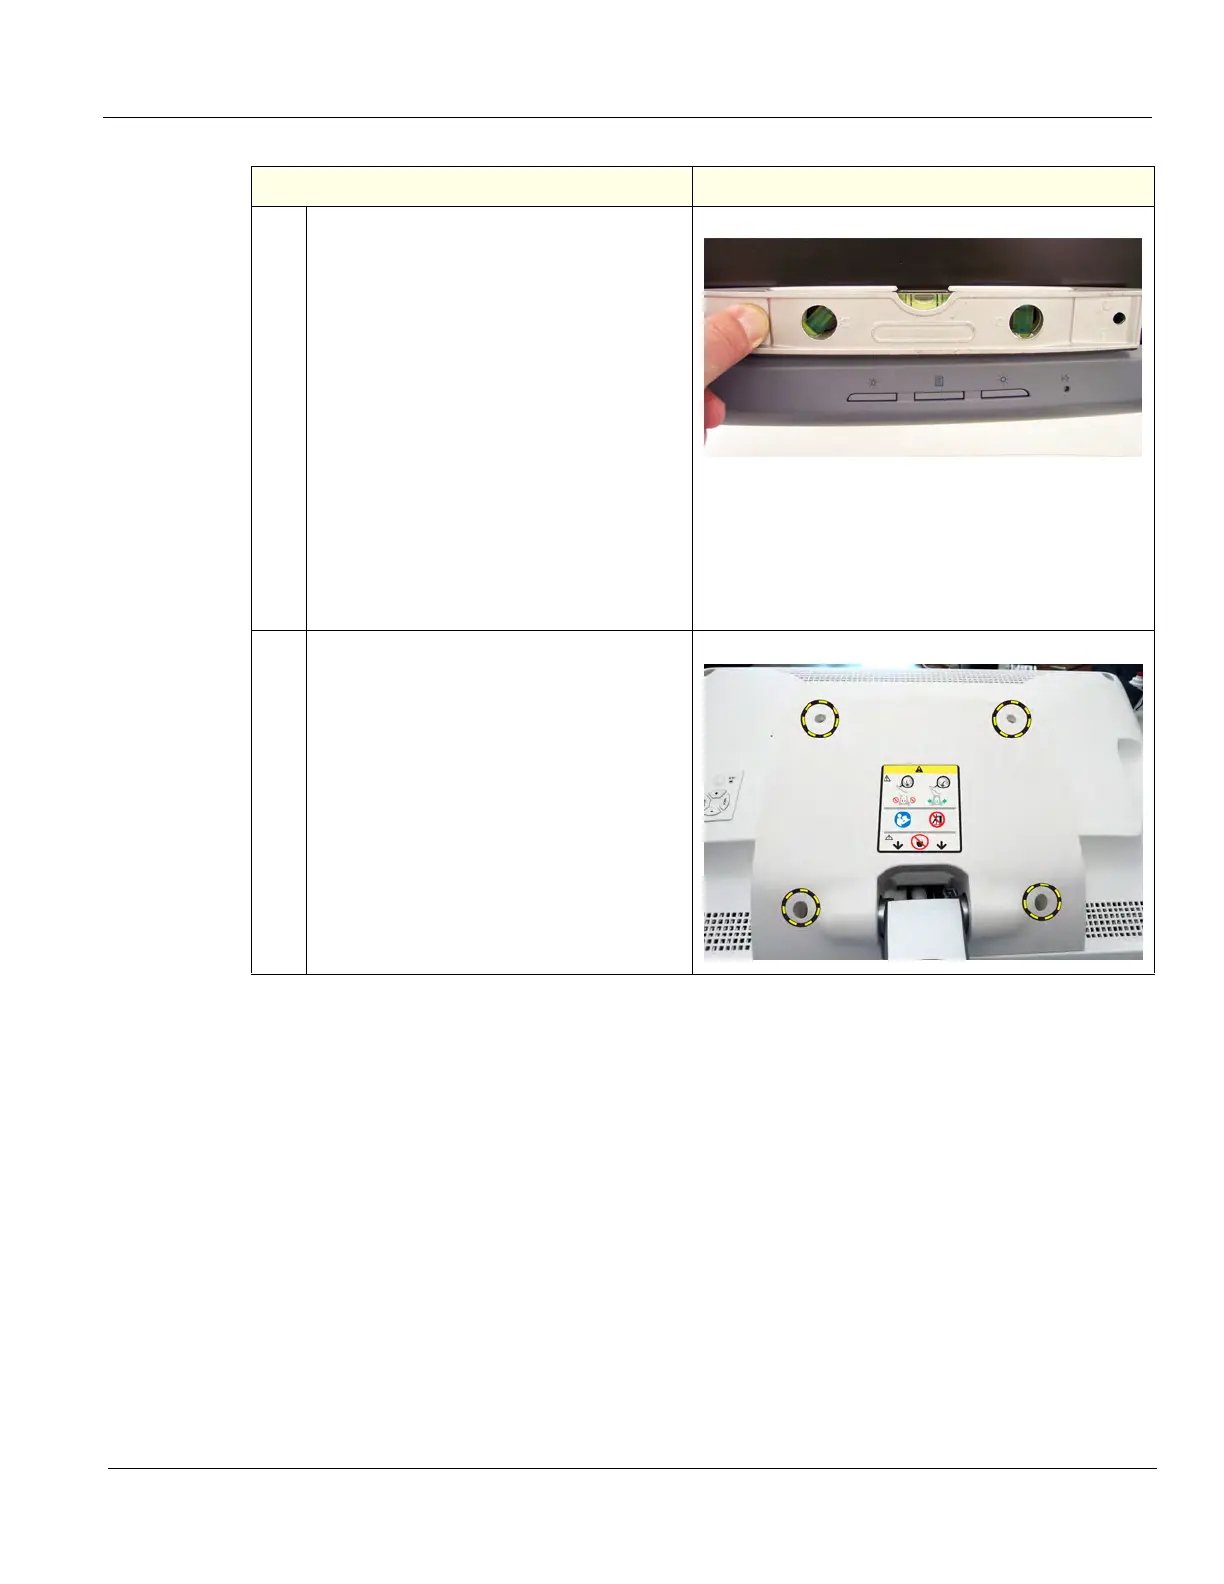
4.
NOTE: To ensure the Monitor is installed
level with the system and before
e- installing the Cable Cover:
MAKE SURE:
- the LOGIQ E10 is on a level surface,
- the wheels are in-line,
- the Monitor Arm Lock is LOCKED.
Check that the LOGIQ E10 is level.
Place a level on the monitor (as shown).
If any adjustment is required, loosen the
four mounting screws and make the
adjustment. Re-tighten the four screws
after the adjustment.
NOTE: If a level is not available, make sure
the Monitor is as square as possible with
the LOGIQ E10, visually.
5.
Re-install the Cable Cover and fixing
screws.
Re-install the Cable Cover from the
replaced Monitor. The Cover IS NOT a
FRU.
Table 8-103 Main Monitor installation
Steps Corresponding Graphic