DIRECTION 5750007-1EN, REV. 1 LOGIQ E10 BASIC SERVICE MANUAL
8 - 188 Section 8-8 - Replacing XYZ Parts
8-8-2 XY Brake Motor replacement (cont’d)
Steps
Corresponding Graphic
1.
Raise the console to its highest position before shutting down the system.
2.
Press the power button to shutdown the unit. Ignore any message regarding the console being unlocked if
the console is not locked in the parking position.
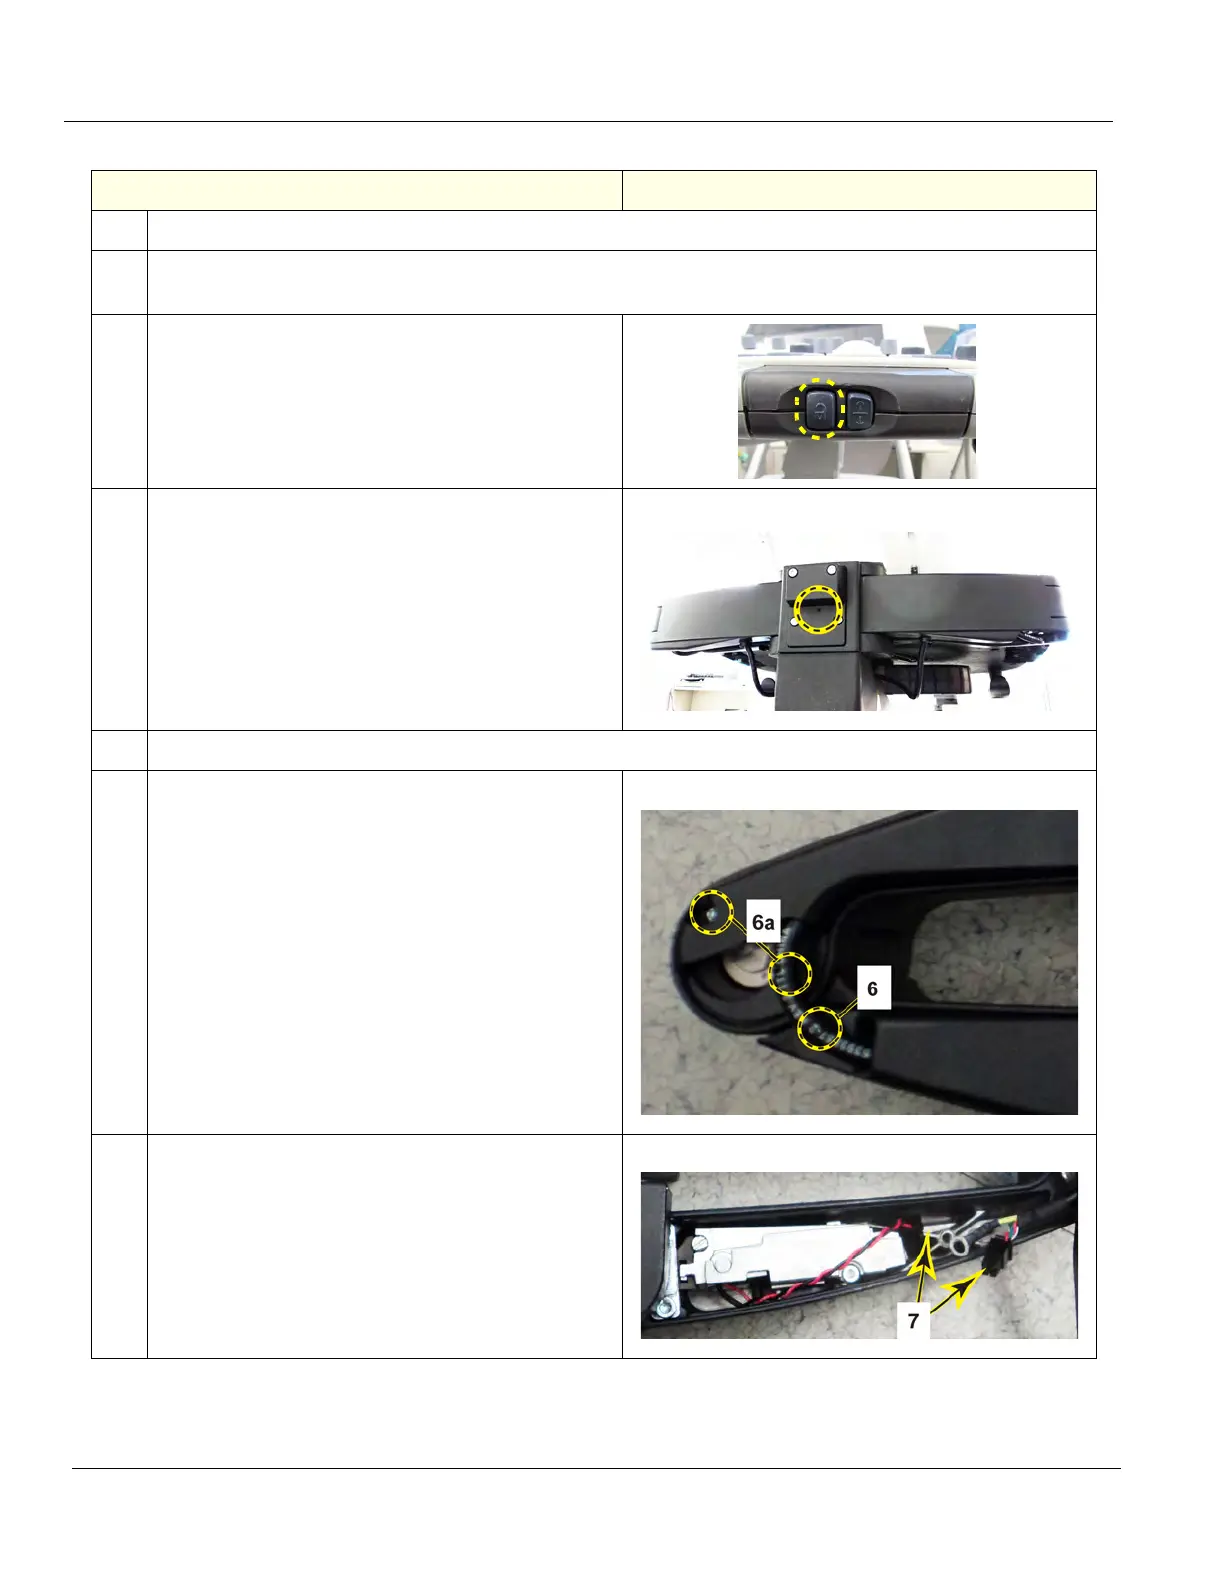
3.
While the system is powering down, push and hold
the XY unlock pushbutton (circled) on the front of
the controls console, to release the brakes inside of
the XY "frogleg" assembly.
NOTE: This step is necessary to make brake
removal easier. Do not omit this step.
4.
Release the console from the park lock, if not already
released as follows:
Insert a 1/16" Allen wrench into the froglegs
assembly release hole. Push the wrench in until an
audible “click” may be heard, then fully expand the
froglegs.
5.
After the system is powered down, unplug the power cord from the wall outlet.
6.
Identify which lock motor needs to be replaced and
remove the corresponding cover, using a T-10
driver:
One TORX-head screw (6) to remove the forward
cover and two TORX-head screws (6a) to remove
the back cover.
7. Disconnect the wire connectors (7) to make sure the
brake assembly stays released.