DIRECTION 5750007-1EN, REV. 1 LOGIQ E10 BASIC SERVICE MANUAL
Chapter 8 Replacement Procedures 8 - 189
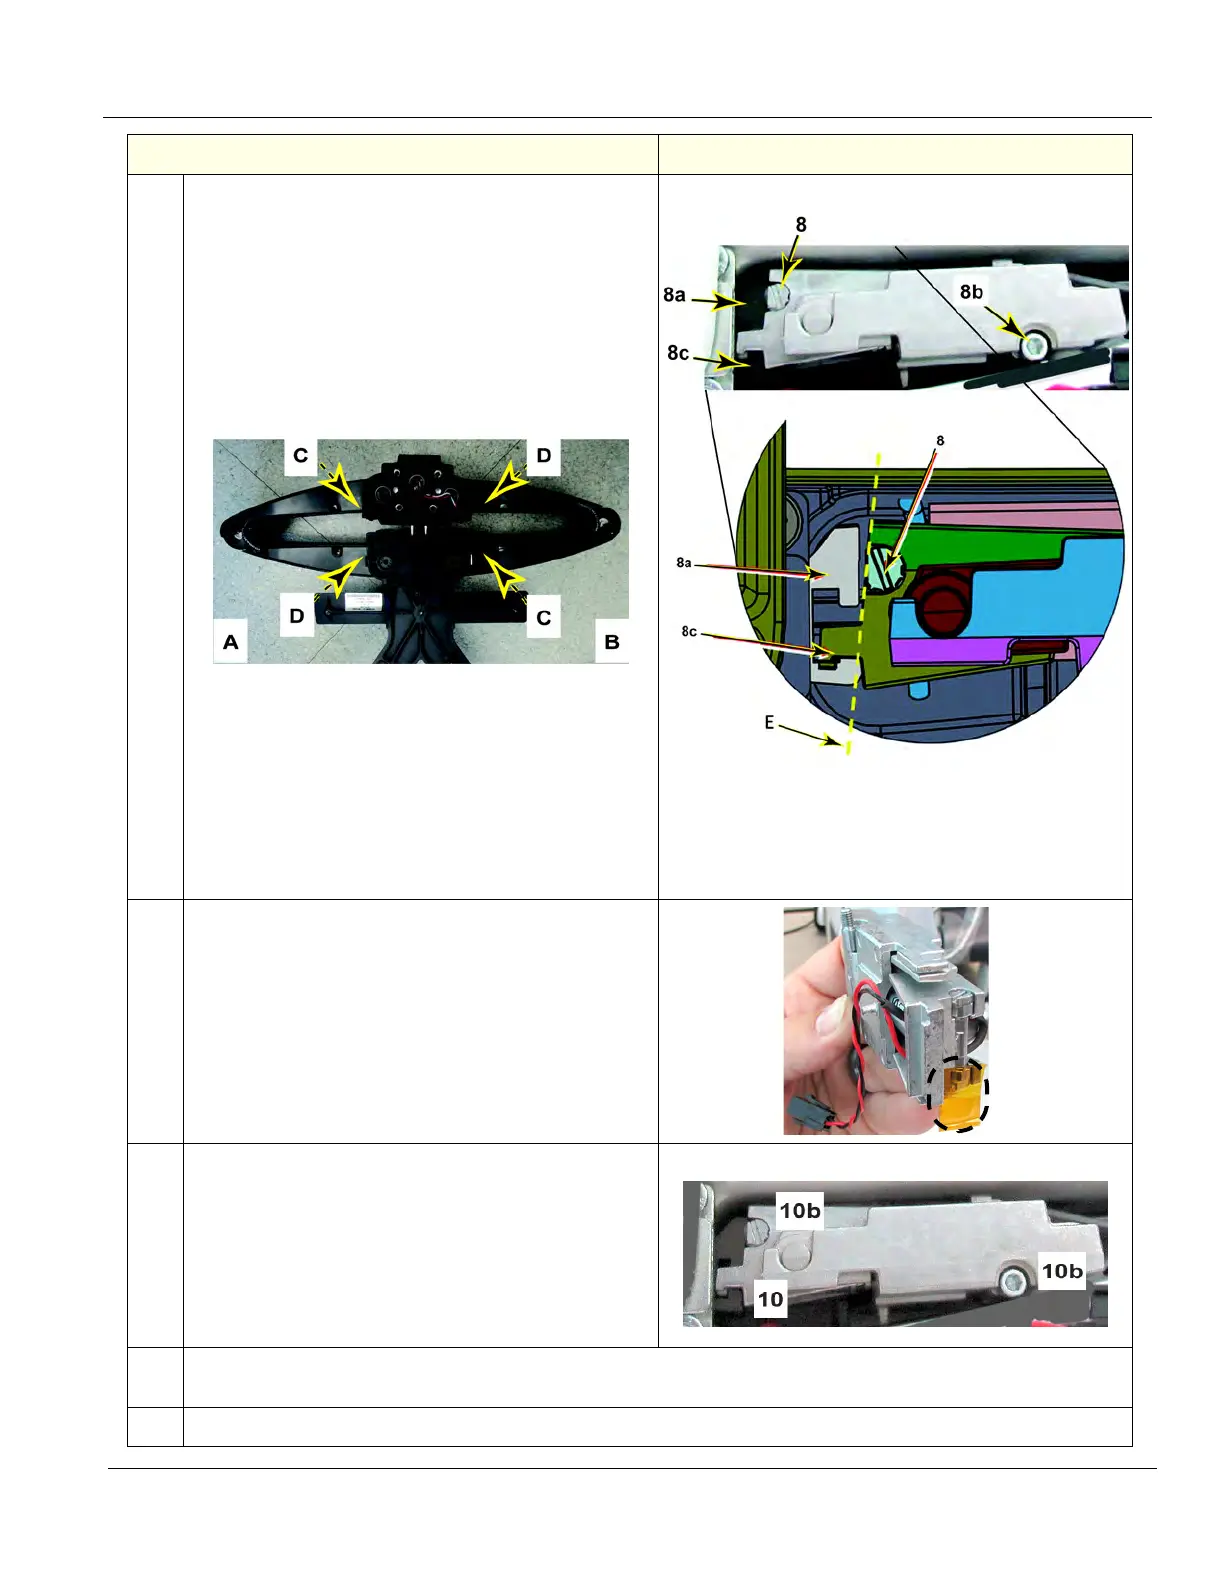
8. Turn the tension adjustment screw (8), so that the
flat side faces the brake shoe (8a), to further release
the lock (brake) motor assembly.
NOTE: When replacing the brake on the right rear
side (A) and the brake on the left front side (B), the
tension adjustment screw (C) turns counter-
clockwise.
When replacing the brake on the right front side (A)
and the brake on the left rear side (B), the tension
adjustment screw (D) turns clockwise.
After the motor assembly is released, loosen the
retaining screw (8b) a little, then gently pry up on the
XY Hinge (8c) with a flat blade screwdriver. Alternate
both steps until the brake can be rocked out
completely.
The brake assembly needs to be gently pried out on
both ends, a little at a time, to rock it out of the arm
cavity.
(Alignment for removal {E}).
9. Before installing the new lock motor and after the old
motor assembly is removed, place a piece of sticky
tape (circled) on the tension adjustment screw on the
replacement motor. The tape is for holding the screw
in place and keep it from falling, while inserting the
motor into the frogleg arm.
NOTE: Remove the tape after the replacement brake
is secured into the frogleg.
10. Install a new lock motor assembly by aligning the XY
Hinge (10) into the slot in the brake shoe (10a).
When the lock motor assembly is properly aligned
and inserted, push the assembly in by the XY Hinge
as the retaining screw (10b) is tightened.
NOTE: The lock assembly may have to be rocked in
from side-to-side and end-to-end for proper
insertion.
11. Reconnect the wire connectors from the lock motor assembly to the frogleg wiring (refer to Step 7 for
reference).
12.
Plug the power cord back into the wall outlet and power up the system.
Steps
Corresponding Graphic