DIRECTION 5750007-1EN, REV. 1 LOGIQ E10 BASIC SERVICE MANUAL
8 - 306 Section 8-11 - Front End Acquisition / Card Cage parts replacement
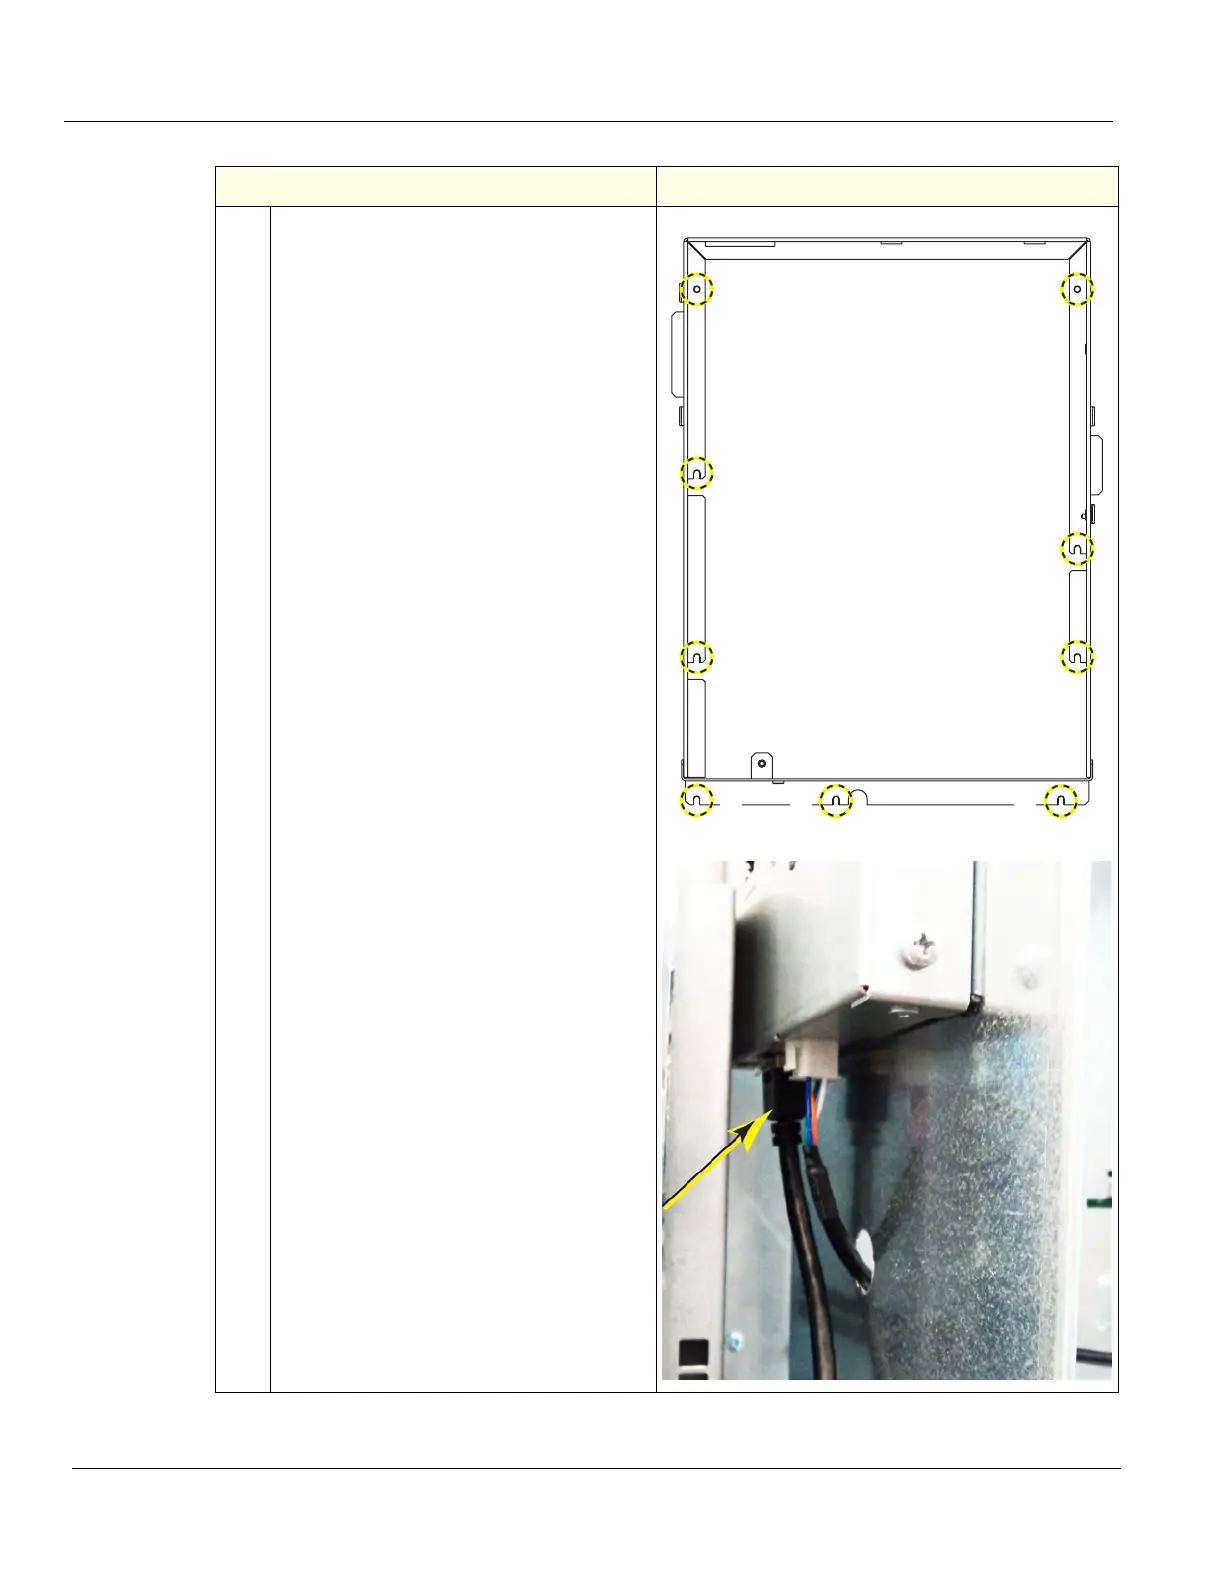
12.
There are 9 flange nuts that secure the
Option Box to the Option Bracket (three are
underneath). ONLY SIX have to be
removed. The lower three only have to be
loosened.
Loosen the lower three and remove the six,
using a 7 mm driver.
NOTE: Be aware, the Subwoofer magnet
may draw the Option Box to it, as it is
removed.
Lift the Option Box up slightly and turn it
away from the Main Power Supply to
access the Network Cable from the bottom
of the Rear I/O. Remove the Network Cable
and continue to remove the Option Box
away from the Card Cage.
Rear I/O USB Cable
Table 8-329 Backplane removal
Steps Corresponding Graphic
A A A